Time To VR
Let’s put some triangles into our Oculus headset. Loosely inspired by Mark Cerny’s Time to triangle measurement, let’s see how quickly we can get some triangles into an immersive virtual reality world.
We’re going to keep this as simple as possible, with the goal of getting a hot red cube on the screen as quickly as possible. For art direction we’ll use as our influence the supercool VR game Superhot.
New Project
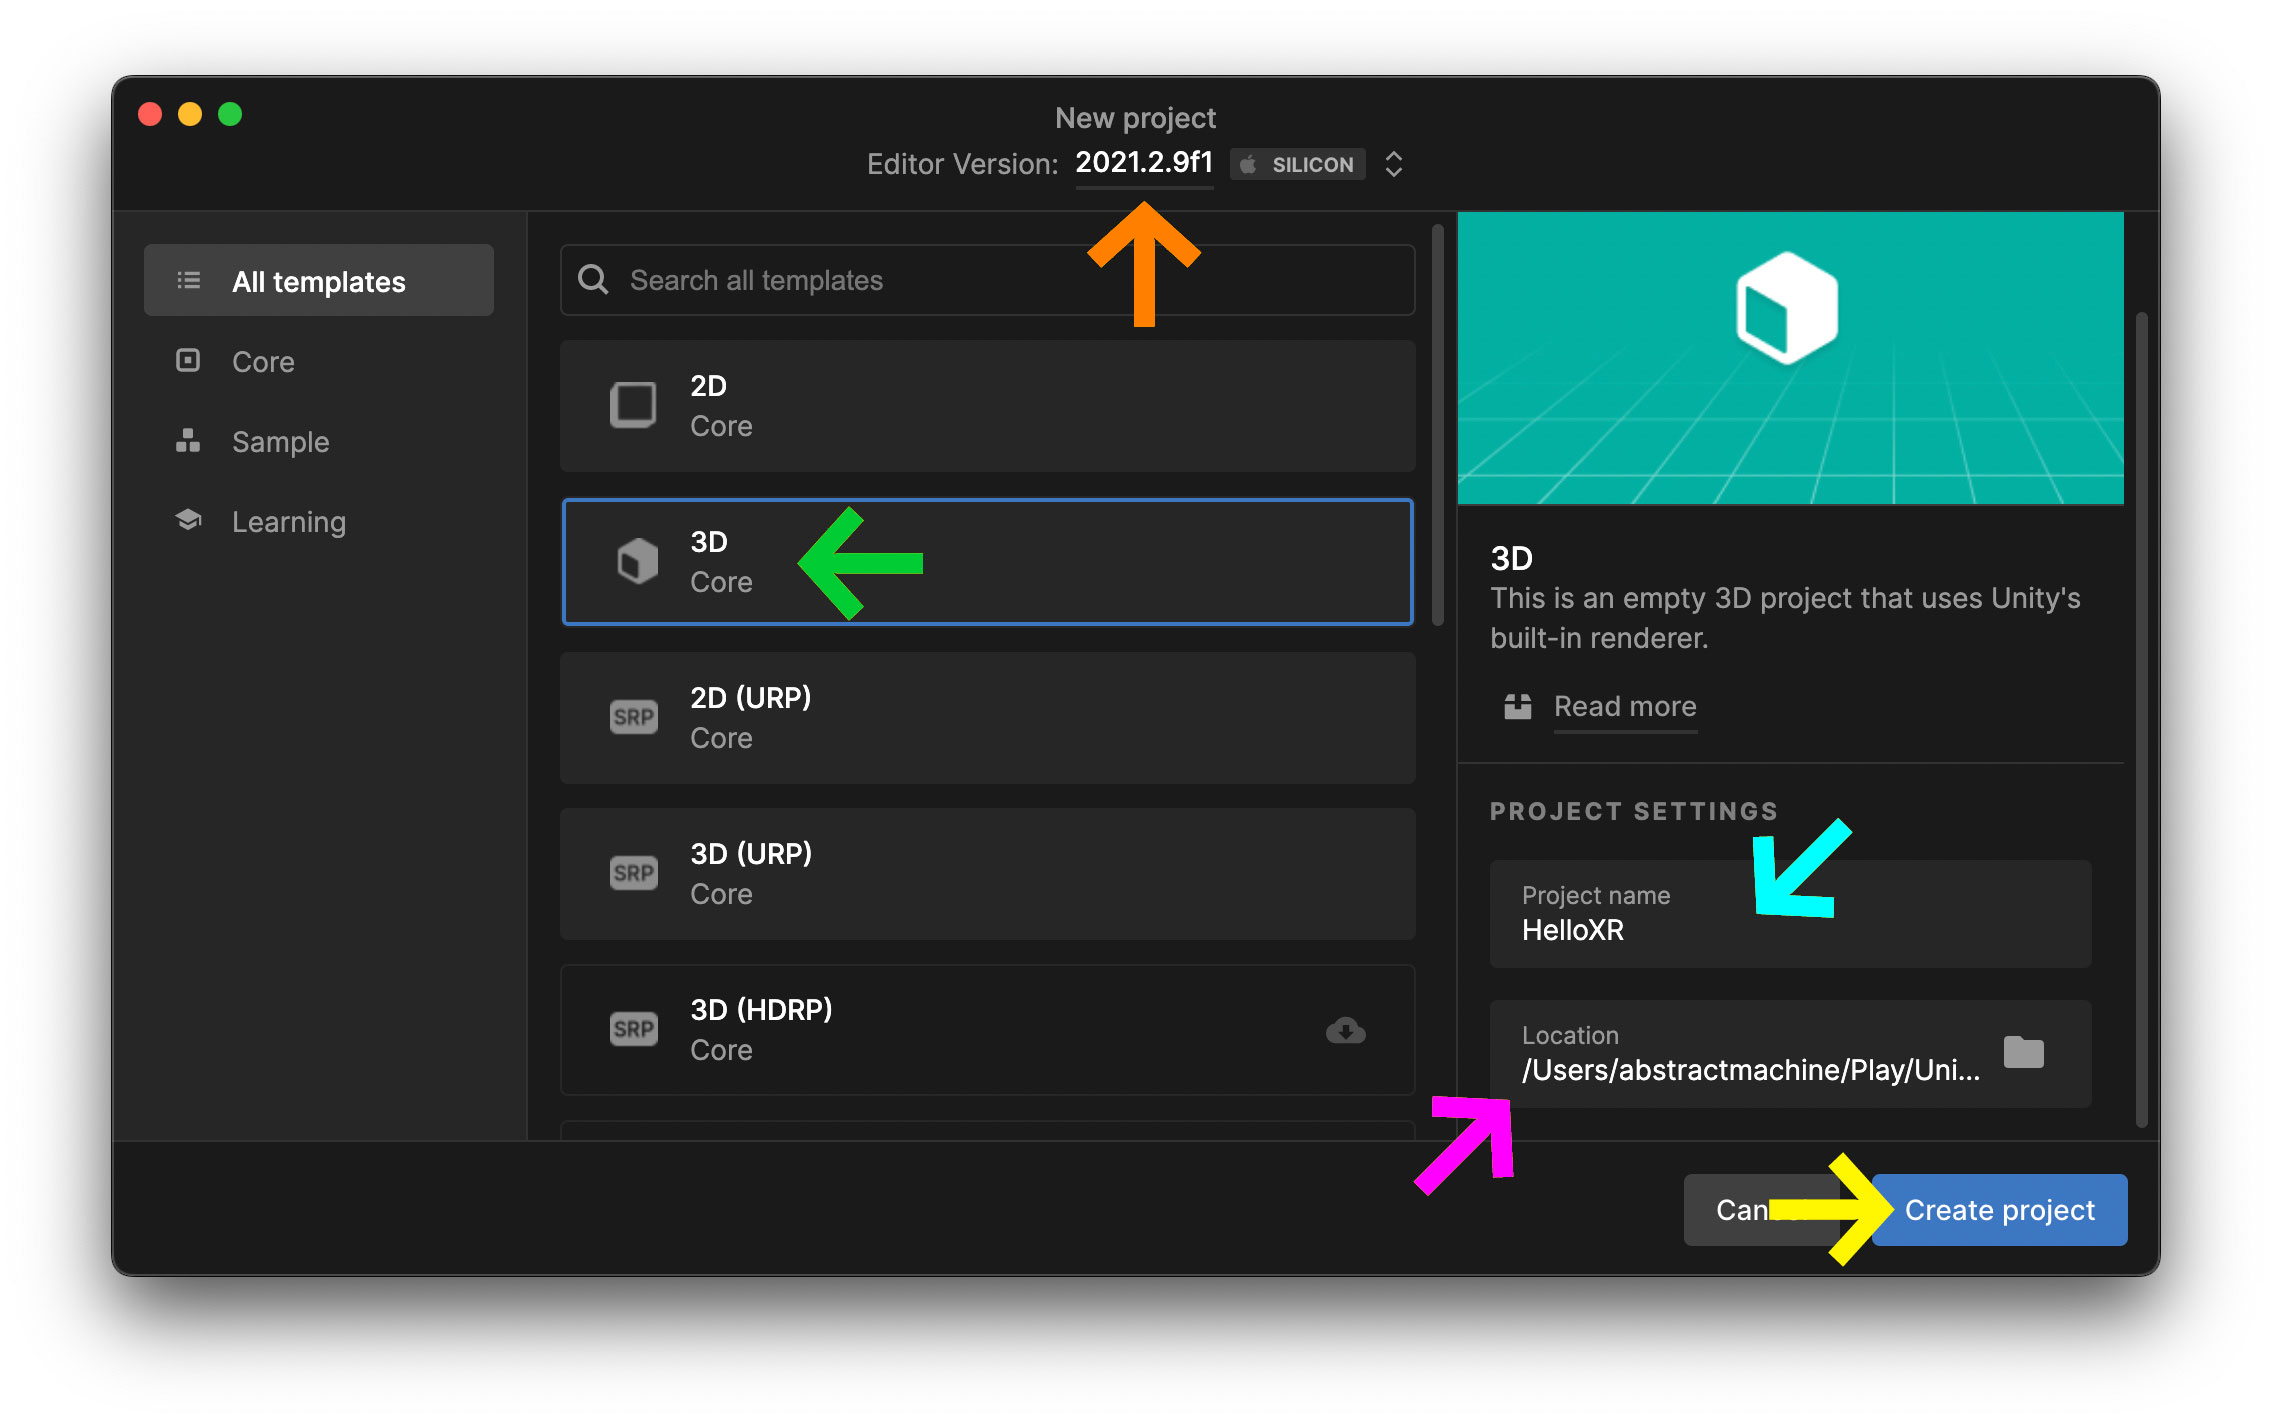
Open up the Unity Hub on your macOS, Windows, or Linux machine. Go into the Projects tab and press the New project button. You will see a series of choices. Make sure you are using at least Unity 2021.2.##Visual Scripting system which was introduced in Unity 2021.2. Make sure also that you are using the 3D CoreProject Settings section, you can give your project a namelocationCreate project
Sample Scene
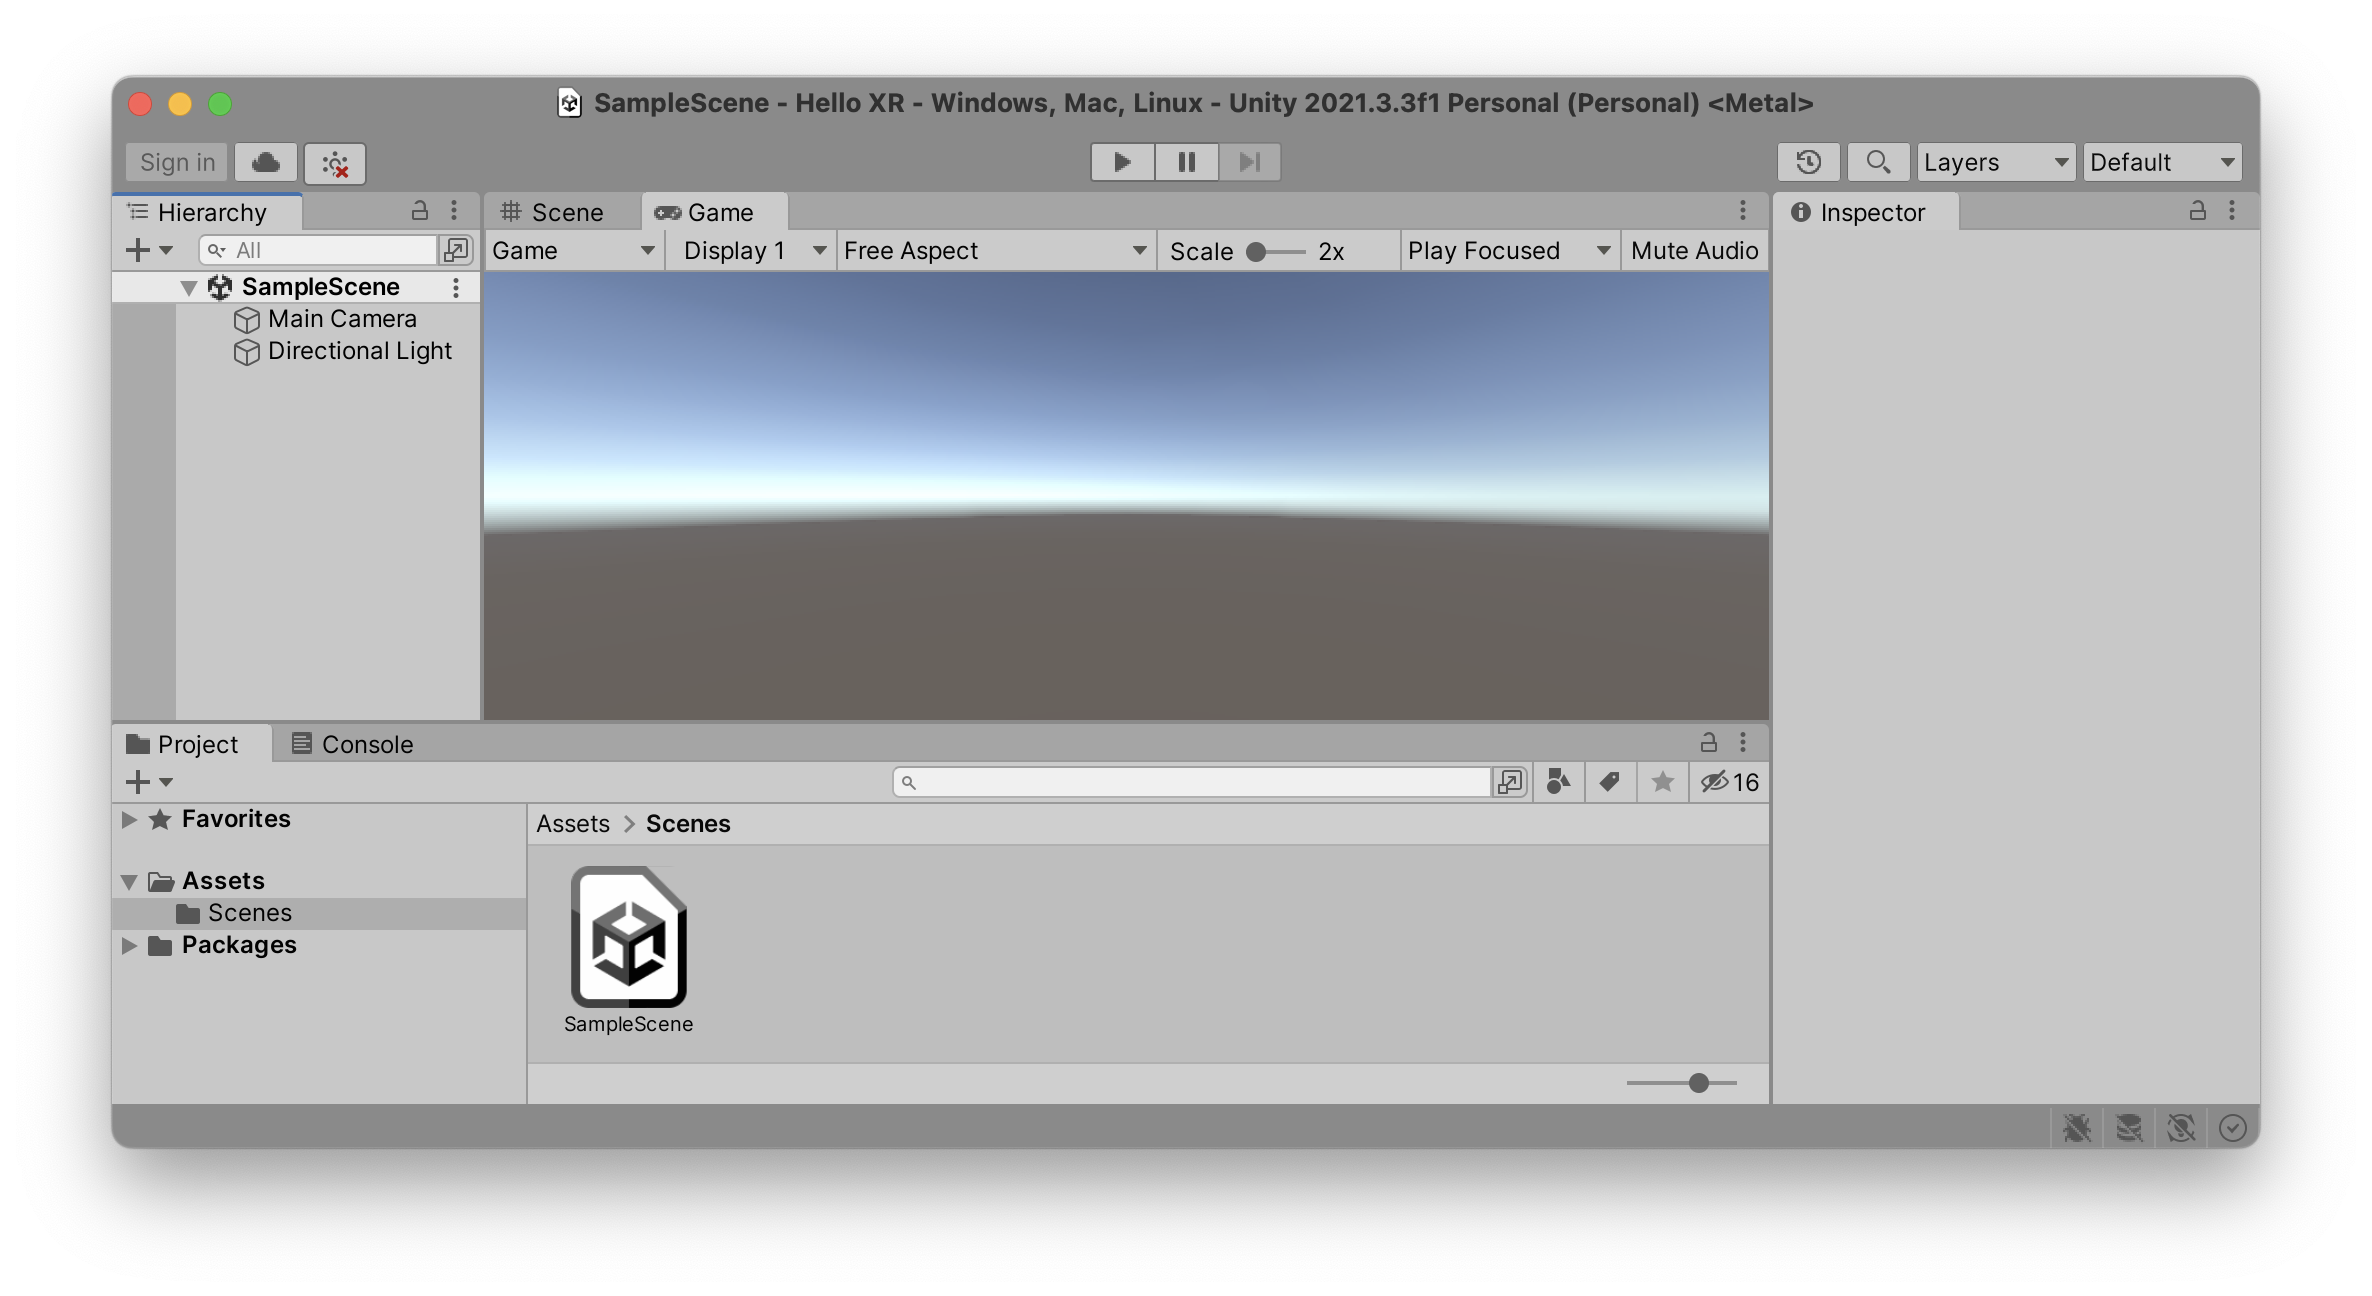
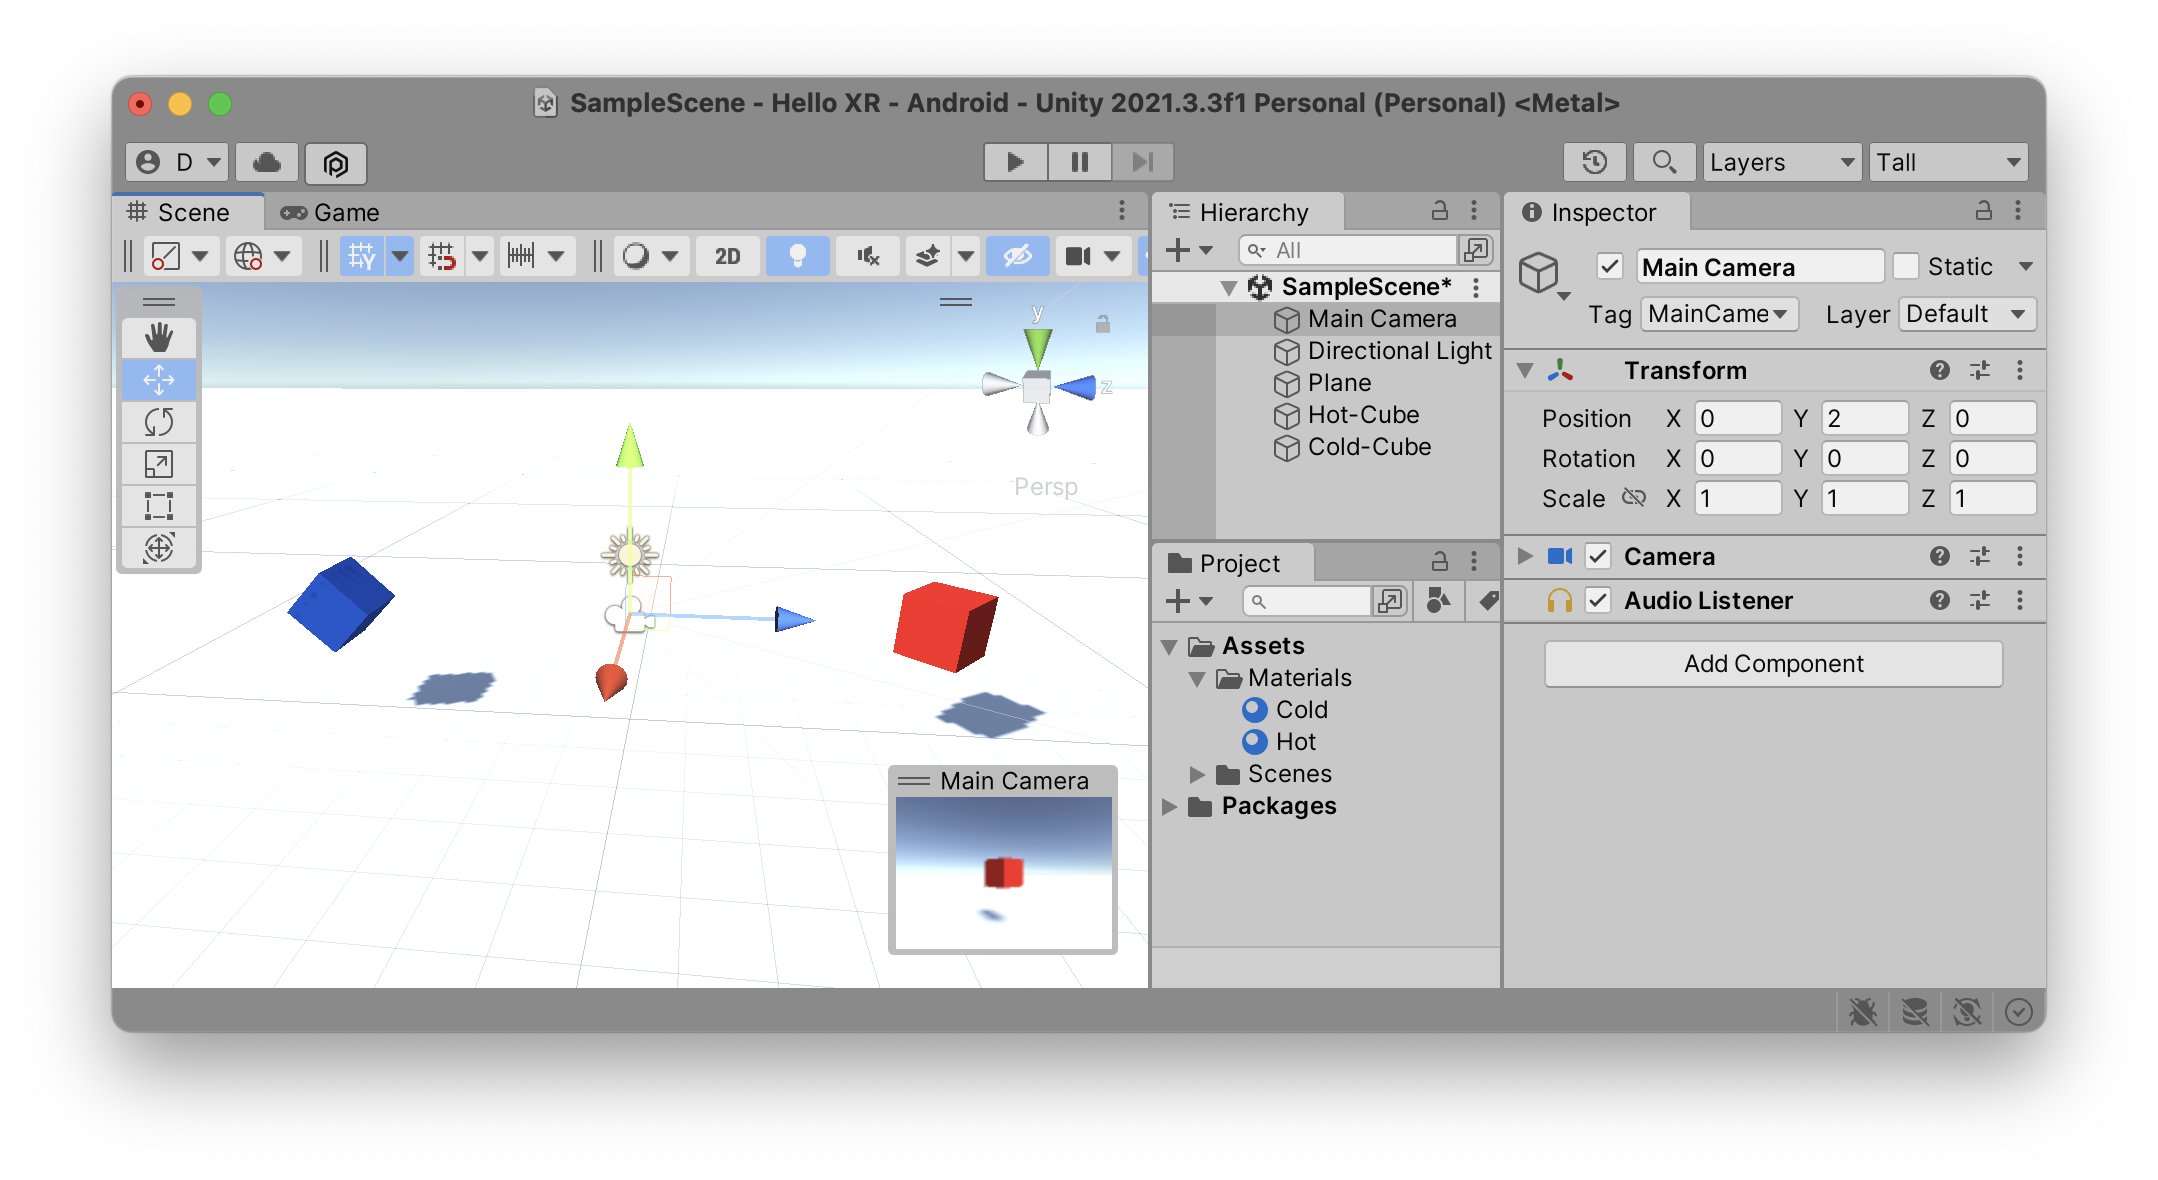
Your project should open up with a SampleScene in the Hierarchy.
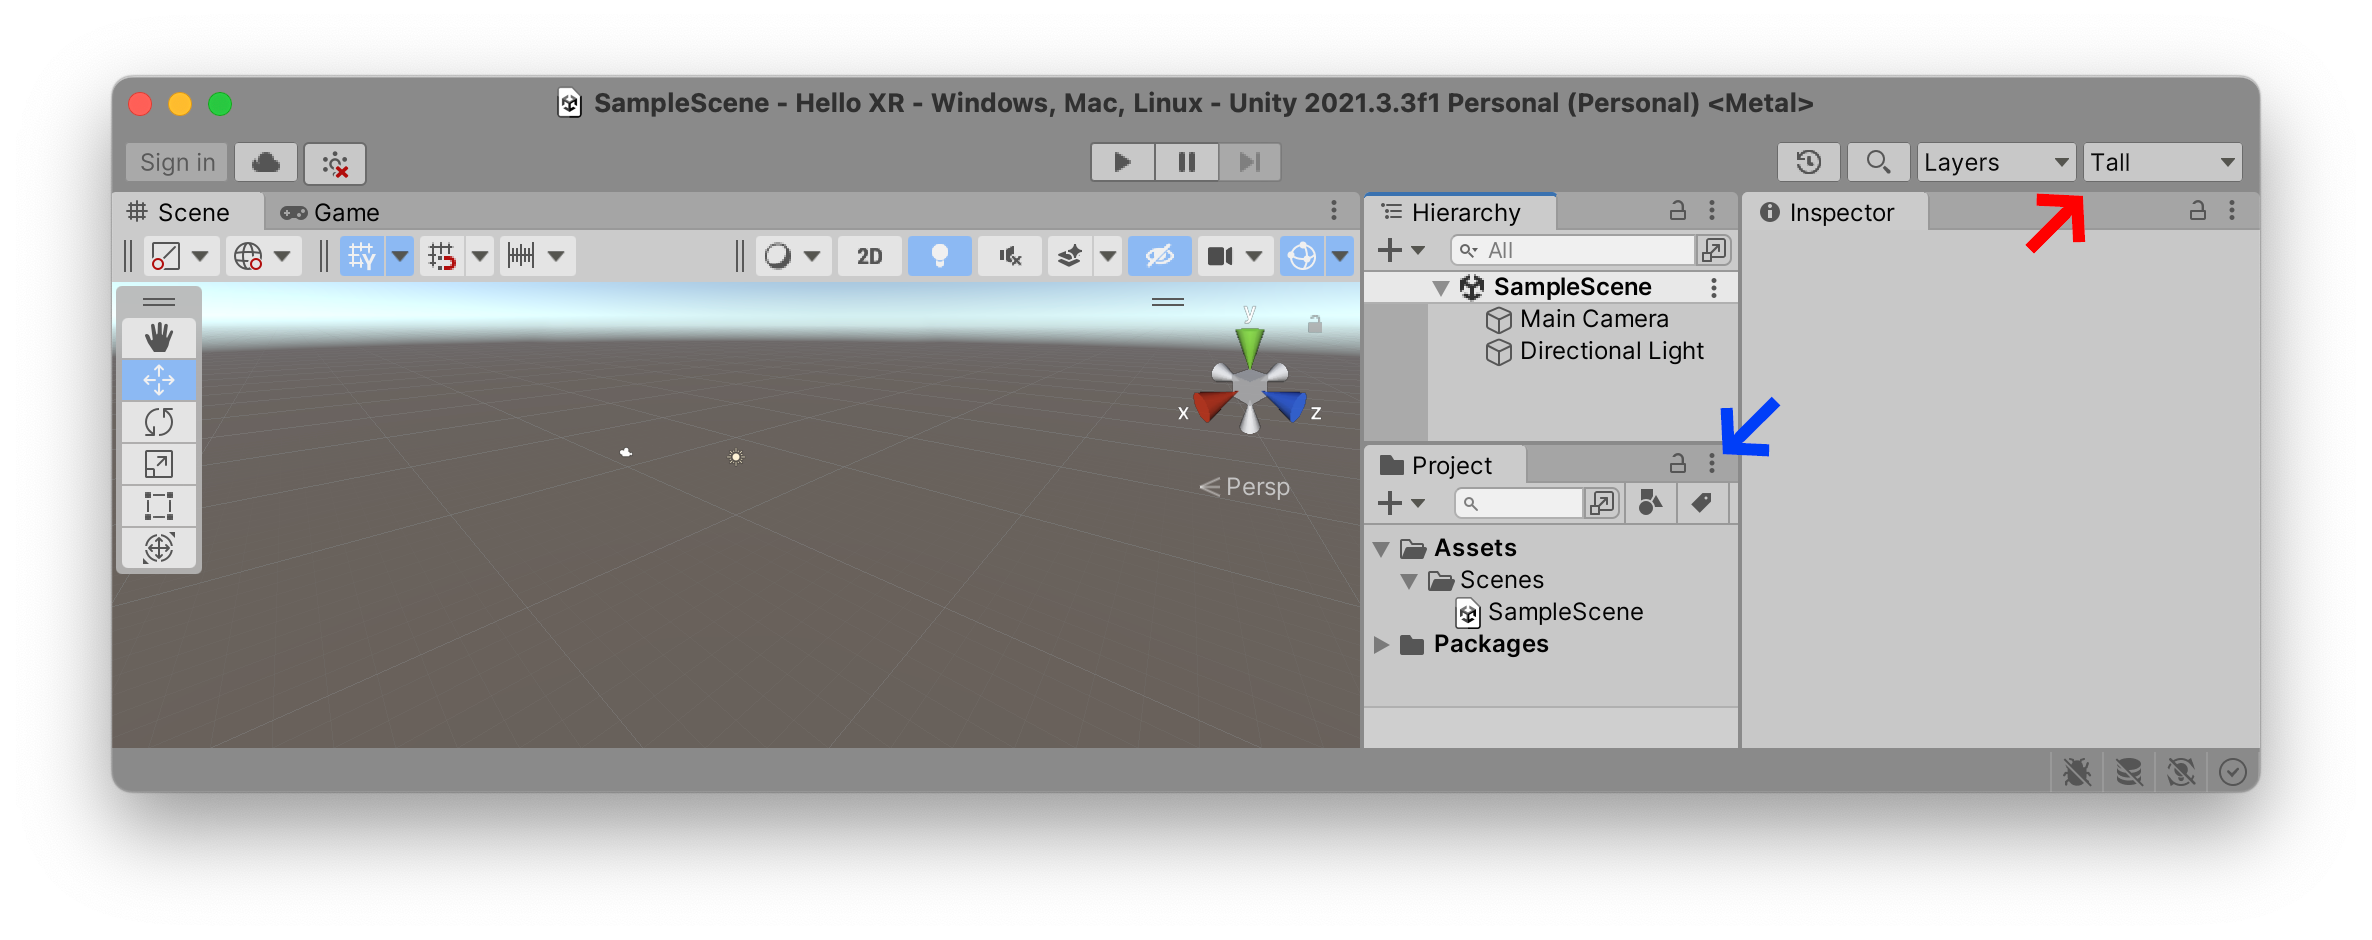
If your project doesn’t look like my screenshot in the rest of this tutorial, it is because I have configured my editor to use the TallOne Collumn Layout…Project tab.
Inifinity Room
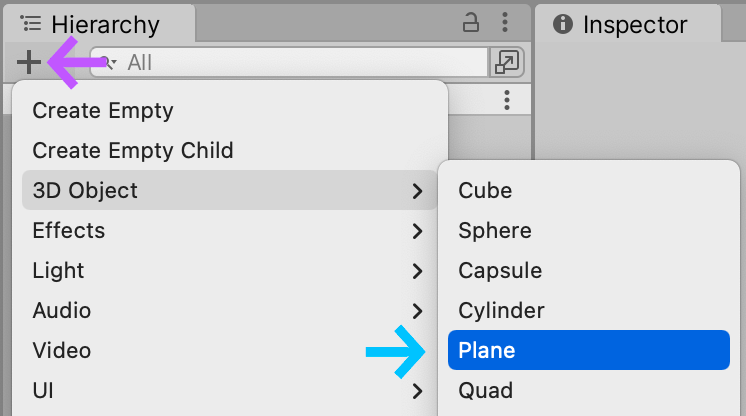
Let’s add a floor and a cube to our Scene. At the top of the Hierarchy tab, you’ll find a ++3D Object > Plane
Select that plane, look at it’s values inside the Inspector tab. You should see the Transform values, which describe the x, y, and z position, the rotation, and the scale of the plane.
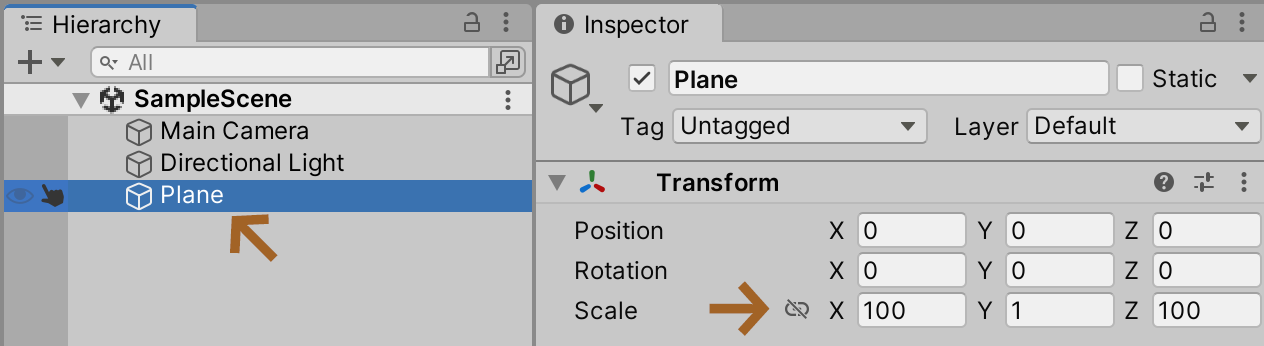
Let’s stretch out our plane to give it a larger size in the xz100
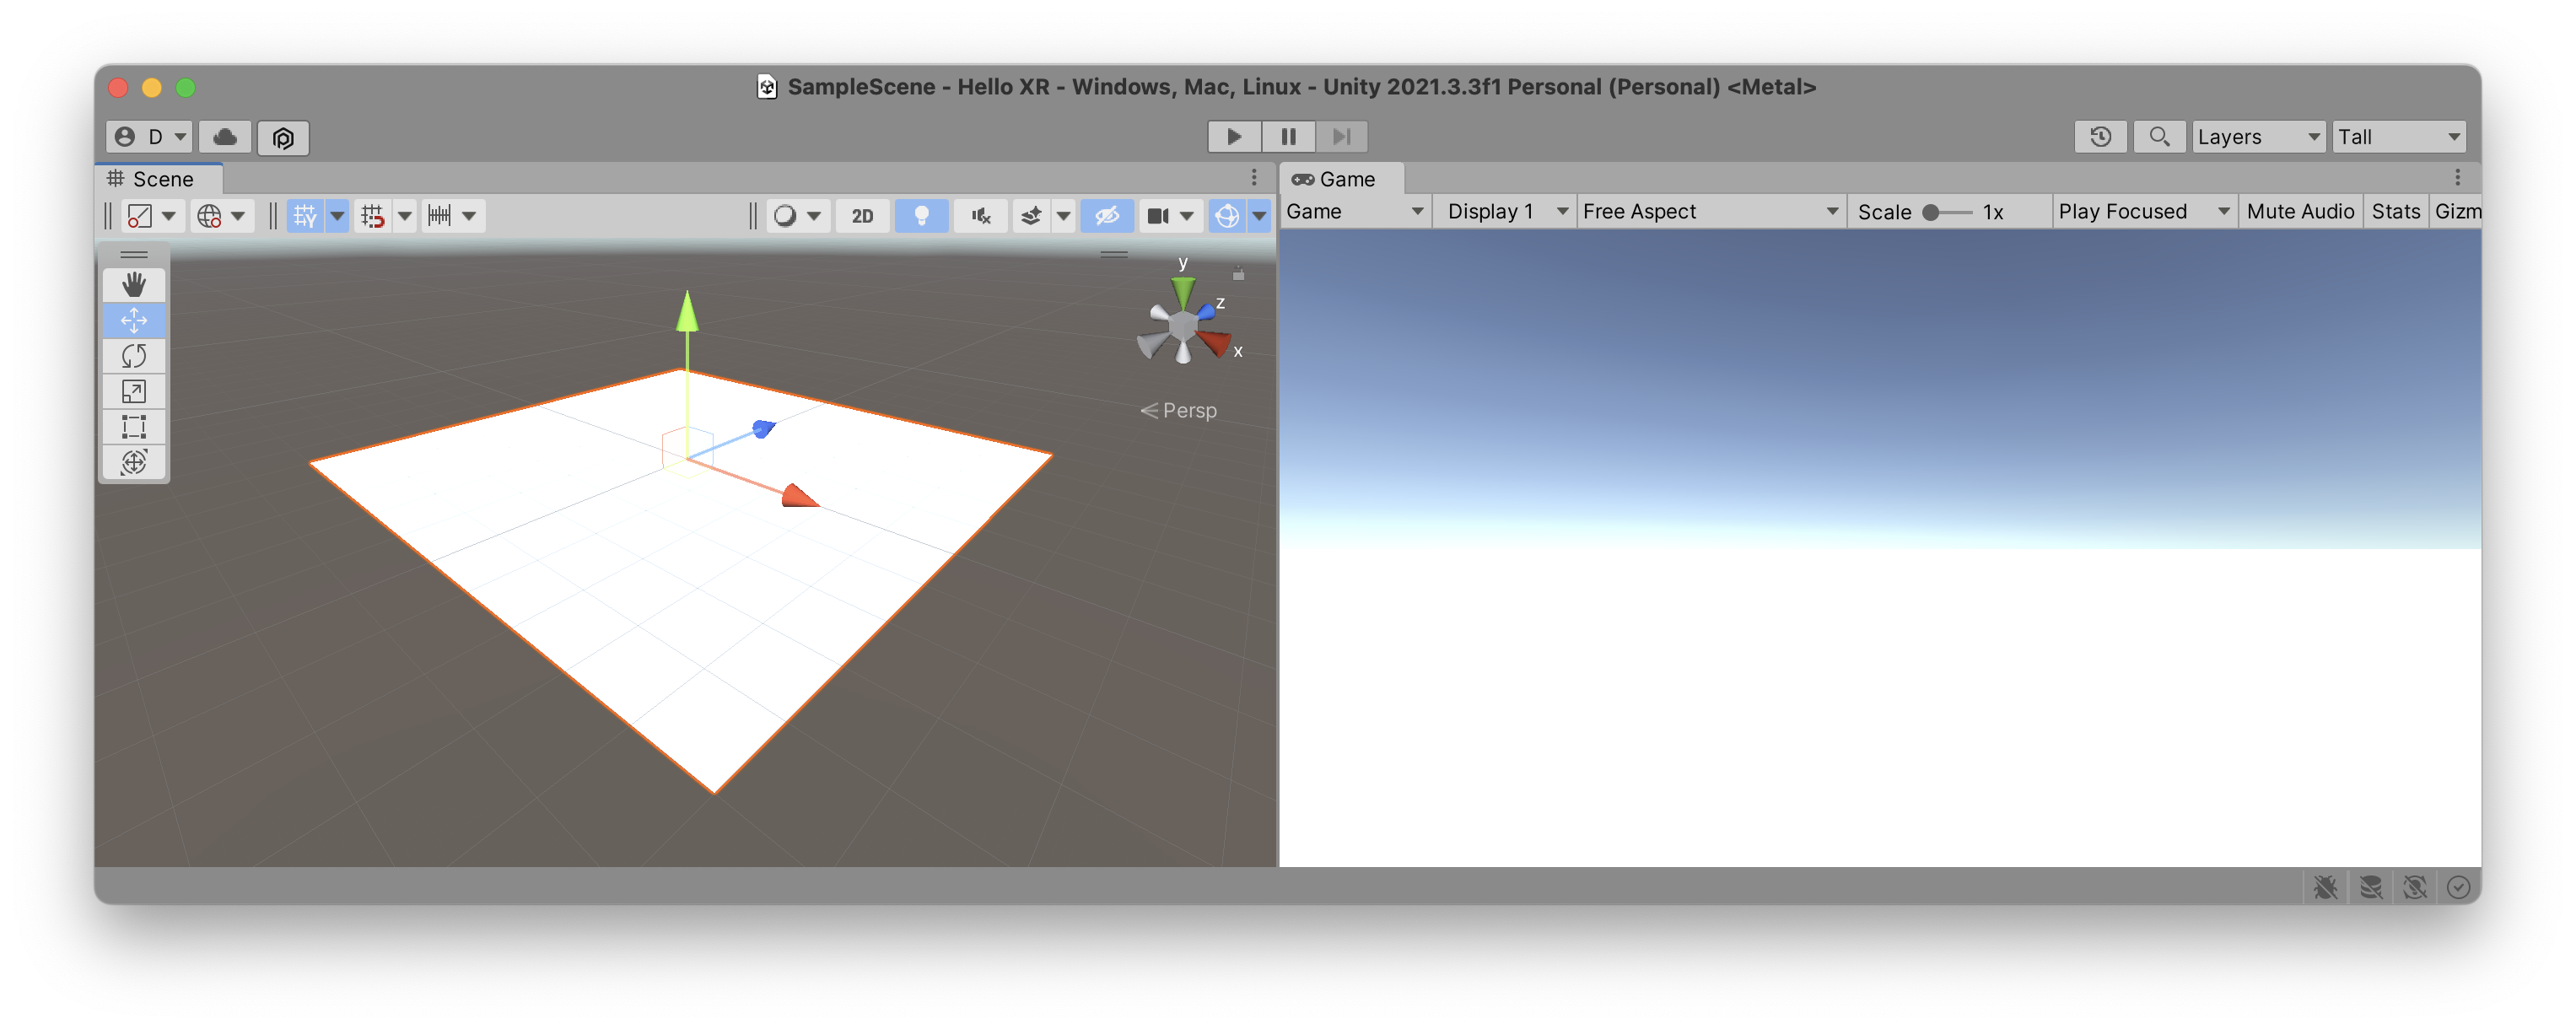
This should create the impression of an infinite white floor spreading off into the distance, similar to the infinite white room in THX 1138.
Hot Cube
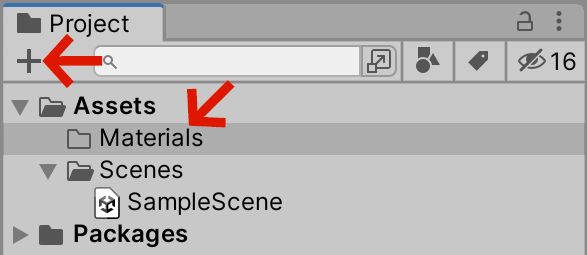
Now let’s put a hot cube in the middle of this abstract room. Before we create the cube, let’s create a new folder to hold all our color materials. In the Project tab, select the +Folder in your Project named Materials
Now let’s create our Hot color material in this new folder. Right-click on the folder, or alternatively select the folder name and click on the +Material. Name that material “Hot”. Give it a redSmoothness0
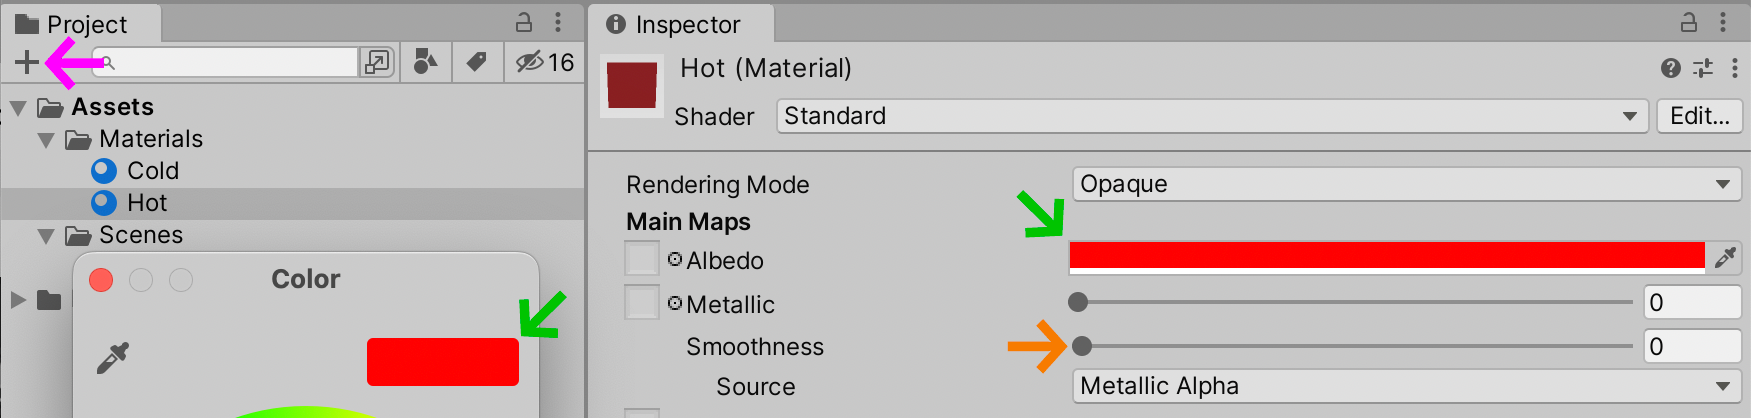
We now have a hot red material to paint our 3D scene with.
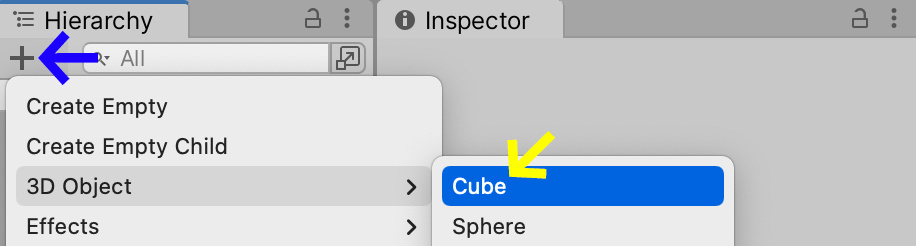
Go back to the Hierarchy+3D ObjectCube
This should inject a 3D Cube into your Scene, but unfortunately the cube is stuck in the floor. Let’s lift the cube into the air and give it a little rotation using the following settings in the CubeInspector:
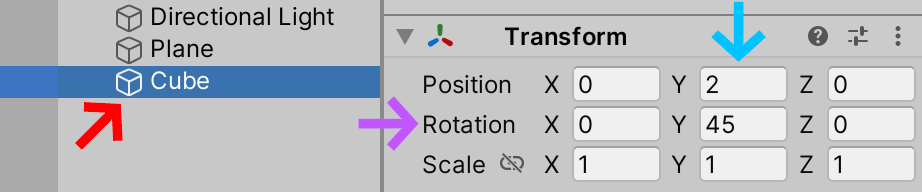
Here, we’ve set the Cube’s position to 2Y45°Y
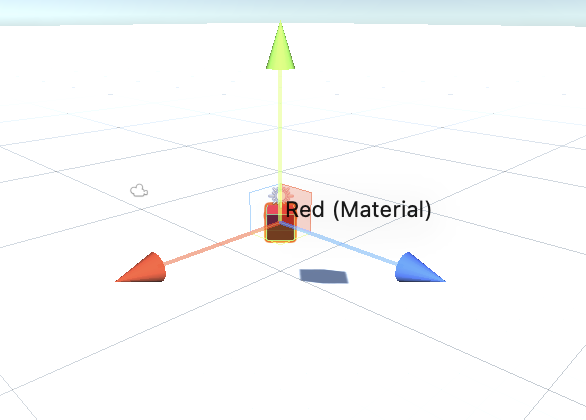
Finally, let’s drag out Hot material from the Project tab, directly onto the object in the Scene tab in order to give it the hot color.
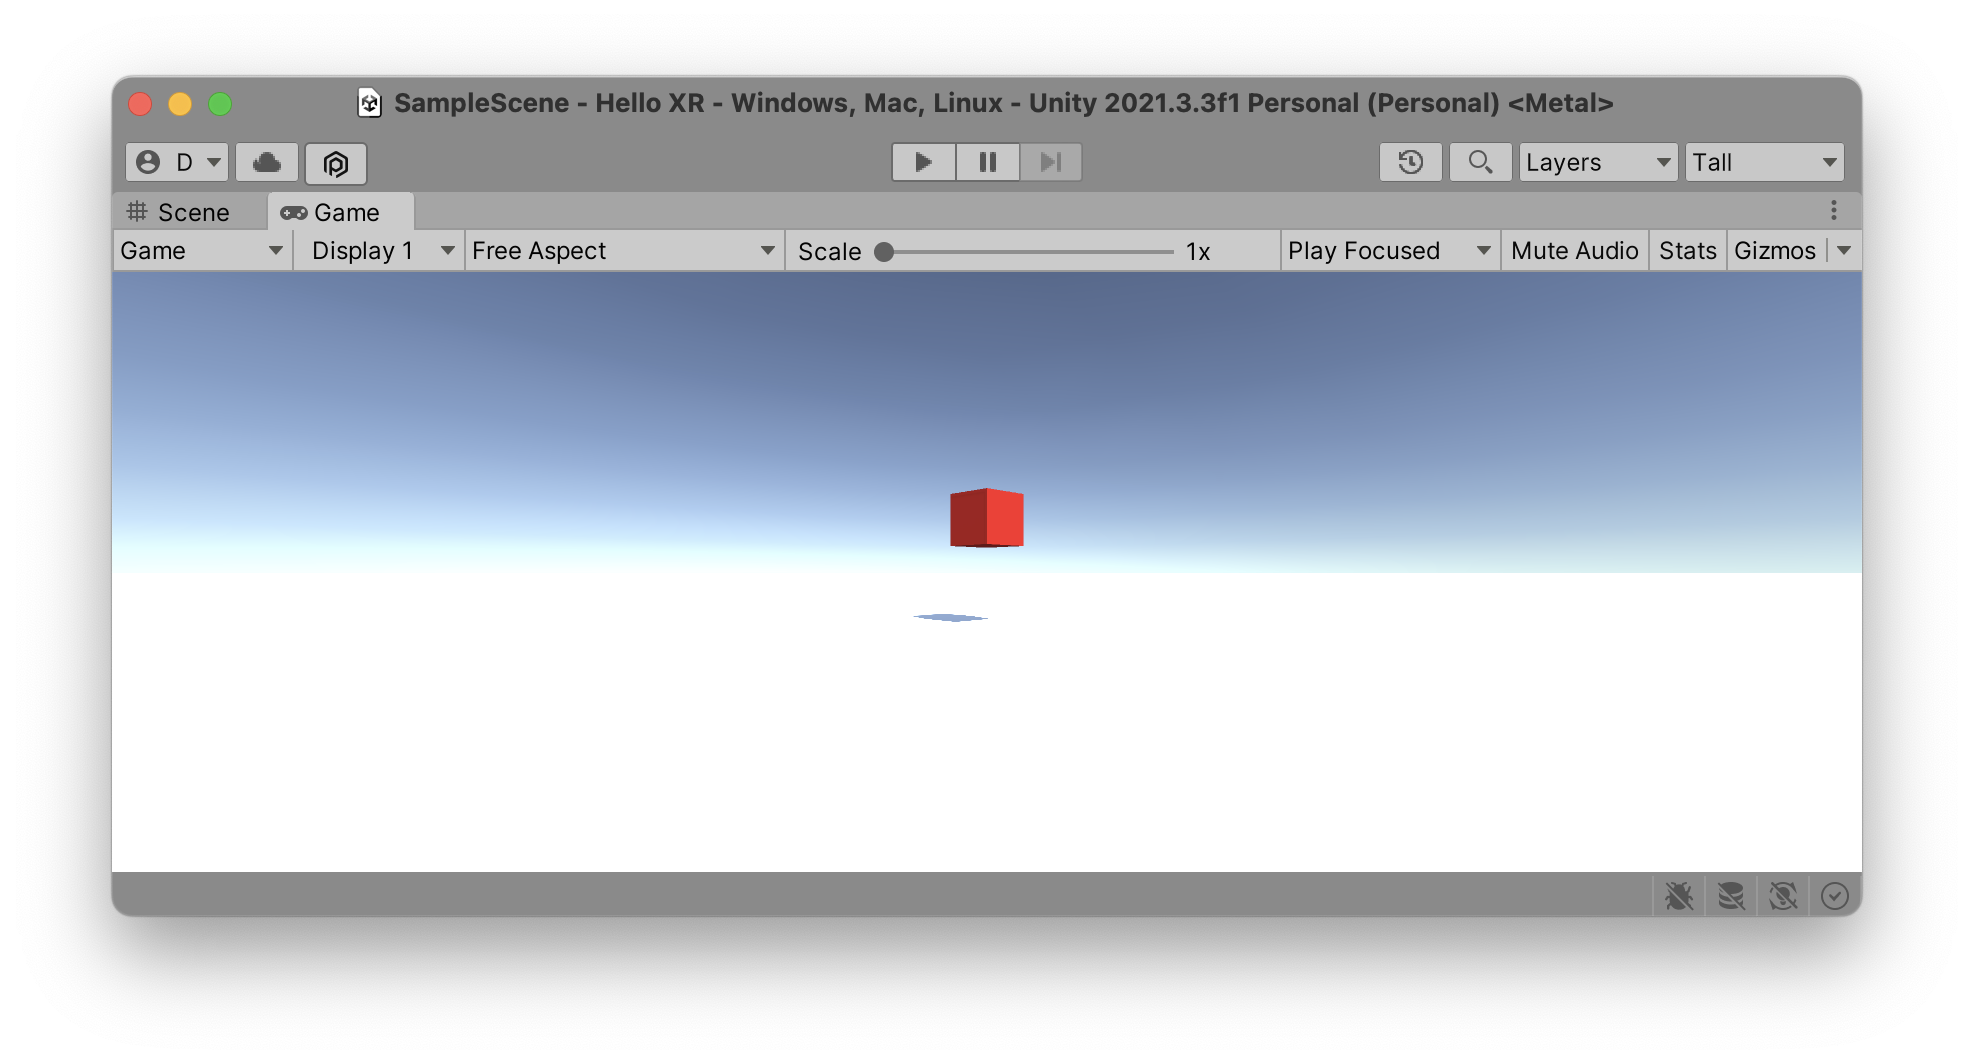
You should now have a Game view that shows a red cube hovering in the air.
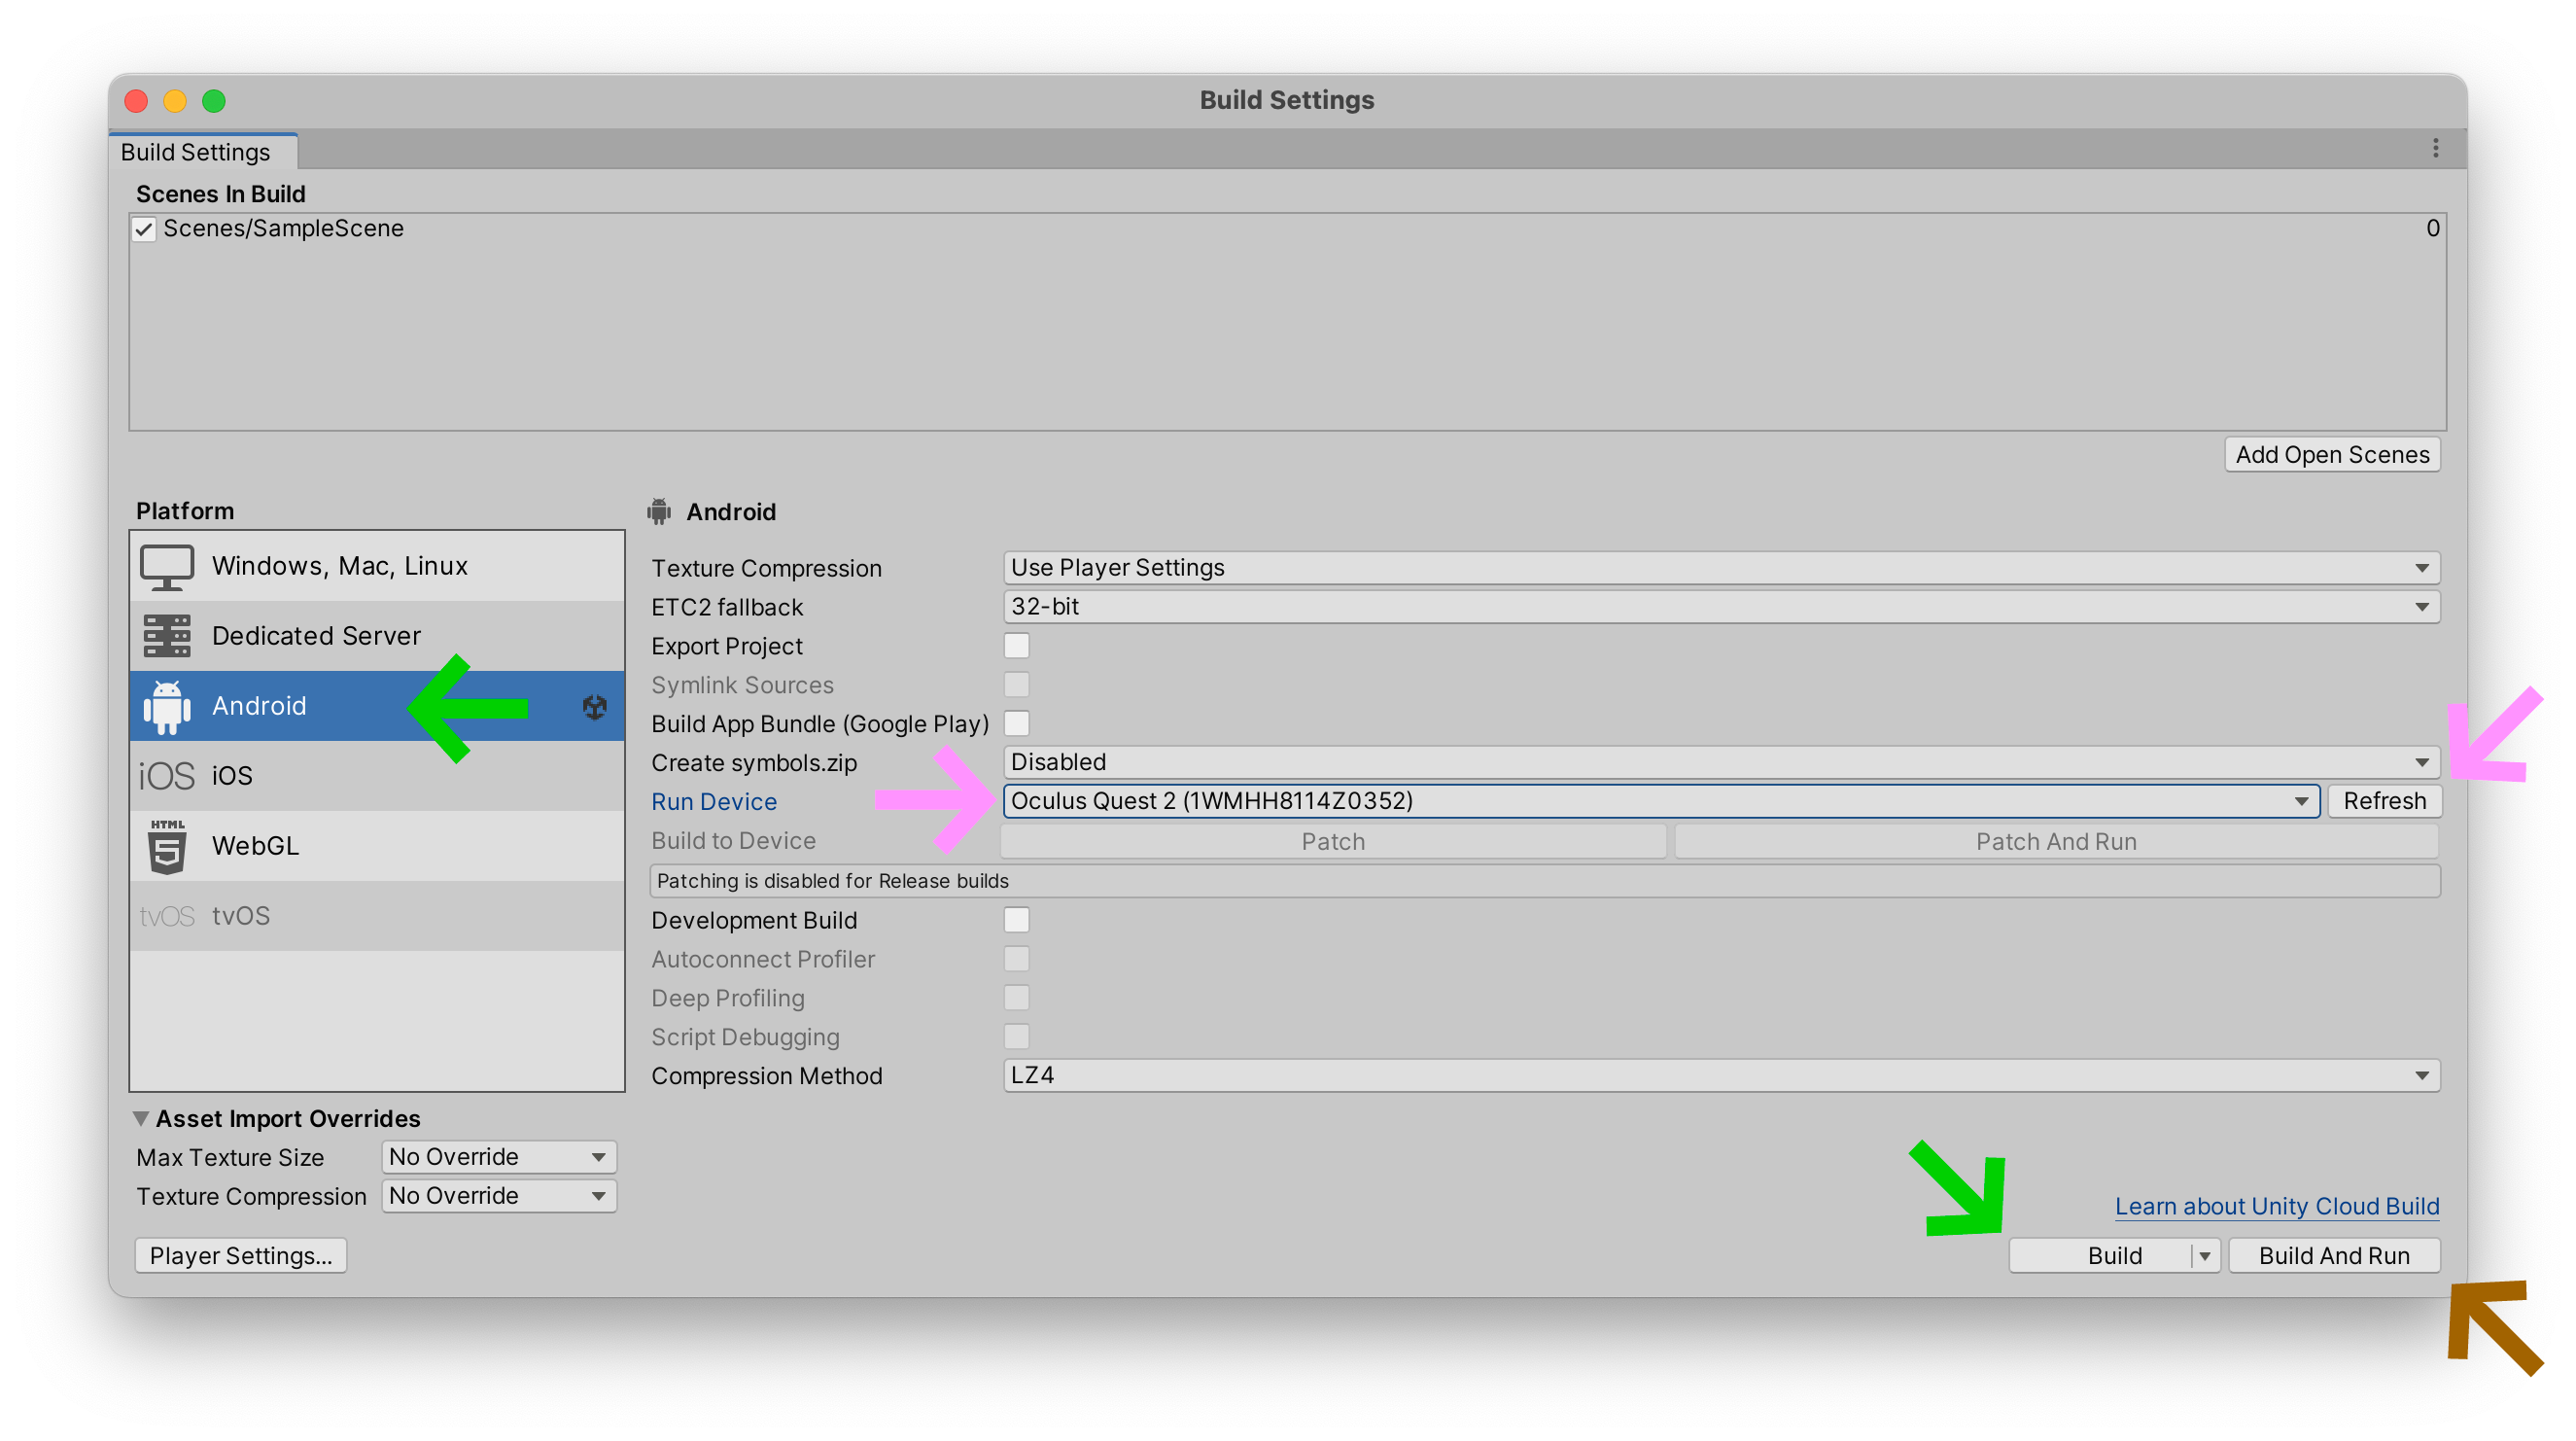
Export to Headset
In order to export to our headset, we need to change several settings in the Build Settings window. In your menu bar, go to File > Build Settings to open this window. Make sure you Switch PlatformAndroidRun DeviceBuild and RunRefreshDeveloper Mode as explained in the Installation tutorial.
When Unity is finished exporting your project, you should see your game inside your Oculus headset. Yipee! Ummm, wait a minute. Look at your headset. What do you see? Is this normal? What the %$@#& is going on. That is totally uncool Unity! There is nothing immersive about this experience.
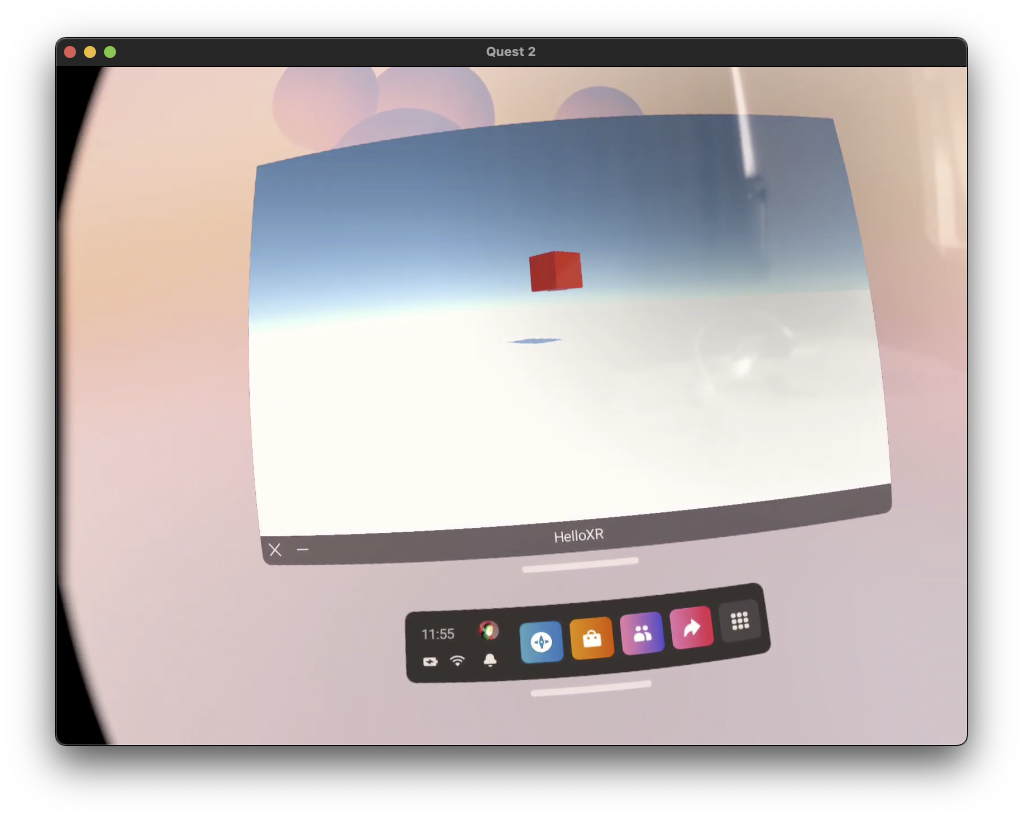
The problem is that we have not activated the “virtual reality” mode in our game. Therefore, Oculus considers that Unity sent us a traditional game that needs to be played on a flatscreen TV. So it builds a flatscreen TV for you inside your headset. Maybe watching flatscreen televisions is just training for our future present dystopic hellscape, but it’s probably not what you wanted.
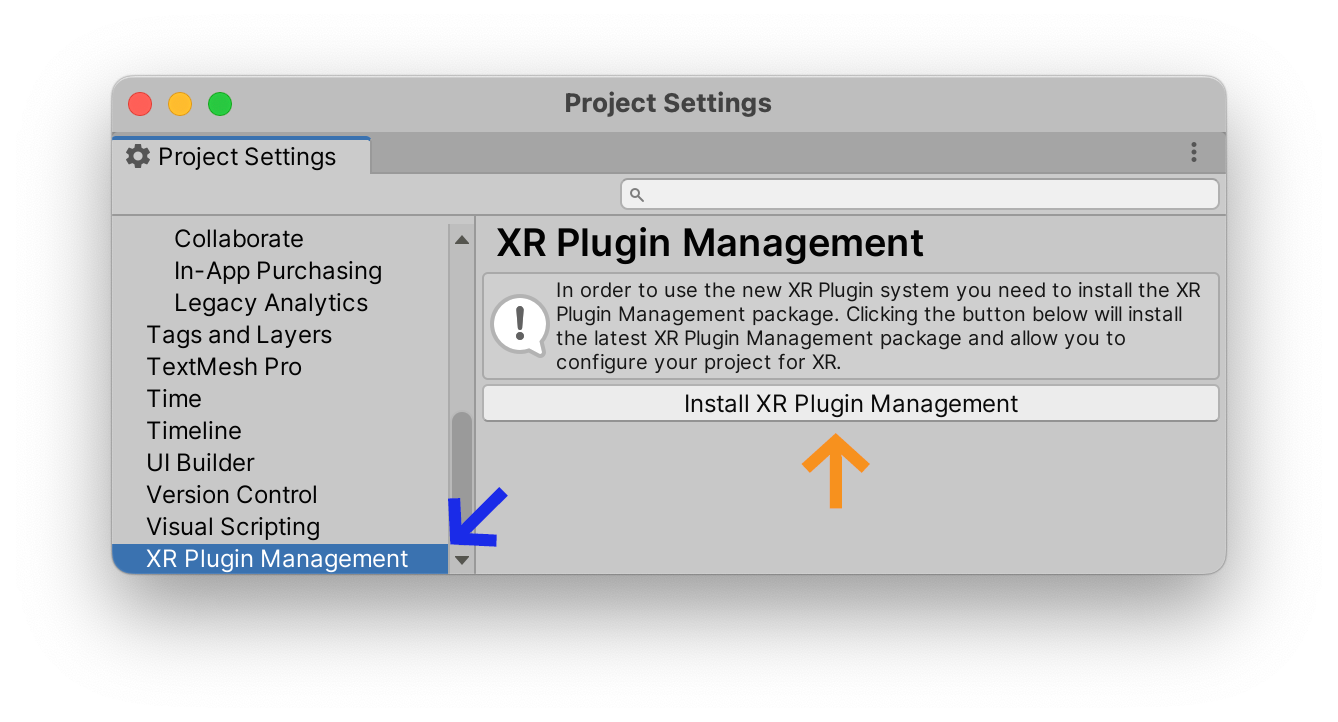
XR Plugin
We need to activate the special “virtual reality mode” inside your Unity project. Open the menu Edit > Project Settings, find the XR Plugin ManagementXR Plugin Management
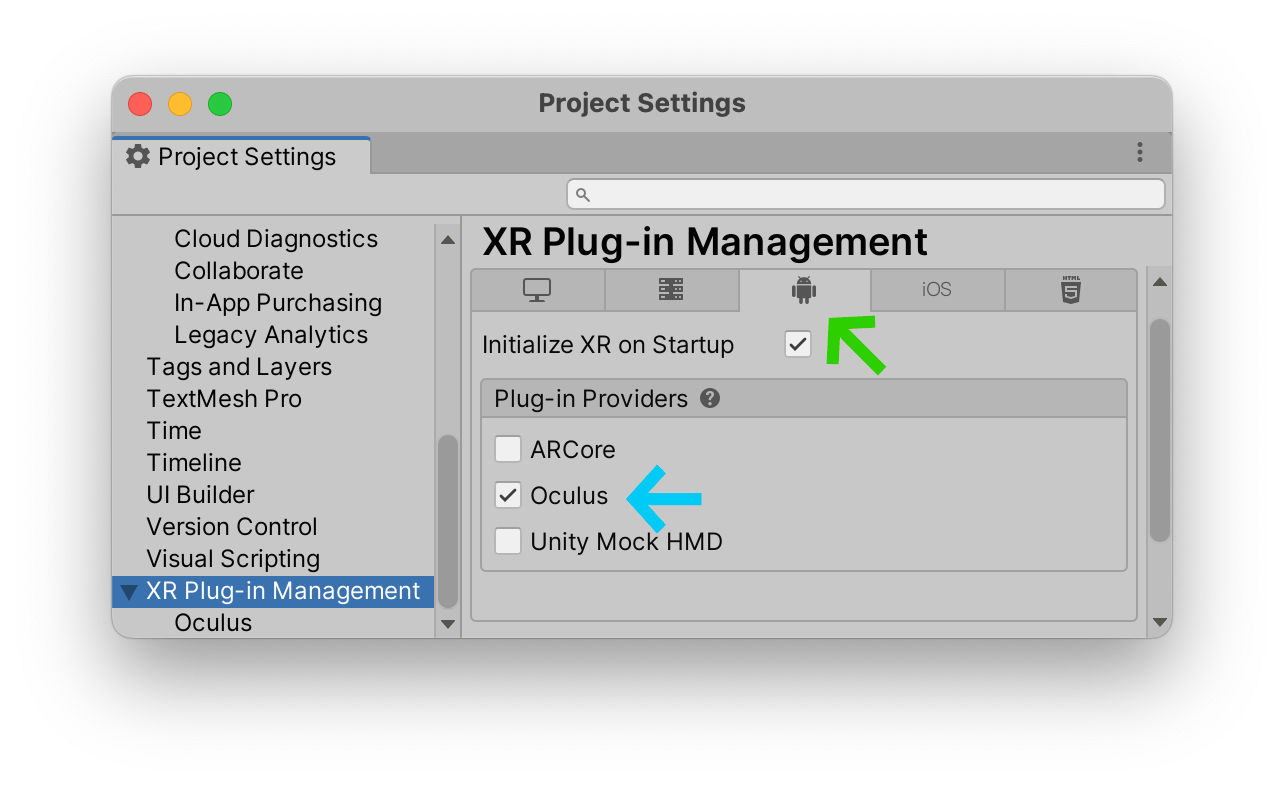
Once the plugin has been installed, select the AndroidOculus
Convert To XR Rig
If you re-build and run your application in your headset, you should now be immersed in a 360° world, but the headset won’t rotate or move with the movements of your head because it is using a classical 3D camera. This is an odd experience. Try it if you like, just don’t move your head. Interresting, but again, not really what you were expecting in a virtual reality headset.

To convert our classical game camera to VR-headset “rig”, select the +XRConvert Main Camera to XR Rig
Now, finally, you can build your application again and run it on your device. You should now see your lovely Red 3D Cube floating in immersive virtual reality.
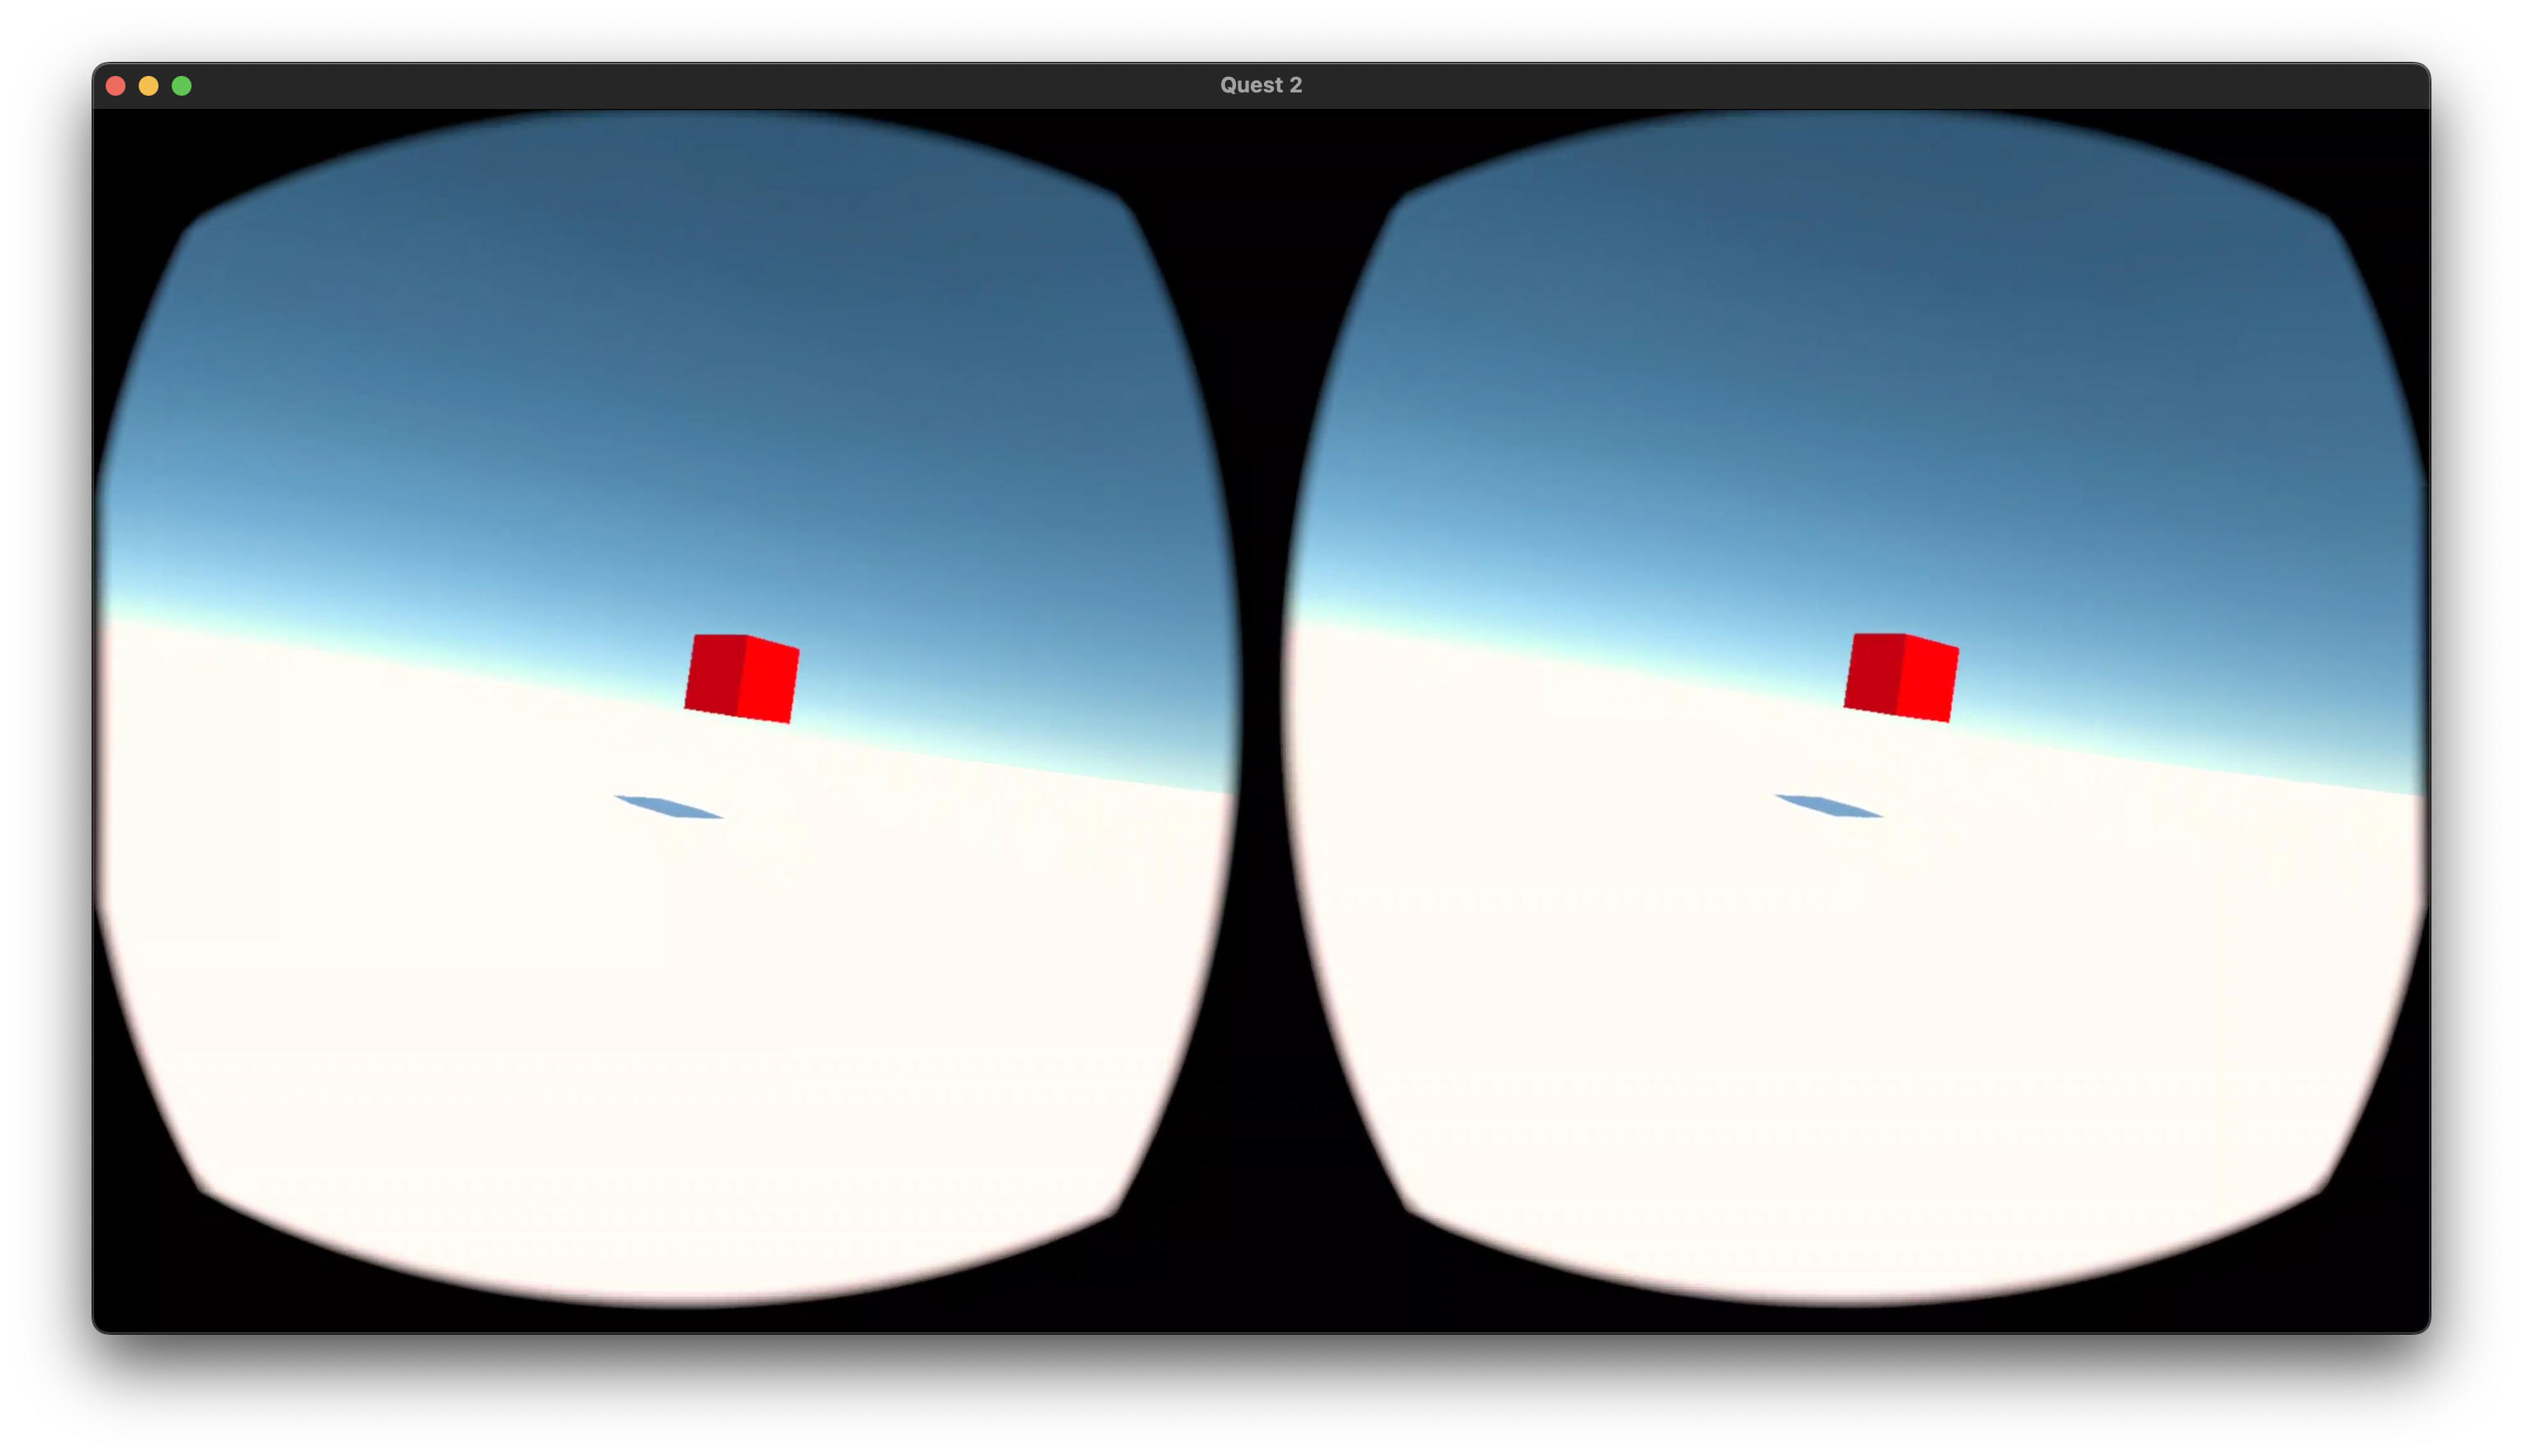
Look Behind You!
A good exercise for thinking about how to design in virtual reality, is to start by putting a second object behind your XR Rig. Create a second material (here I’ve chosen blue), and place it “behind” the XR Rig.
Now when you Build and Run
The next obvious step would be to continue this greyboxing method by building an entire blocked-out city directly inside of Unity, and then to start animating elements within this scene. Hey, sounds like a good subject for a tutorial.