Install Unity
Let’s start by installing Unity to our machine. For this tutorial we will be using Unity 2021.2. The full version number has three components ####.#.## that stand for YEAR.version.update. The important numbers here are 2021.2. The third number is the update/bugfix version. You do not have the have the exact same version of 2021.2.## as me in order to follow this tutorial.
Unity Account
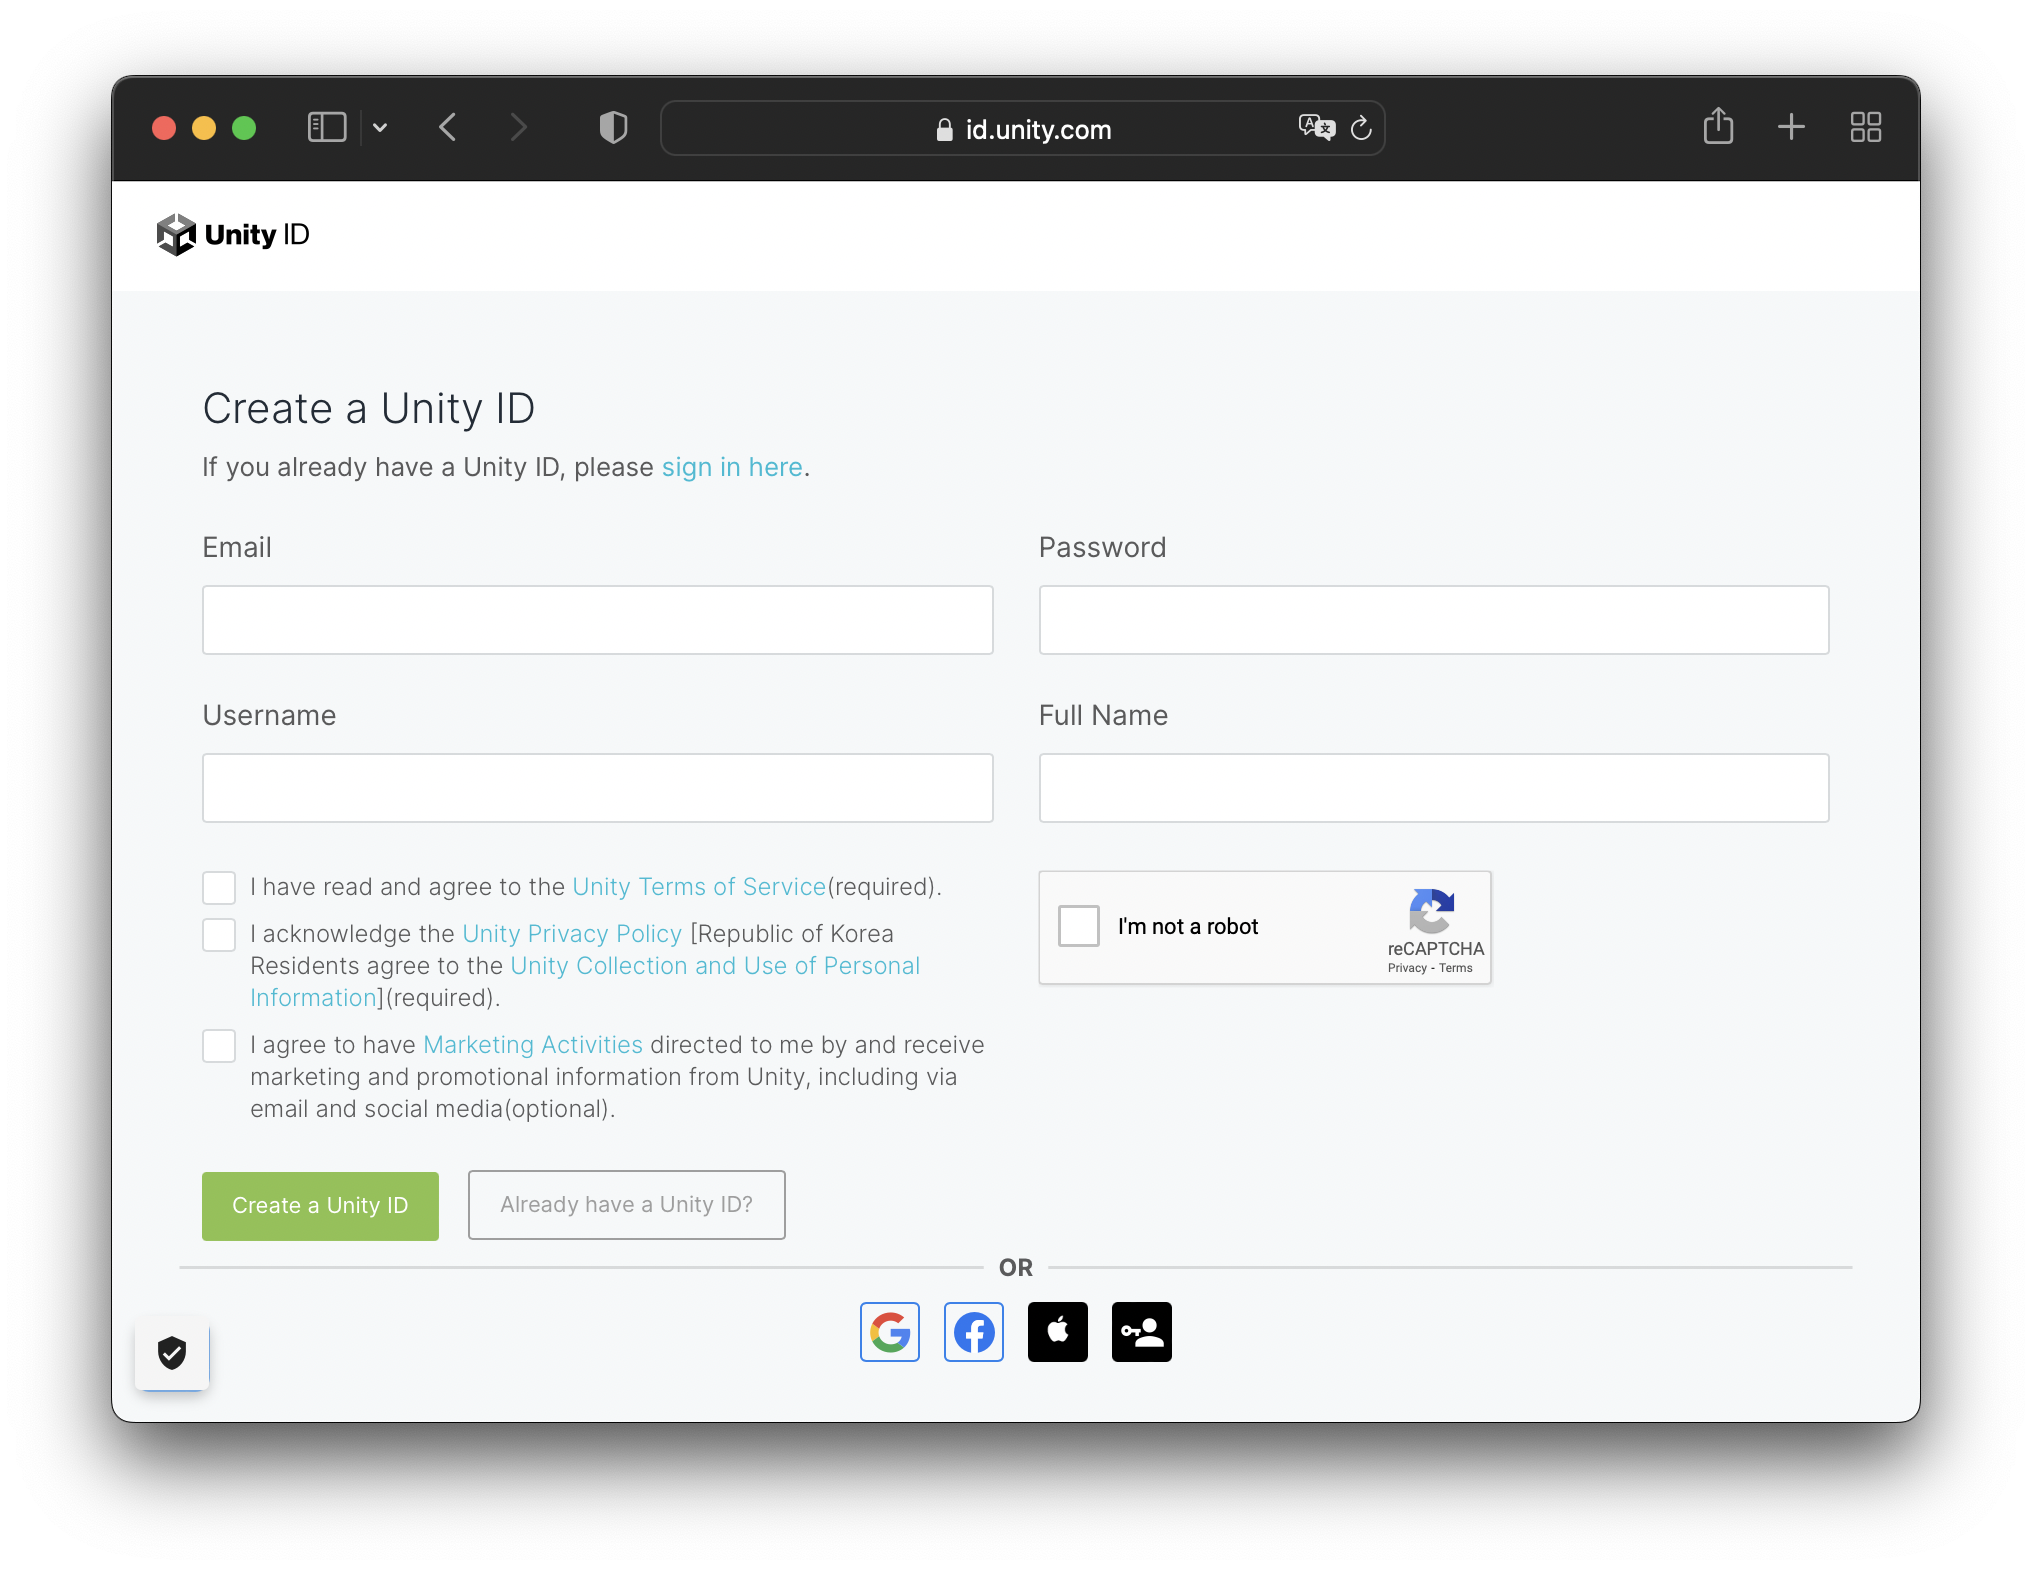
Unity is free, but requires an account to download and configure correctly. Go to id.unity.com and create an account. Ignore the Pro and even Student accounts, making sure you are using the free Personal account.
Unity Hub
Always install Unity on your computer using the Unity Hub. While there are rare exceptions to this rule, the general idea is to use the Unity Hub as a central “hub” (hence the name) for installing and tracking updates to Unity itself, starting and updating your projects, installing and using “templates” that help you quickly start various types of projects, and finally as a means of updating and installing various components you will use to publish your game/experience to platforms such as the Oculus Quest.
Sign In
Once you have installed the Unity Hub into your Applications (macOS) or Program Files (Windows) folder and opened up the application, make sure you sign in using your Unity account. This will make installing additional components easier in a later chapter.

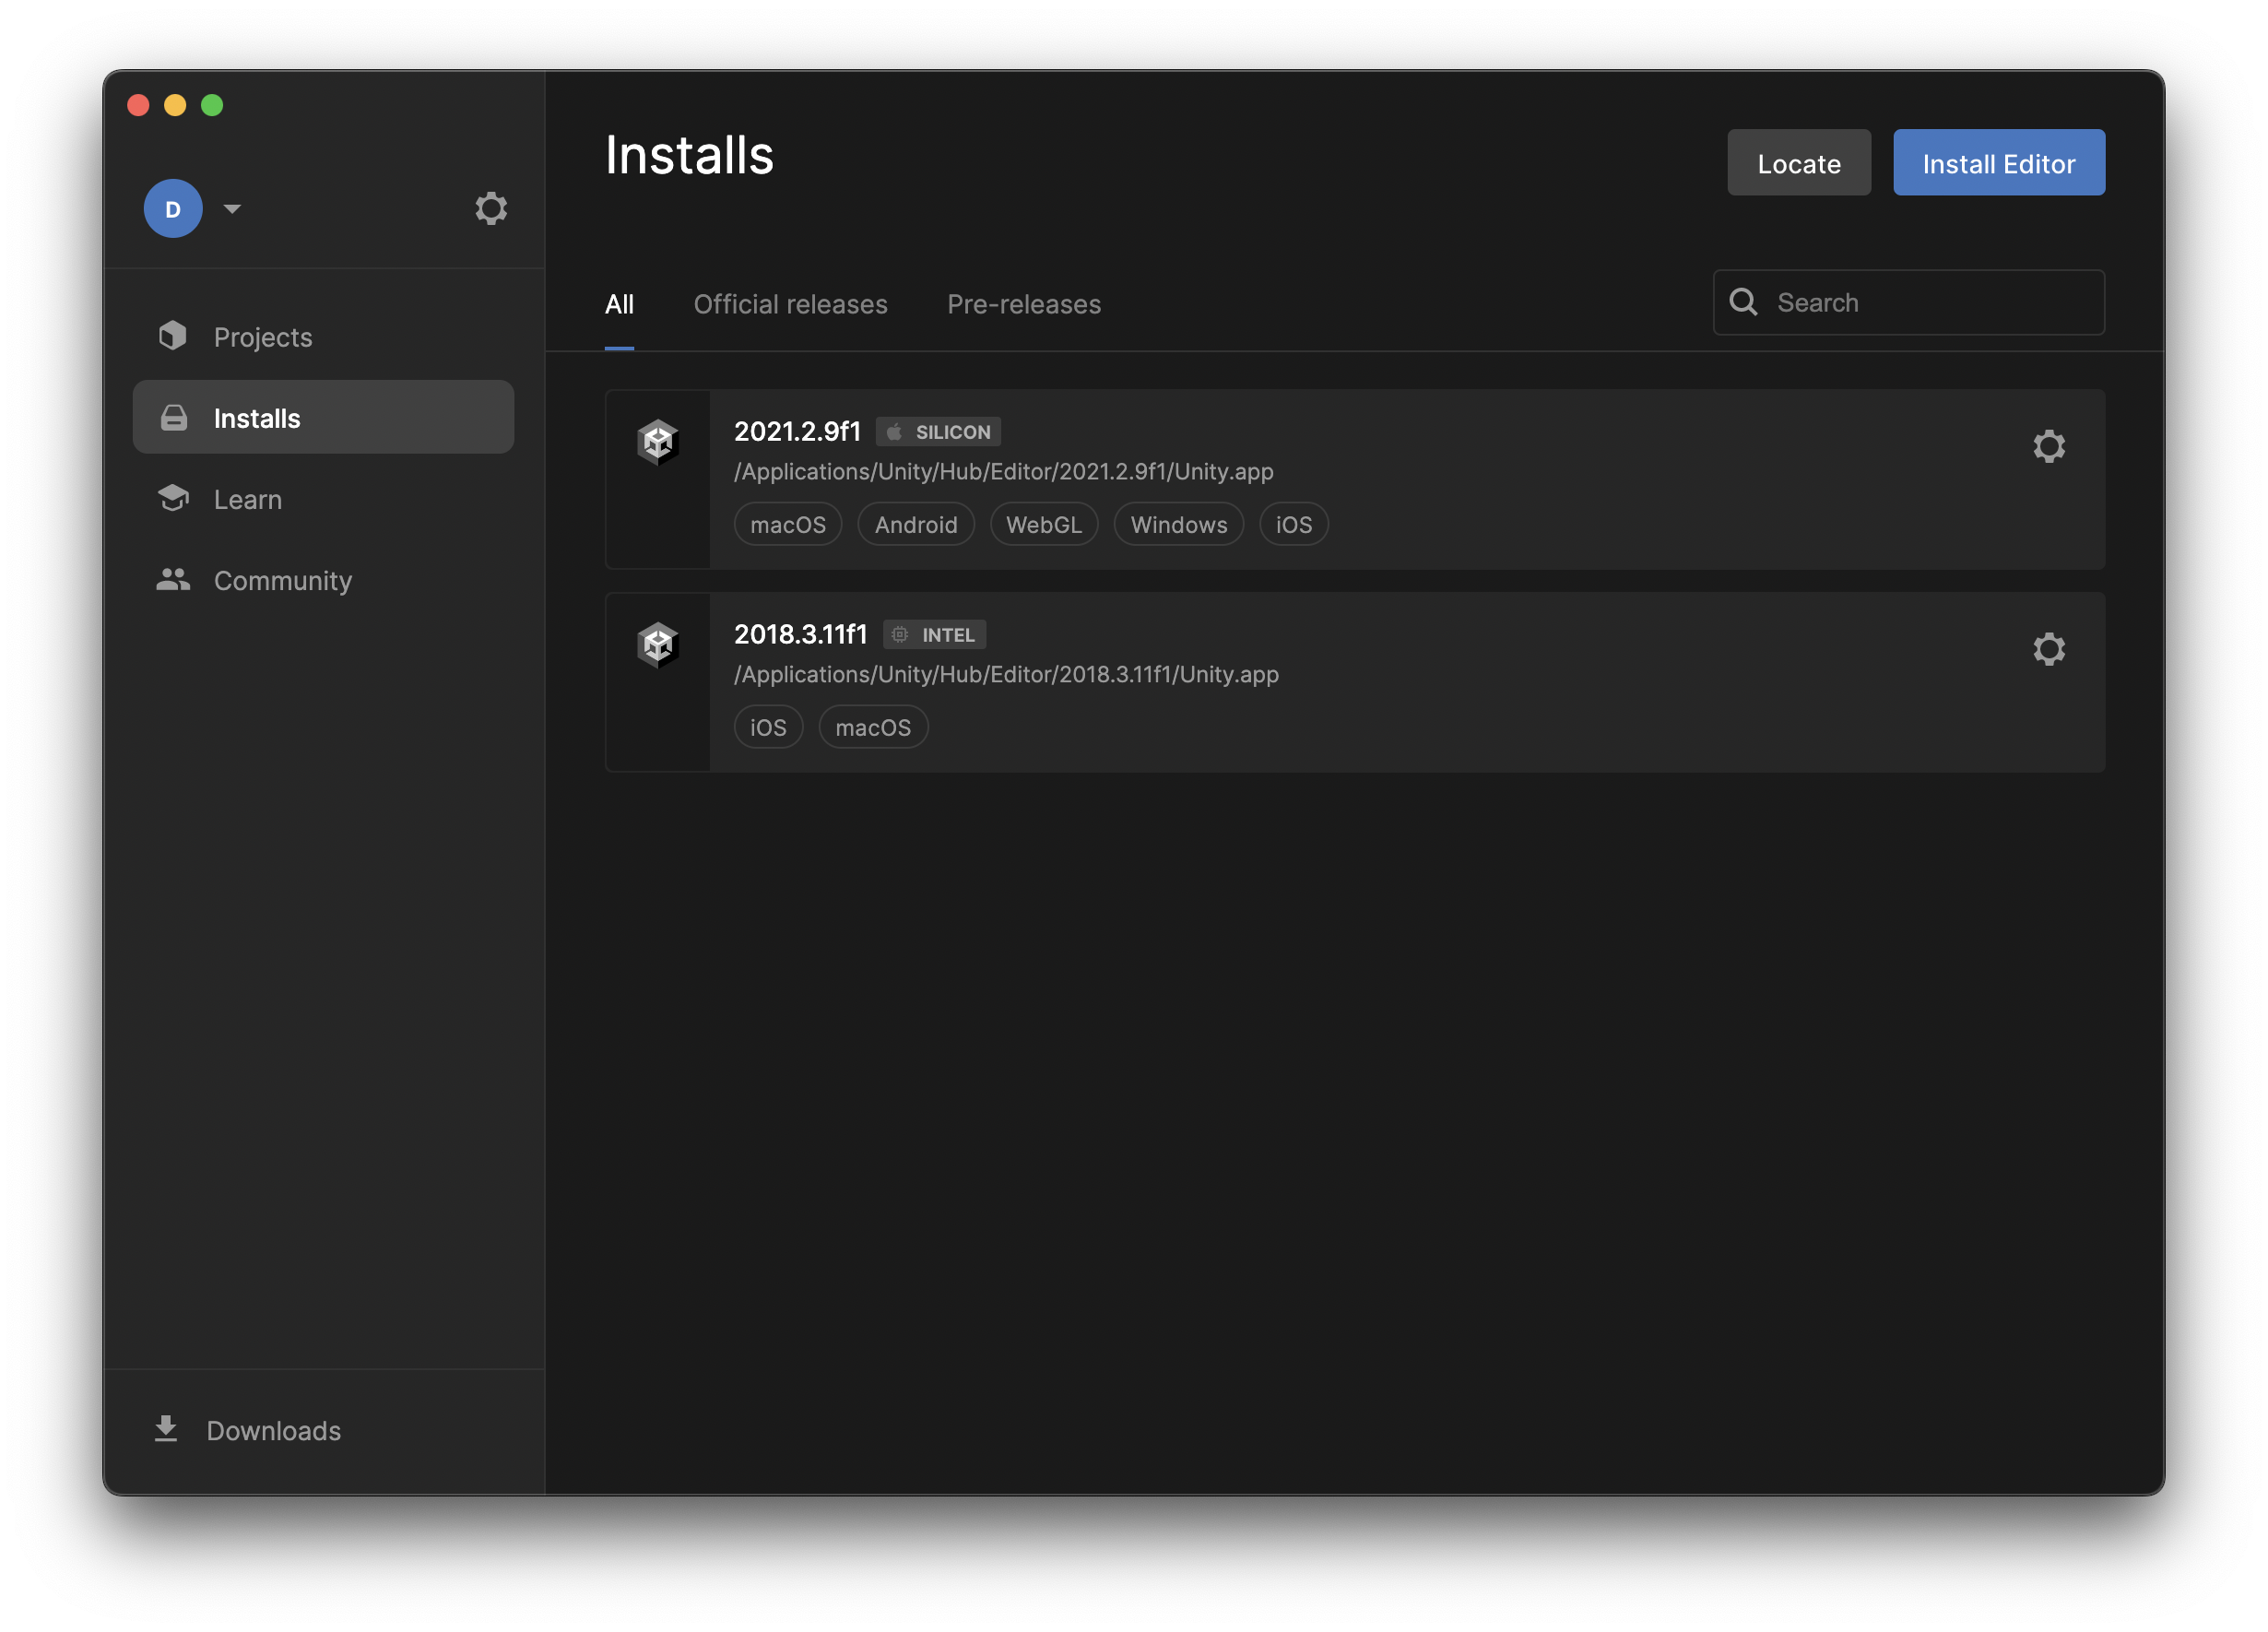
By the large blue D, you can see that I have signed in as Douglas by looking above the Projects icon inside the Unity Hub.
Install Unity 2021.2
Open the Installs tab, and select the Install Editor button. Select Unity 2021.2.##.
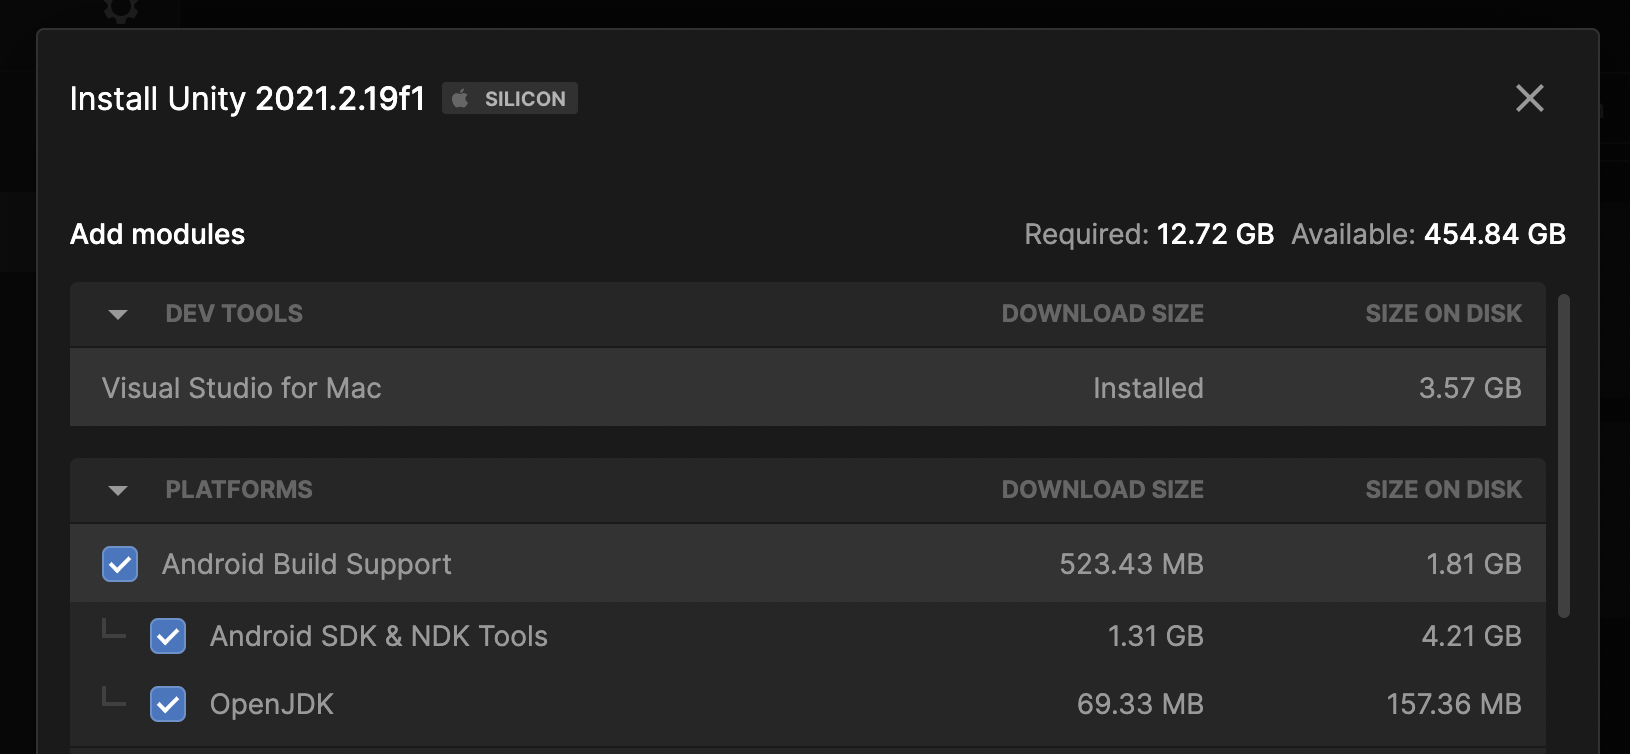
In the above illustration you can see that there are several optional components we can install along with the base Unity editor. Make sure you install Visual Studio as we will use this to write scripts for our game. You also need to install Android and both sub-options: Android SDK & NDK Tools and OpenJDK. Oculus headsets are actually Android devices with a built-in processor, and integrated graphics chip, and screen. You are basically wearing a small portable computer on your face.
You can add whatever other modules you want, for example WebGL, iOS, etc. If you want, you can use the Unity Hub to install or remove any of these additional components at a later date.
Install Oculus
Now let’s install the various development tools that will allow us to send our games directly to our Oculus headset.
This tutorial follows the checklist Oculus provided on their developer site: developer.oculus.com/…/unity-gs-overview. That checklist is pretty long and you don’t need to follow all of the steps. I will list here the most important bits. If you run into problems, you can always go back and follow the complete checklist step-by-step and hopefully find the source of your problem.
In the documents Setup Development Environment and Enable Device for Development and Testing, they suggest the following steps :
- Download and install the Oculus mobile app from Google Play or the App Store.
- Follow the in-app instructions to sign in with your developer account credentials.
- Pair your headset.
- Wear your headset and follow the instructions in the headset to finish the setup.
In our experience, we didn’t find this process as easy as suggested above.
Install Oculus App
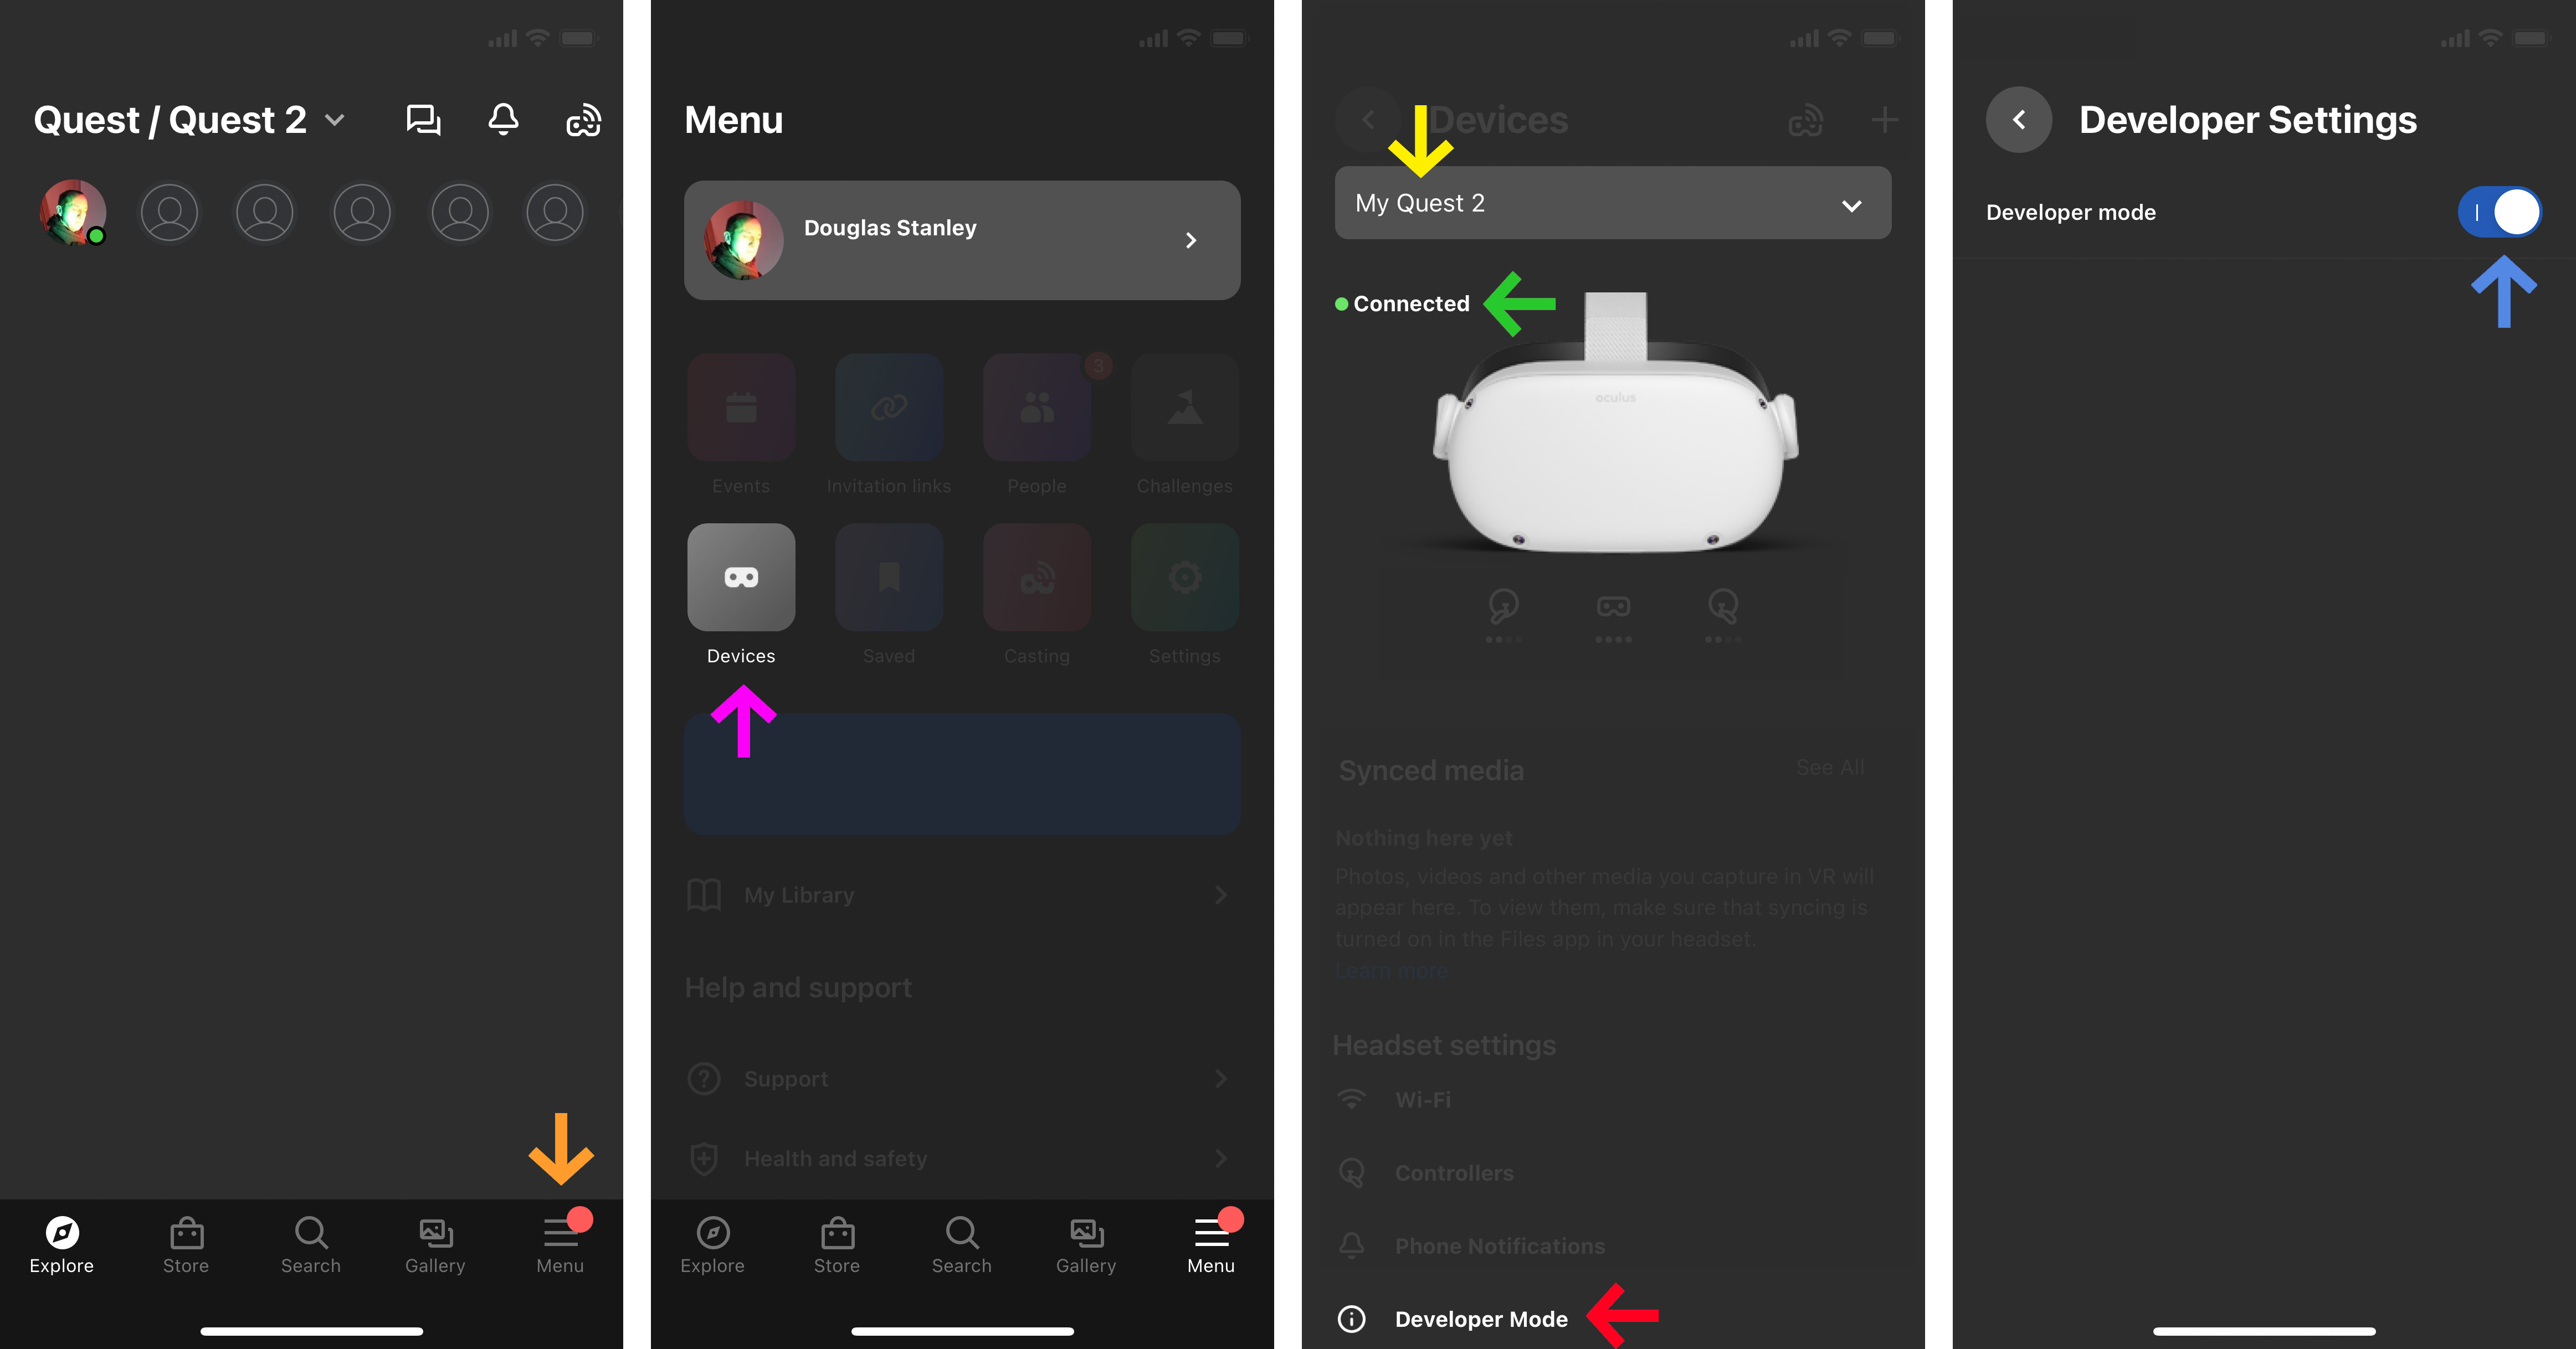
The fiddly bit in this process is the app. You have to download an iOS/Android app to your phone (cf. oculus.com/setup) in order to place your headset into Developer modeDeveloper modeMenuDevicesMy Quest #ConnectDeveloper Mode
WIFI
In order to complete these options your Oculus device needs to be on, and connected to the same wifi as your phone.
You will also need the same Facebook account on your phone and in your headset in order to complete this process. Yes, you read that correctly: you need a Facebook account to activate this magical developer mode. Yes, Facebook will ask you to use a credit card (you can say no) or to use a telephone (your other credit card) to “confirm” your identity. This is the world we live in.
Warning: if you don’t see the option to add your phone number in the Oculus app, just go to the Facebook app and add your number there. On the other hand, Oculus is quite happy to let you enter a credit card number whatever the application: be careful.
Eduroam

At the Head – Genève we have fancy wifi. Fancy buildings, fancy wifi. Specifically, our wifi is part of the Eduroam network, allowing us to immediately connect to wifi in universities and research facilities all over the world. It’s kinda cool and feels sorta old skool Internet. Something something something… sharing… knowledge. You know the vibe.

The trick though of fancy wifi is getting the Oculus connected correctly to the network. Here are the settings we used for connecting the Oculus to Eduroam wifi:
- Wifi: Eduroam
- Method EAP : TTLS
- Authenfication Phase 2 : PAP
- Certificate : “DO NOT VALIDATE”
- Identity : firstname.familyname@hes-so.ch
- Anonymous :
- Password : AAI password
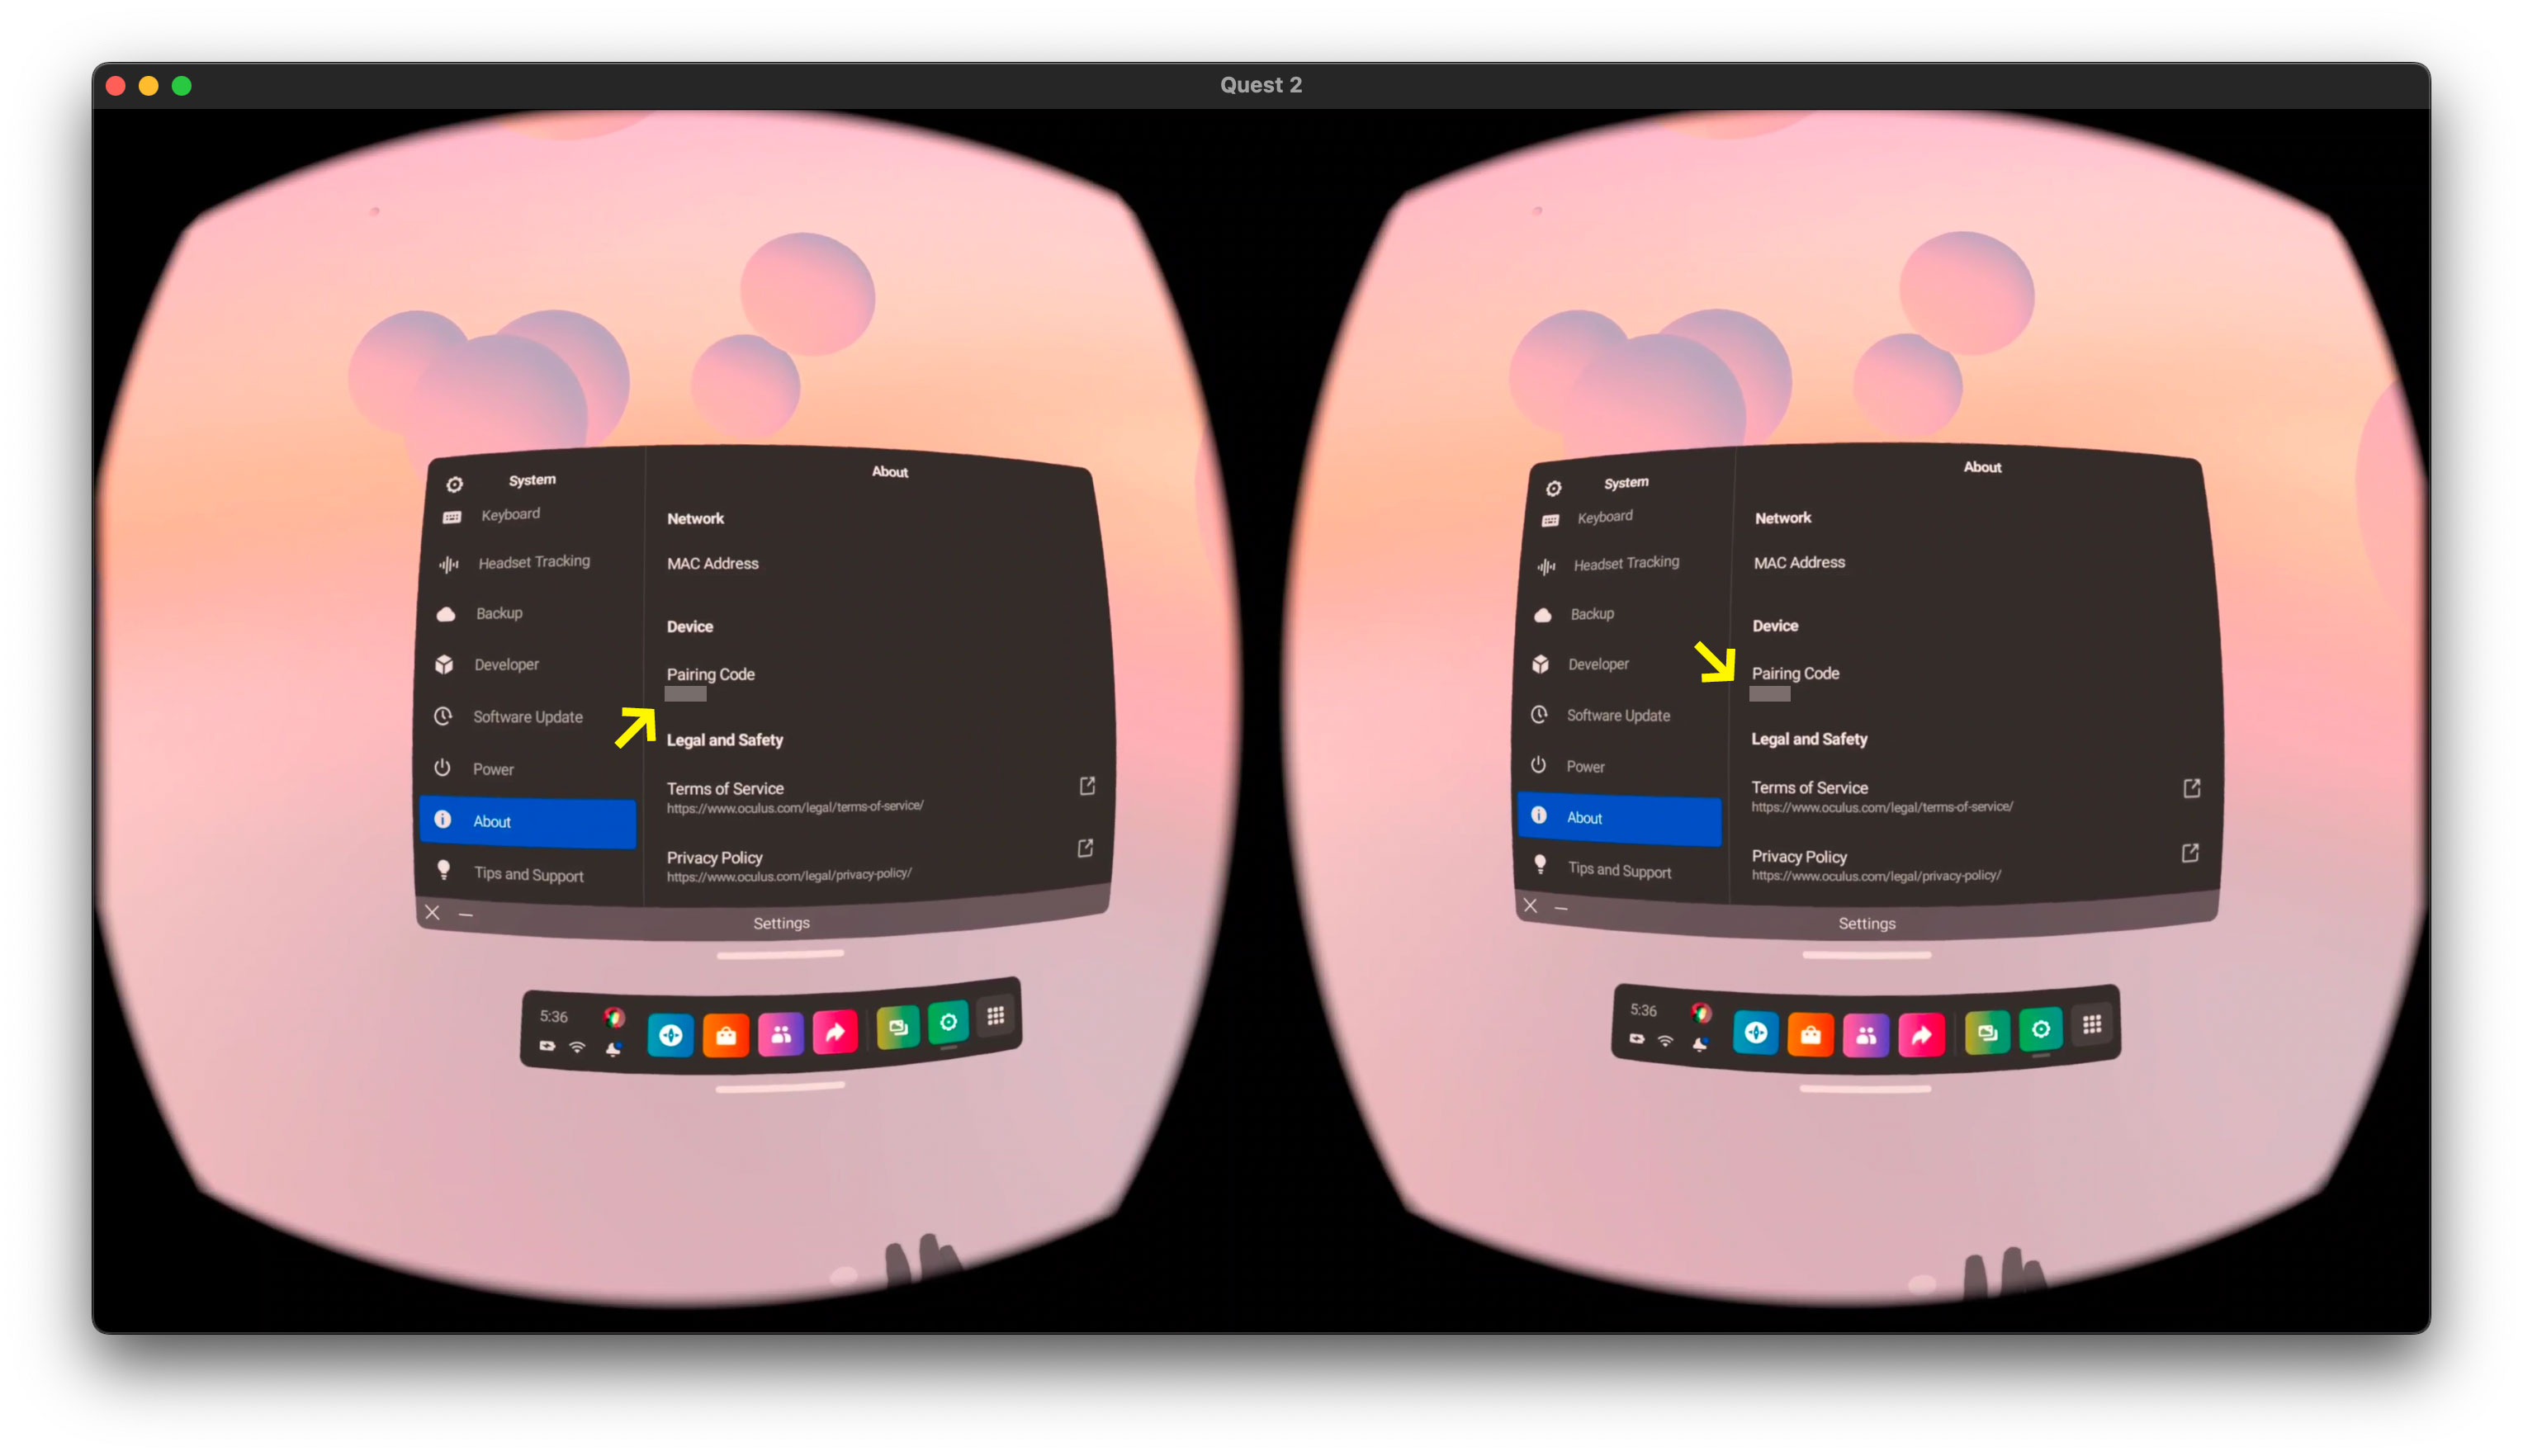
Pairing Code
One problem we had when pairing our Oculus headset to our Oculus app was finding the %$*# pairing code. It is placed in a crazily obscure spot: Quick Settings > Settings > System > About > Pairing Code: #####
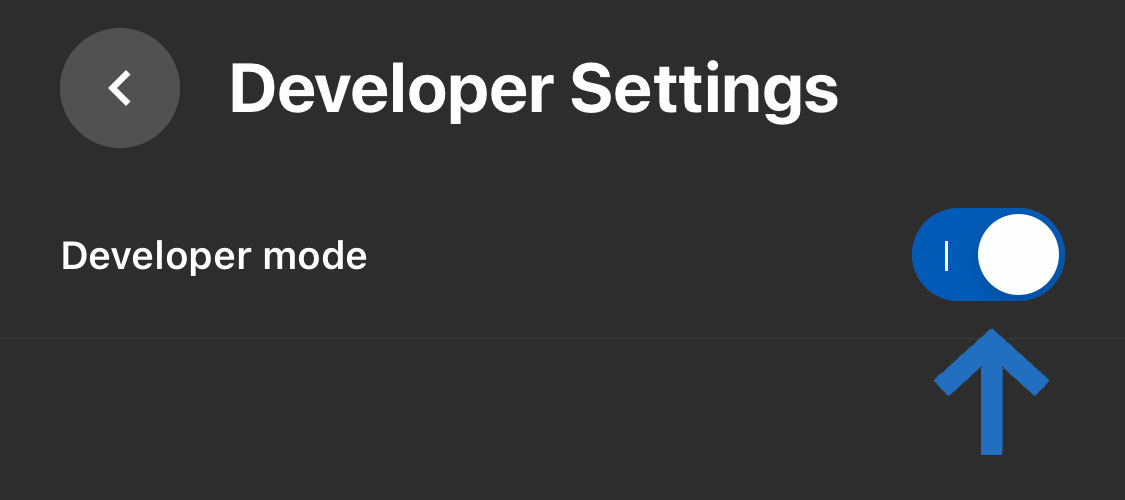
Developer Mode
The thing you are looking for is this blue button in Developer mode
Activate Bluetooth
A curious detail that we discovered when trying to pair with our Oculus: you must have bluetooth active in your phone for the app to find the headset. Apparently, Oculus uses bluetooth to find any Oculus devices nearby.
Facebook Login
Another problem some people have had in our projects is related to having multiple developer accounts on the same device. This is absolutely possible: if you have problems, don’t start removing your collaborators accounts from your device out of panic. You just have to make sure you have signed in with the same Facebook account on your phone and your Oculus Quest device. Sorry to insist, but if you are having problems activating Developer mode, verify the following:
- Make sure you have a Facebook account (Yes, I know, Facebook… I feel your pain)
- On your Oculus phone app sign in with the same Facebook account you use in your headset
- On your Oculus headset sign in with the same Facebook account you use in your phone app
These instructions might seem absurdly redundant, but considering how many times I’ve seen this issue… Also, did I mention how many times I’ve seen people signed in with different accounts on both their devices?
scrcpy
Advanced Users Tool Tip
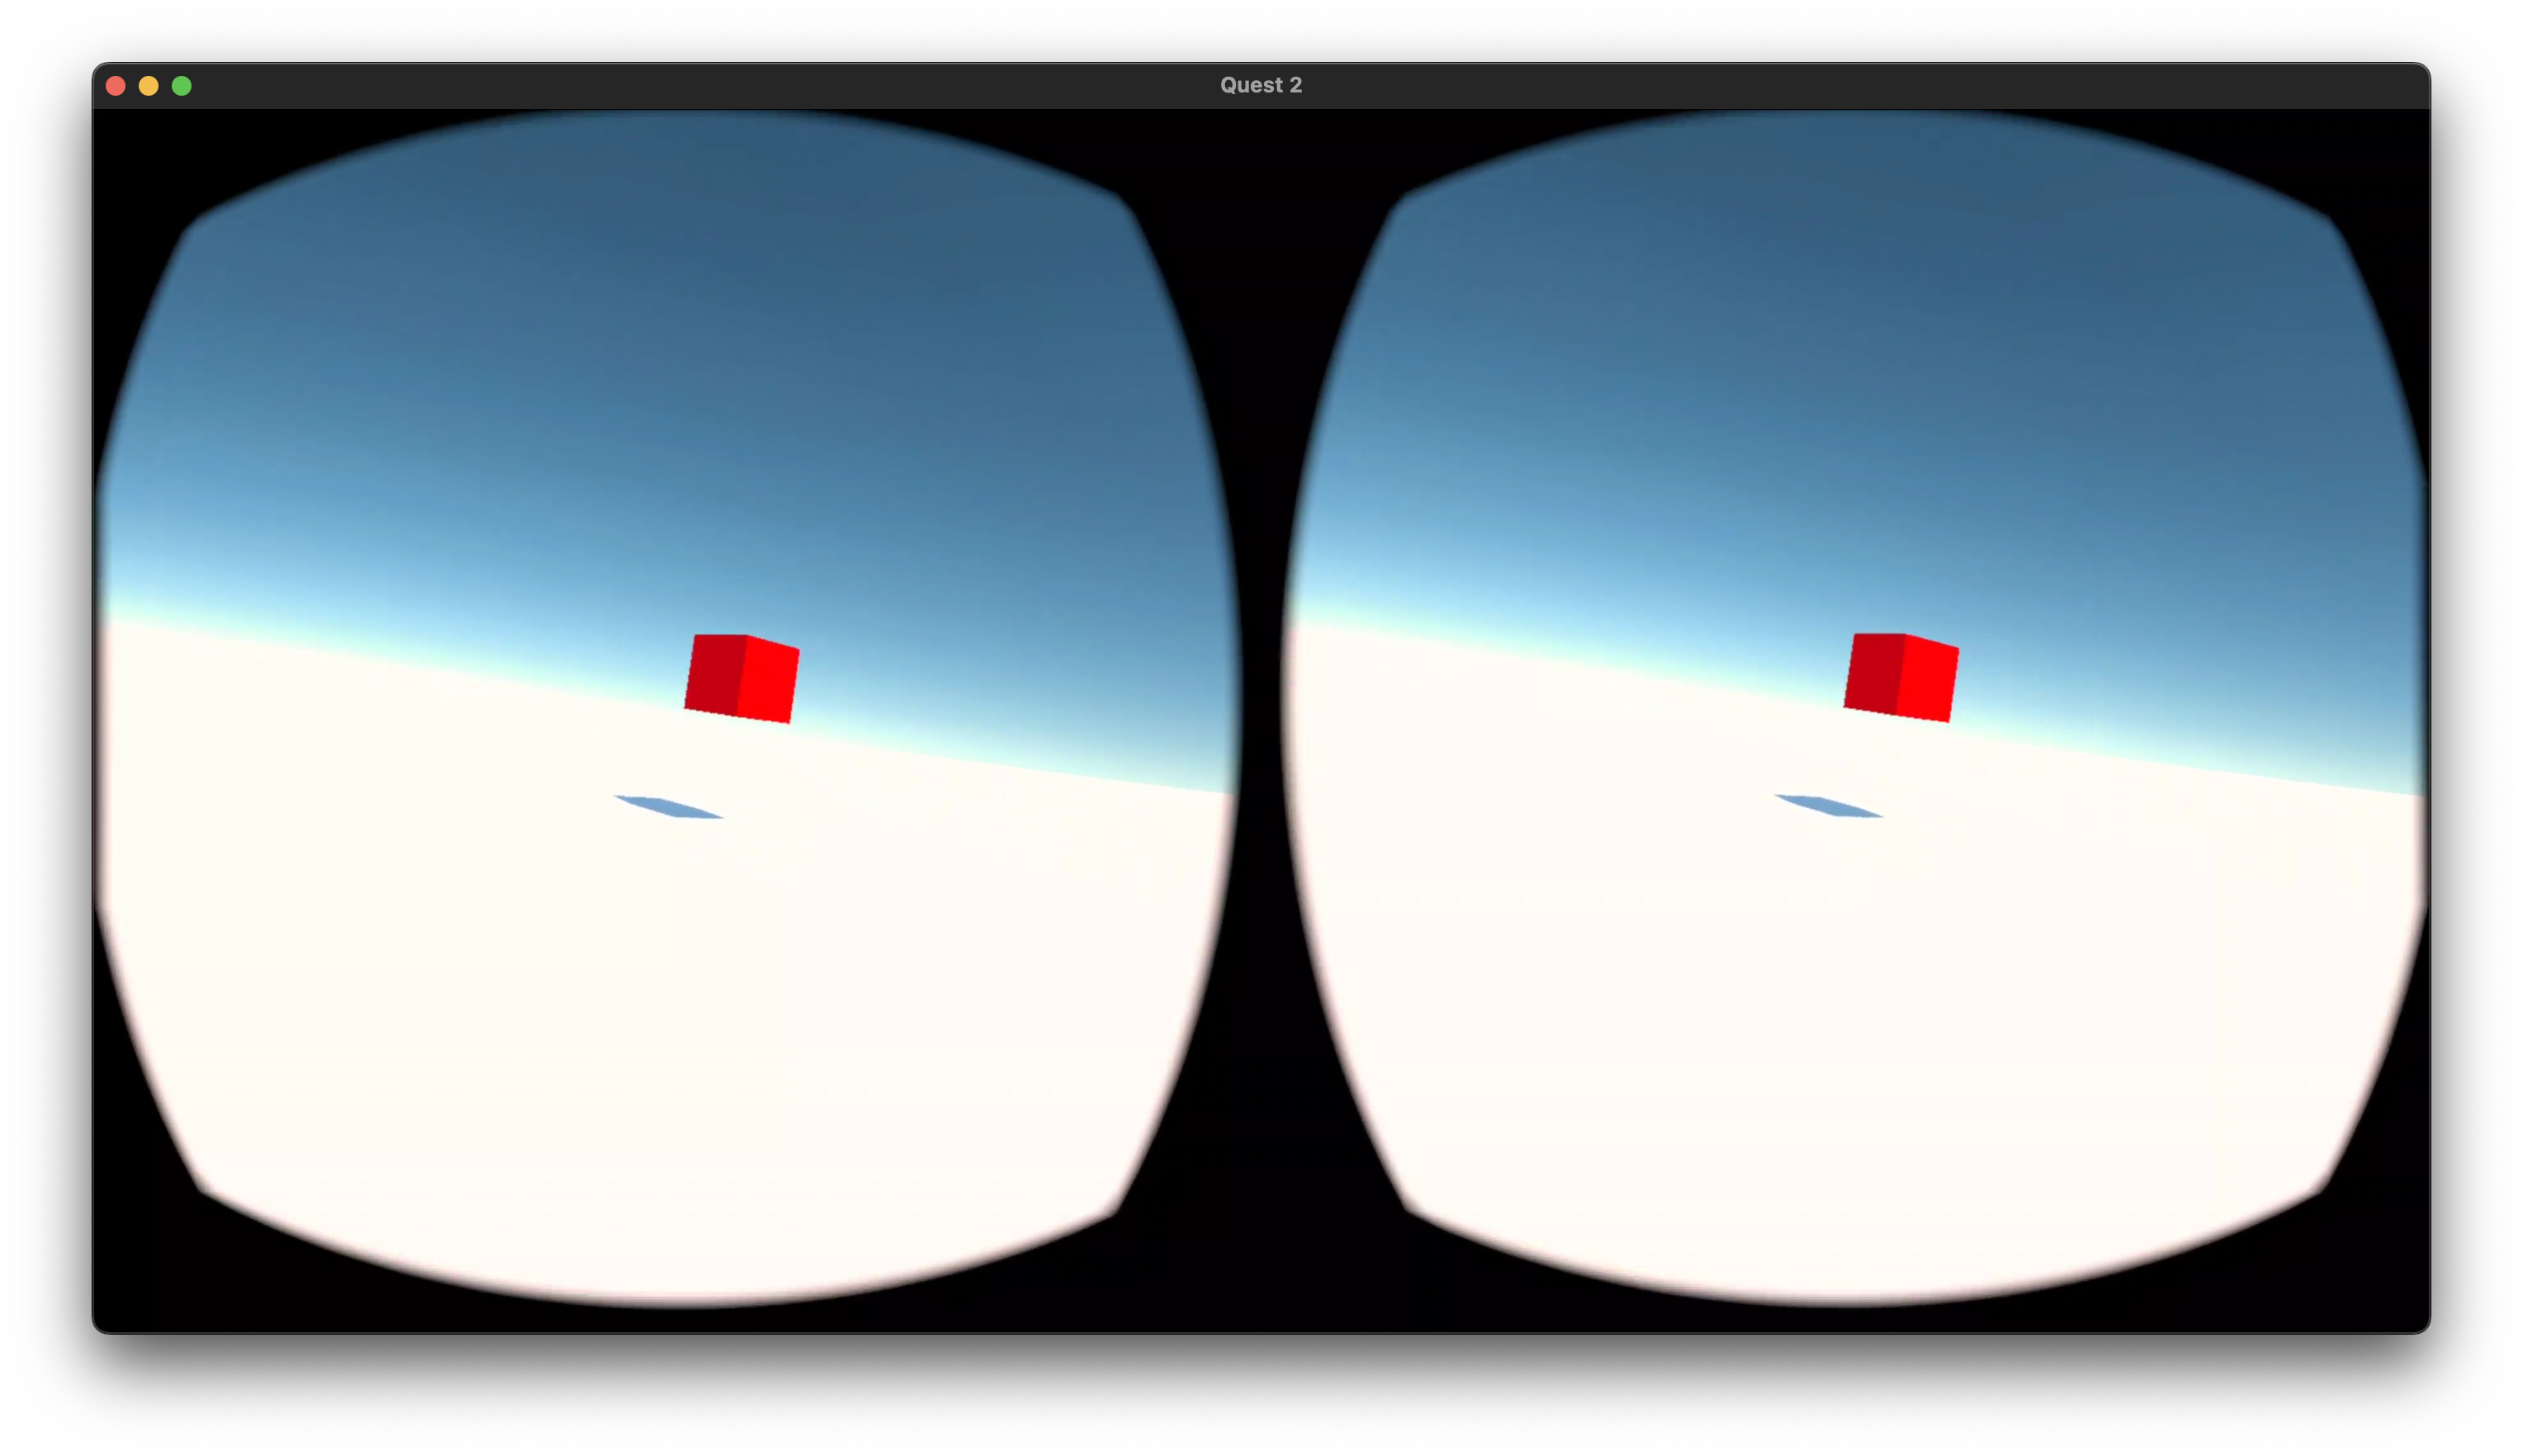
This is an optional install — technical jargon warning — but recommended: scrcpy (“Screen Copy”) is an awesome little tool for streaming content from any of your android devices to your computer. Why is that handy? Well, since the Oculus is just an odd-looking Android computer sitting on your face, it is handy to be able to see what the Oculus sees from a window on your computer.
If you use a Mac, and you already have brew installed, and you know what the Terminal is, you can quickly install scrcpy with the following commands:
brew install android-platform-tools
brew install scrcpy
Once this tool is installed on your machine, just type scrcpy into your Terminal and it will open a window showing the contents of your Oculus headset.
If you are using a Windows computer, go to the scrcpy github page where they have an installer for you to download. Just follow the instructions there.
Here is a good configuration that my colleague Pierre Rossel found that works well for presenting VR projects. The idea here is to use the crop settings to preview only one of the eyes of the VR headset:
scrcpy --crop 1632:1220:50:320All the images of the headset from this tutorial — including the Pairing Code image above, or the image below from a future tutorial — were taken using this scrcpy tool.