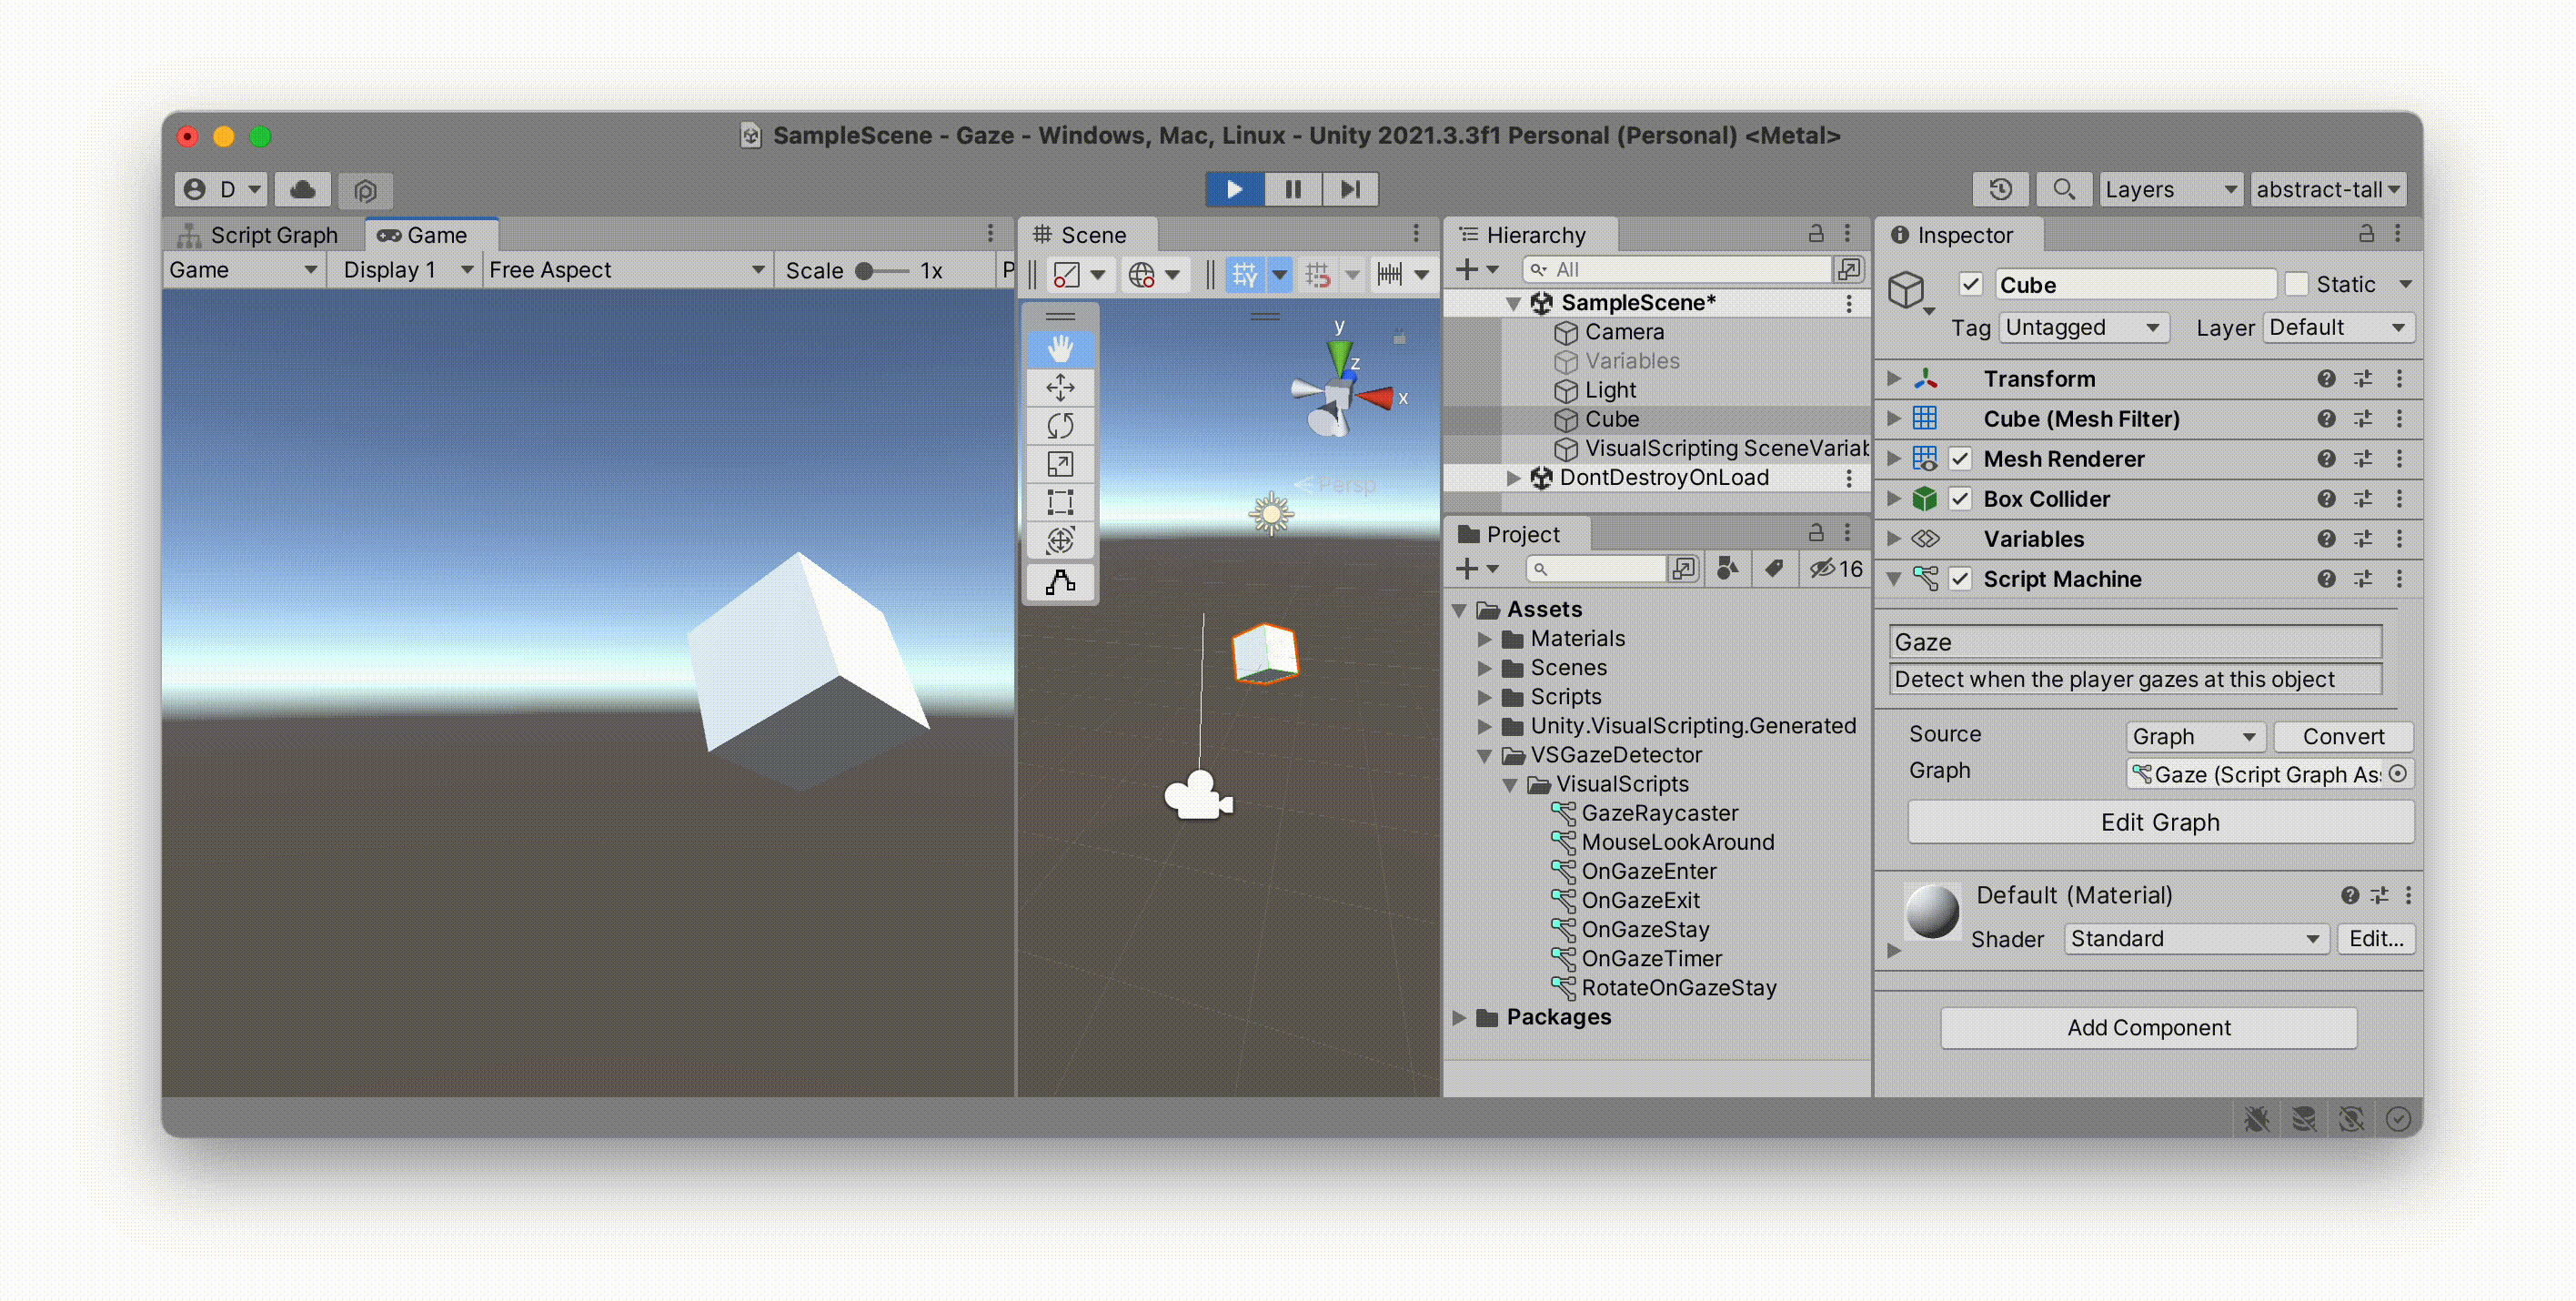
Gaze
One of the most obvious forms of interaction we can design with in VR is the gaze: we are already wearing a headset, meaning that there is by default an implicit gaze. Given the current offering of VR experiences, I would argue that the gaze is an underdeveloped mode of interaction. This tutorial will therefore explore detecting where we are gazing — in a general sense at least — within our immersive 360° visual field.
Warning: designing interactions around the player’s gaze is a mixed bag. For one, there is a wide field of view and our players are potentially looking at many different things inside of this field of view. You need to be smart when you are designing interactions around the gaze. Think big targets. But more importantly, we do not look at things the same way we touch things, and fixing your eyes on an object in order to activate it is an inelegant, often physically uncomfortable, gesture. When I have to stare at an object to activate it, it can quickly feel like I’m embodying Cameron Vale in Scanners with my head about to explode.
Despite these fundamental problems, detecting a users’ gaze is nevertheless a simple concept to understand and often a good starting point for designing simple interactions in virtual reality without getting bogged down by complicated controller setups. Just be careful not to melt your player’s brain.
At the Media Design Master program at the HEAD – Genève we have built a lot of projects with VR, AR, XR, and whatever realities you want to add to that list. In 2021, my colleagues Marion Bareil and Pierre Rossel developped a series of projects with our students exploring how you could interact solely with your gaze inside of a VR world: cf. Imagining the City of Tomorrow. The following project by Alejandra Oros shows one such interaction using this modality.
For a recent class we taught together, Pierre Rossel adapted this gaze-detection approach into a simple series of scripts built with visual scripting: VS Gaze Detector. We will now use these scripts to add gaze interactions to Unity.
New Project
In my Unity Hub, I’ve created a new 3D project named GazeUnity 2021.3Unity 2021.1 or later.

New Materials
Similar to the last tutorial, I’ve created a new Materials+MaterialscolorsHotColdDefaultScripts
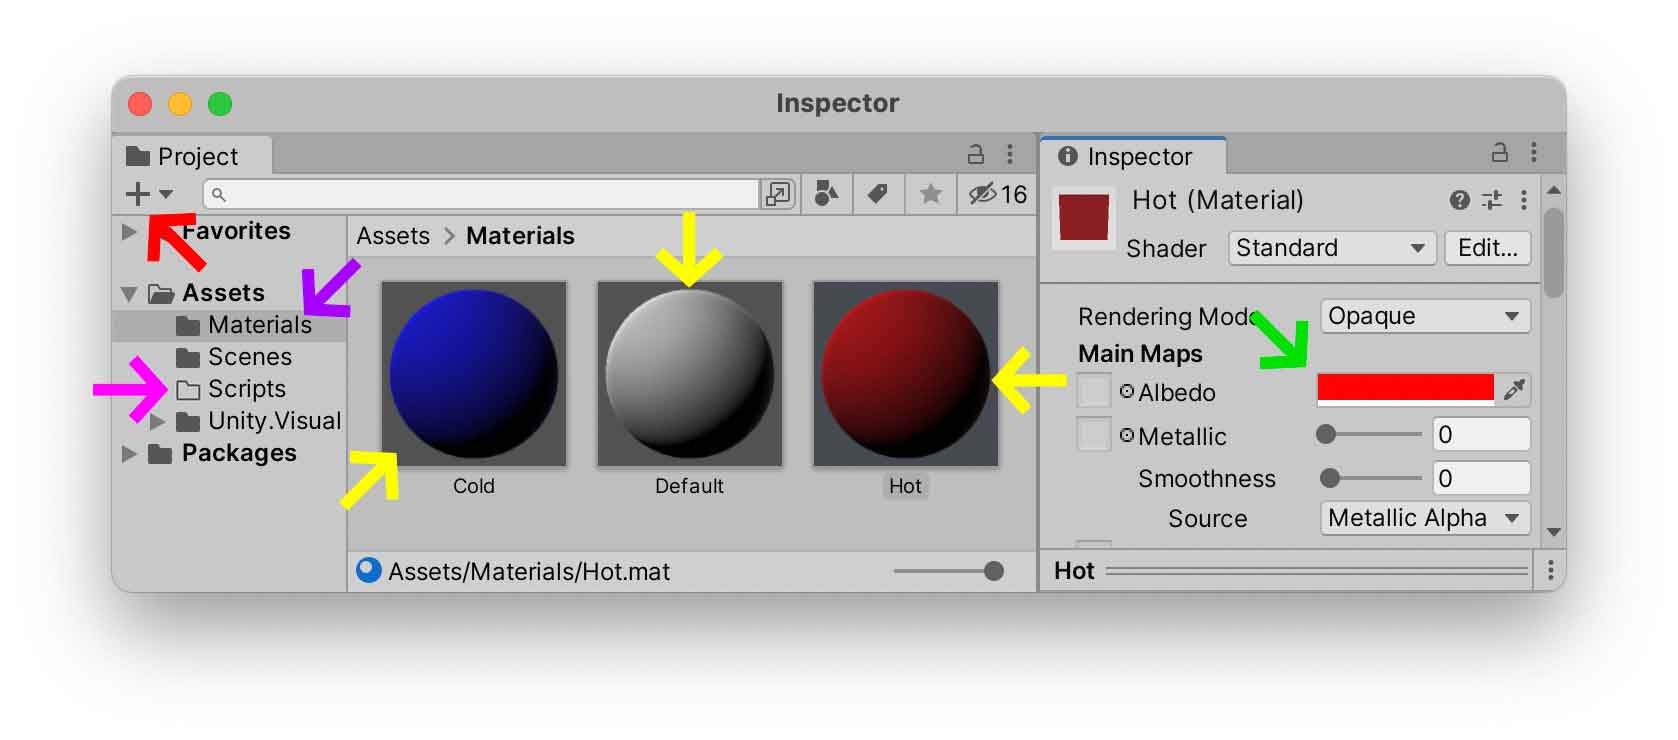
Let’s create a new (+CubeapplyDefault
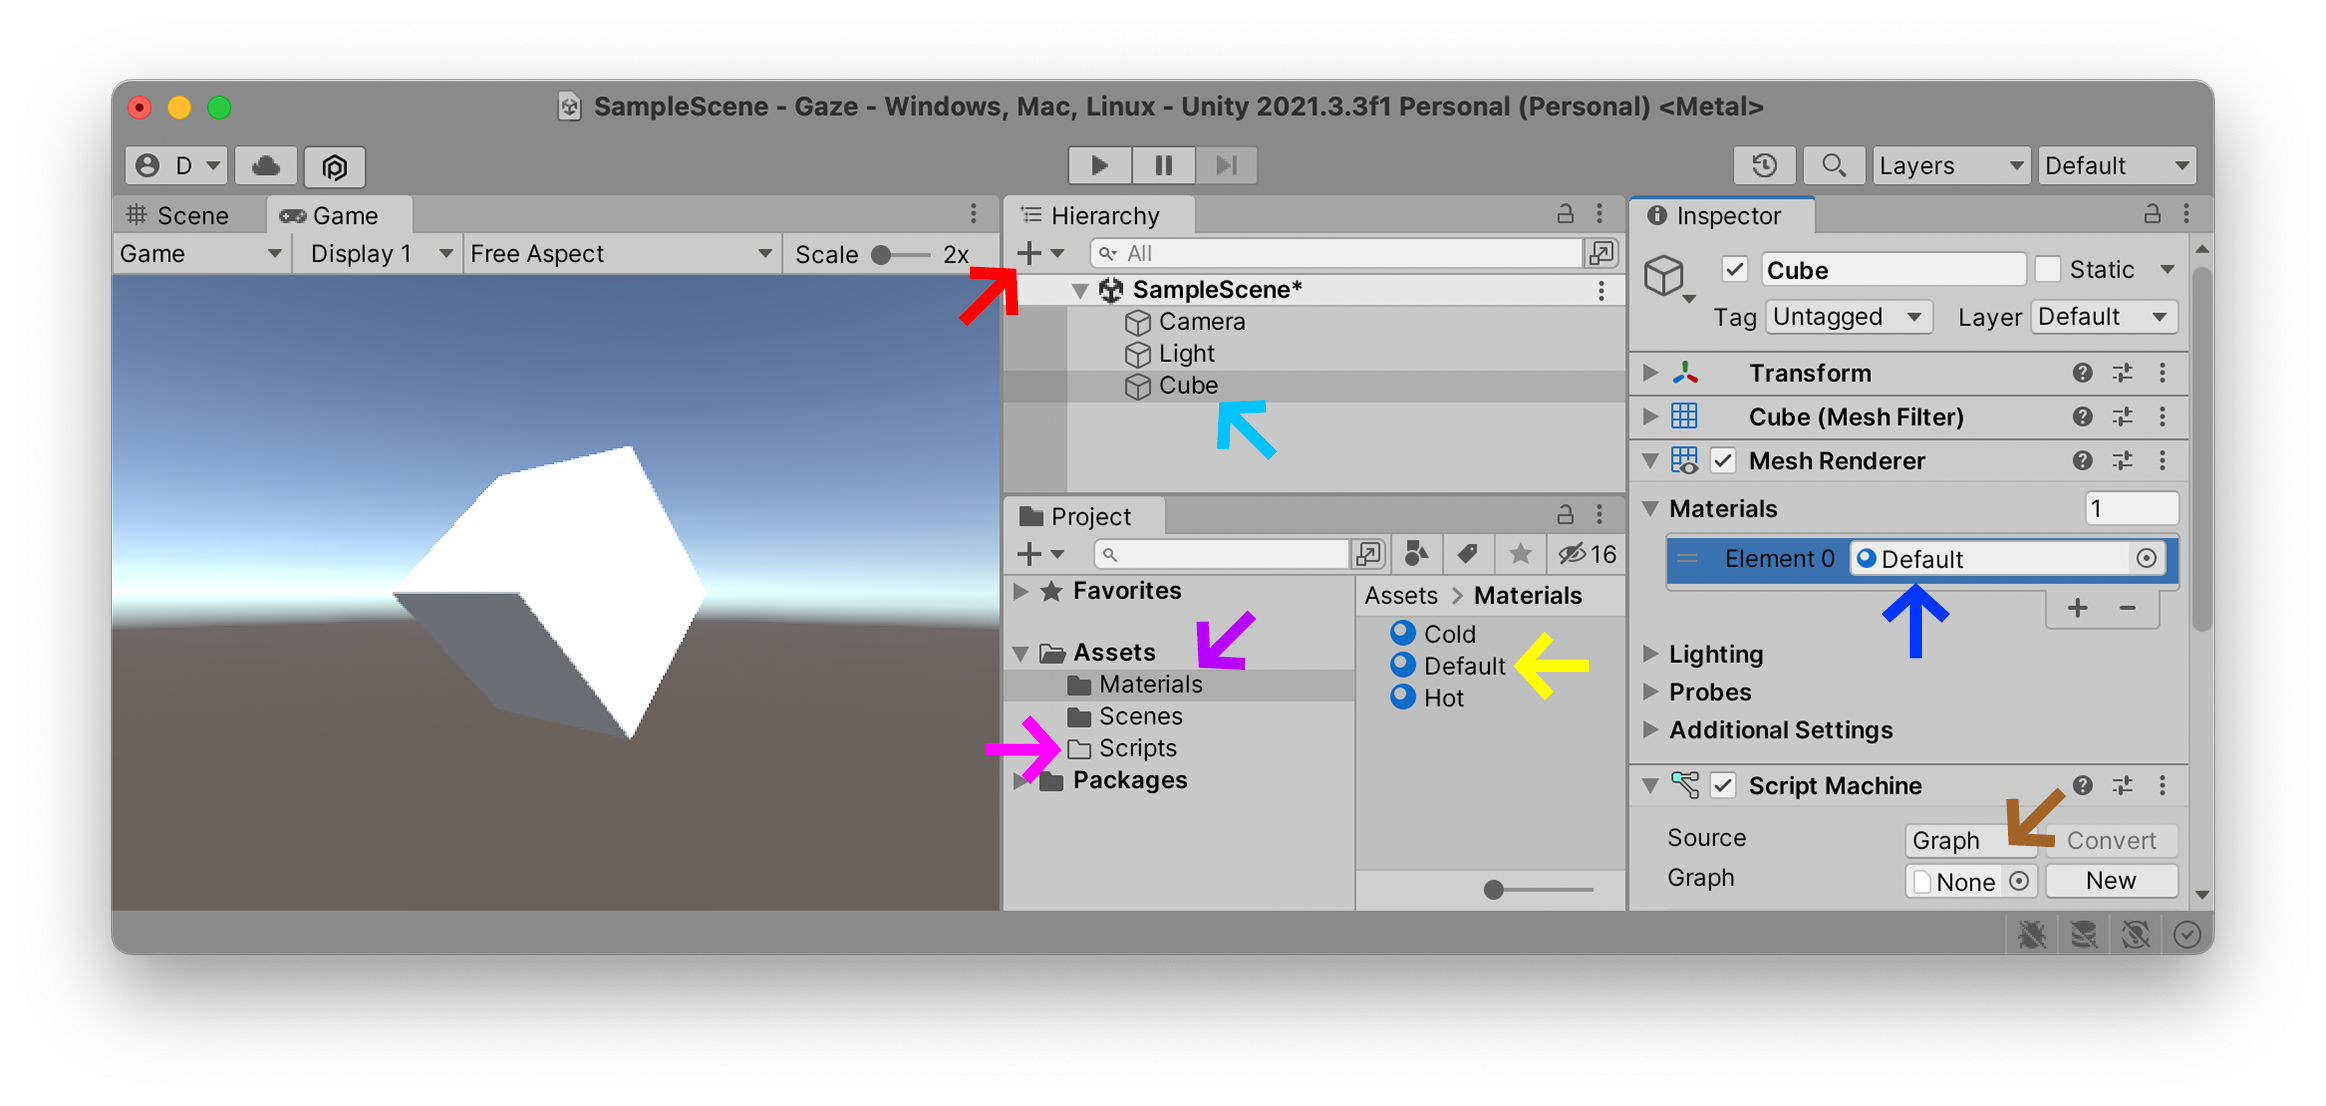
Add an empty Script MachineCubeGraph. In the future, this Script Machine will detect whenever the player is looking at it — but for now its contents will remain empty. Once this CubeScript MachineGaze Detection package to animate the object.
Import Unity Package
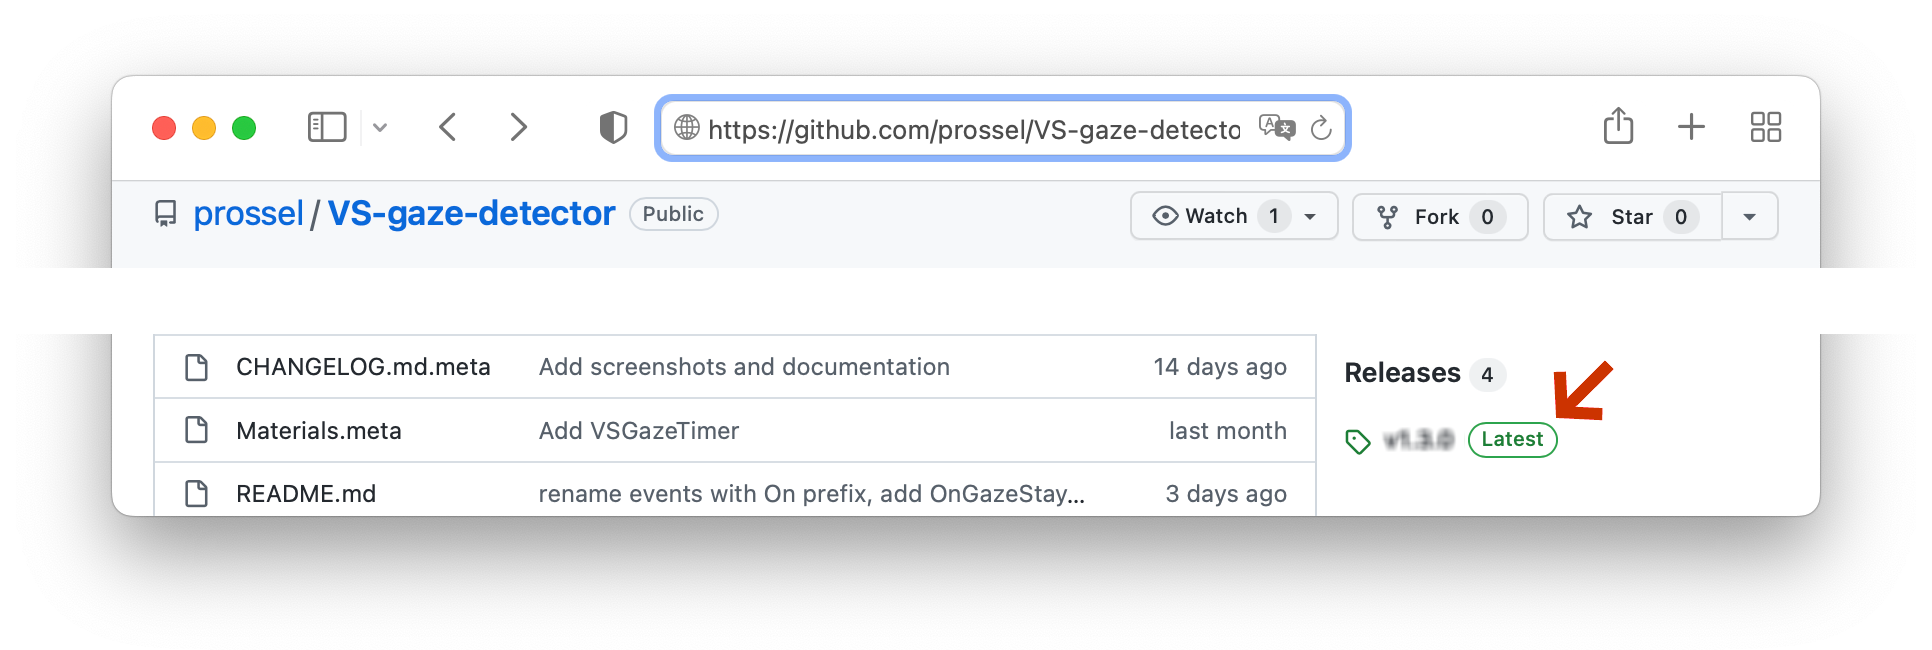
Go to Pierre Rossel’s VS Gaze Detector page on Github, and click on the Latest Release button. On this page, find the VSGazeDetector.unitypackage
Once you have downloaded this file, you should see a VSGazeDetector.unitypackageImportrequired scripts
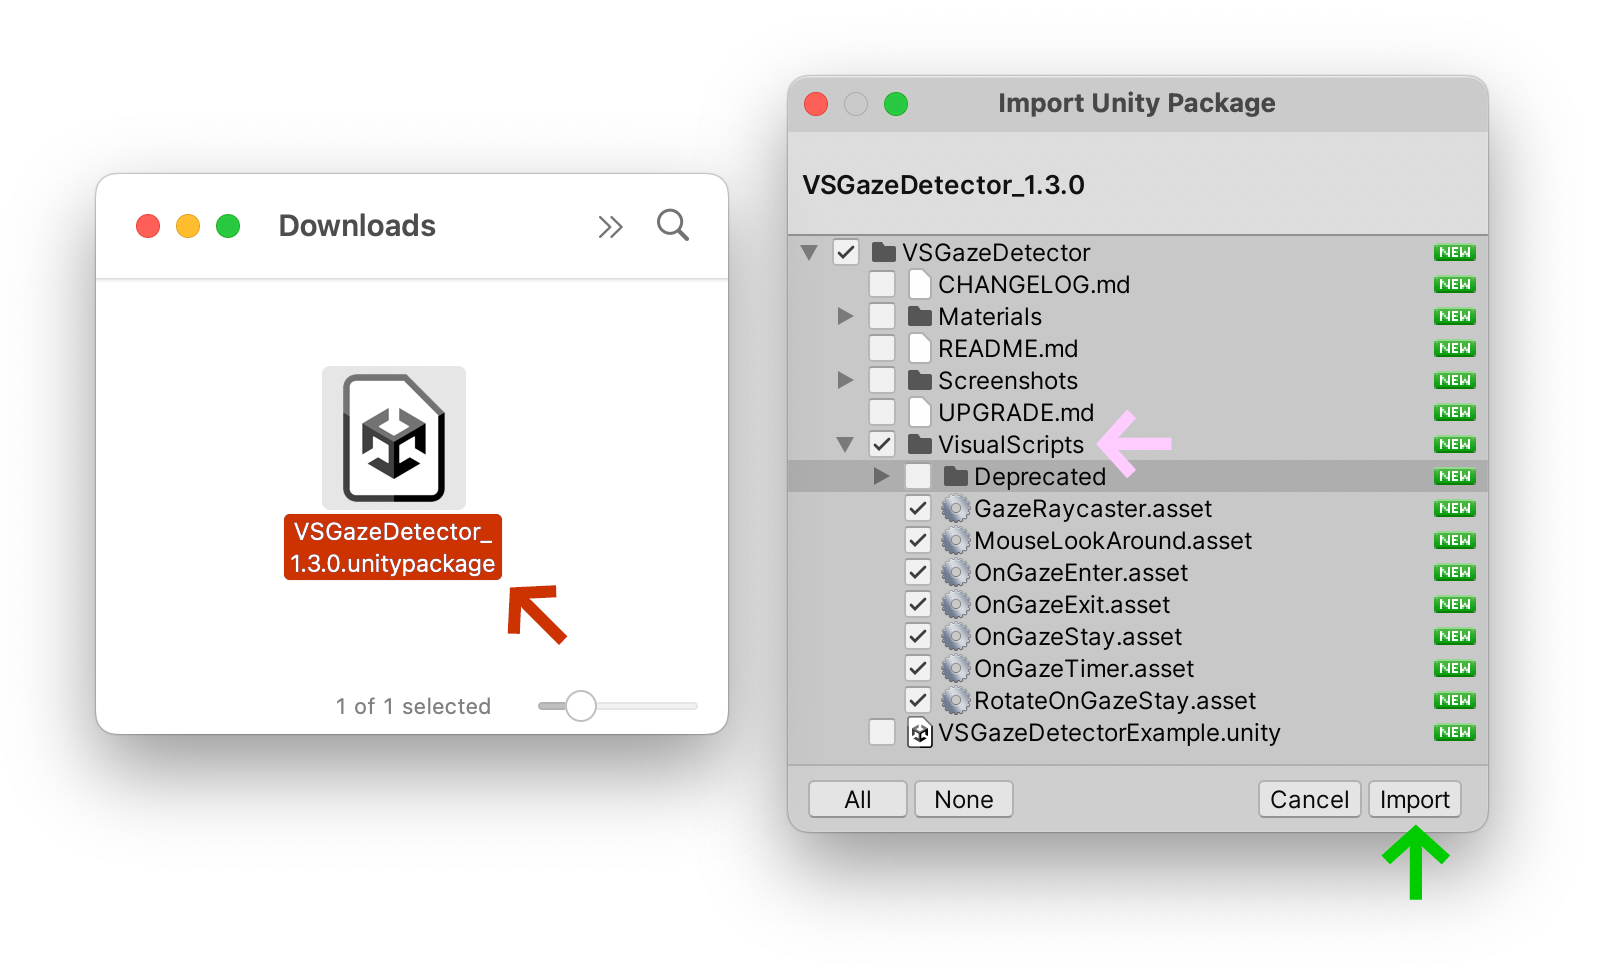
When Unity has finished importing these scripts, you should now see them inside your Project
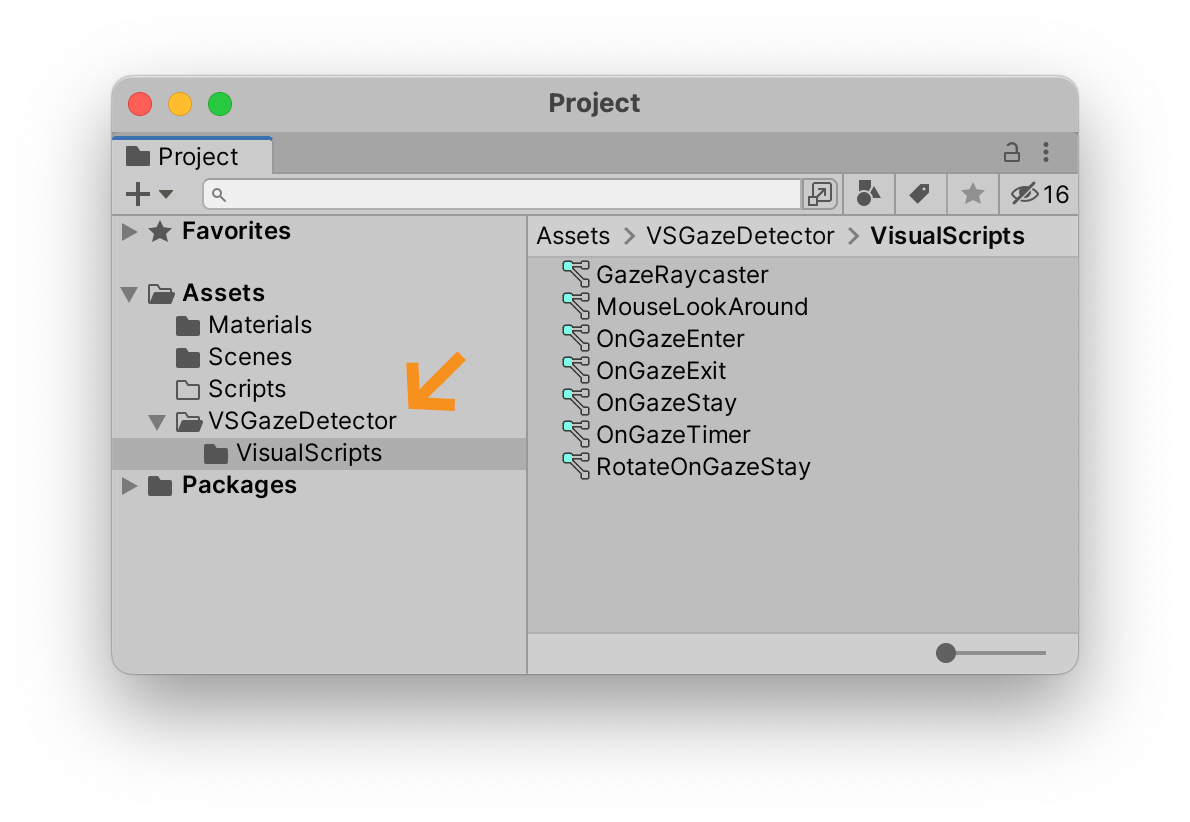
We are now ready to start using these scripts in our project.
Camera Raycast
In a 3D game engine like Unity, a RayRayCamera
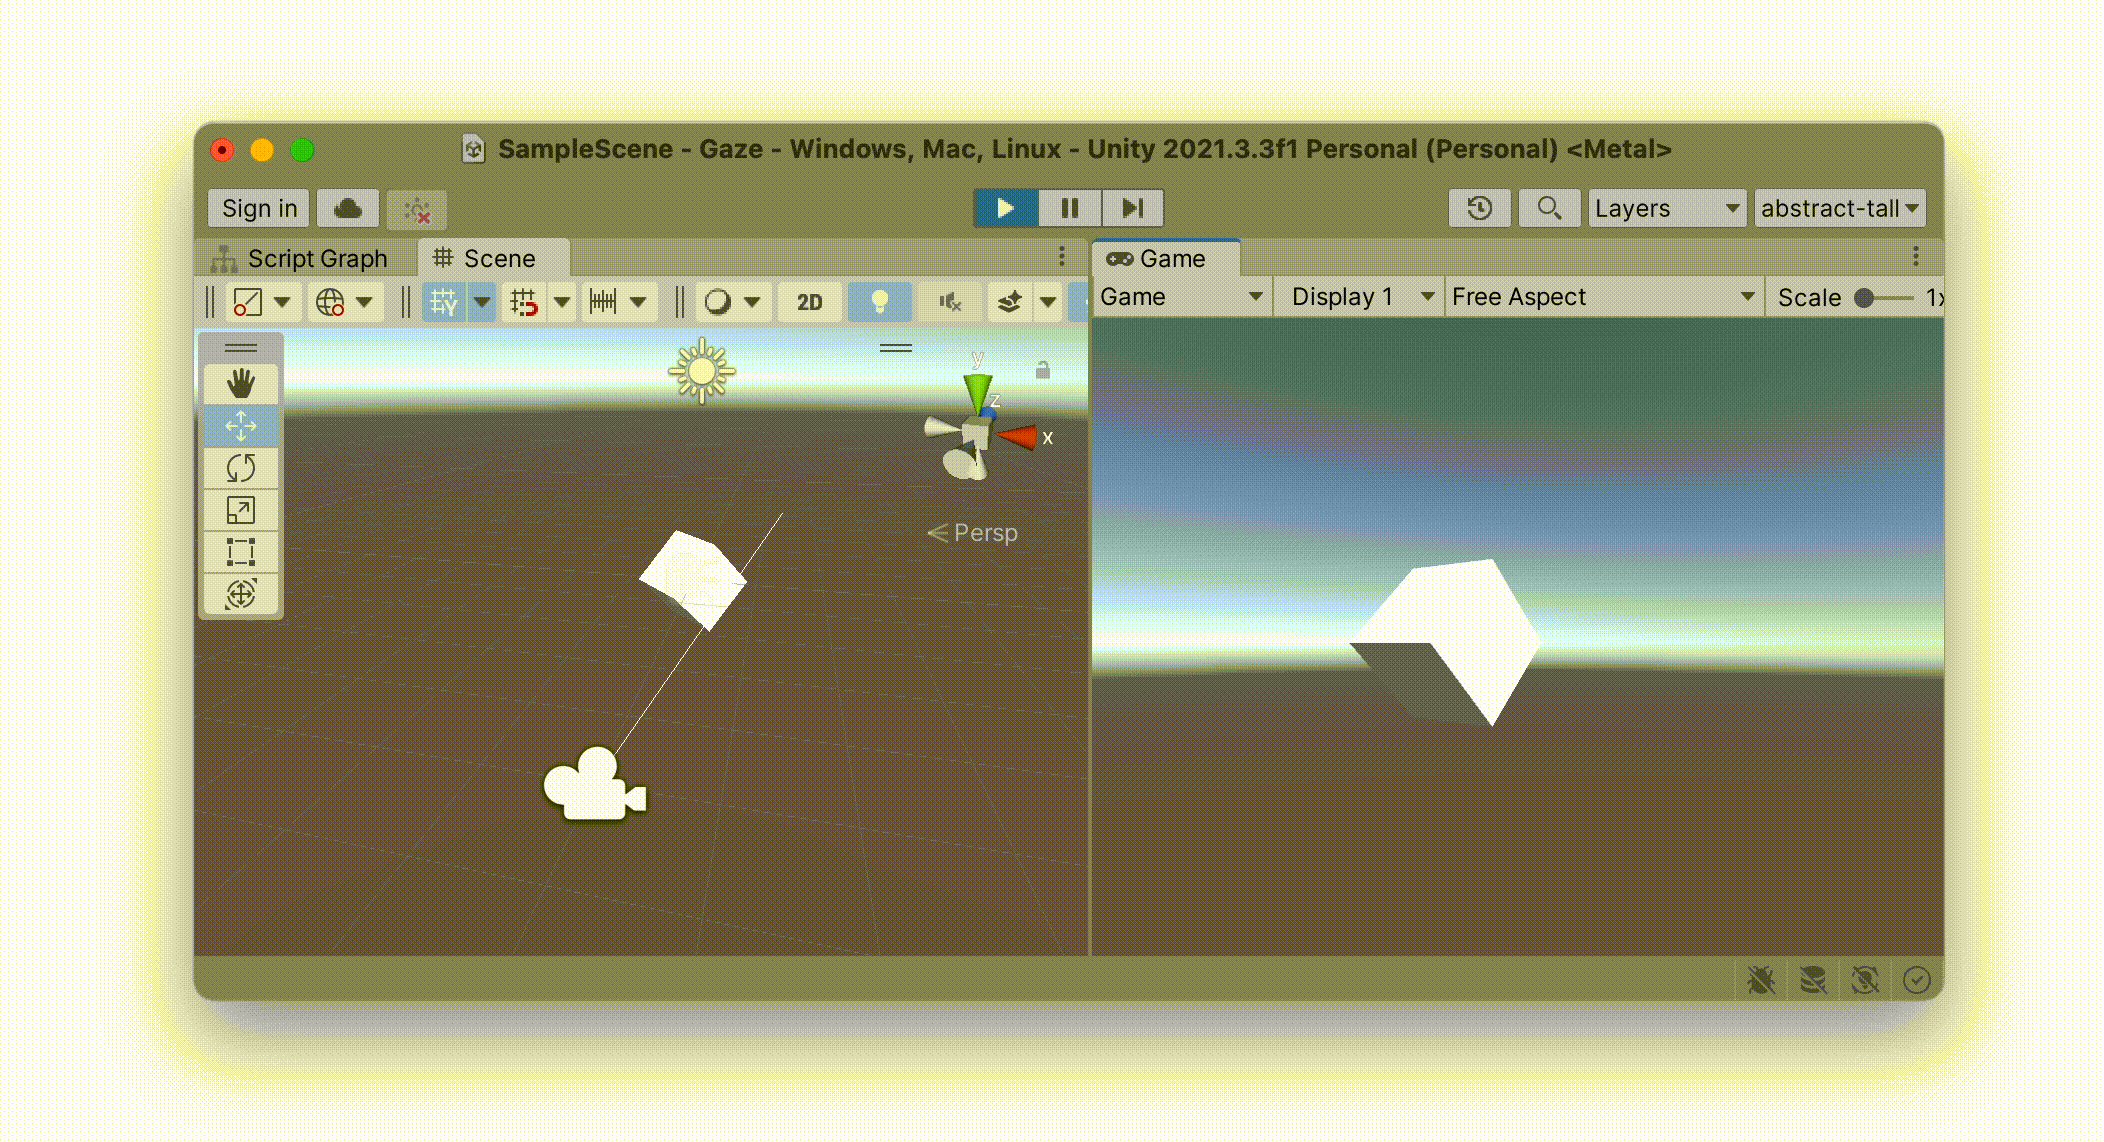
In the illustration below, you can see several white lines expanding out from the camera. This square pyramidal cone describes what is called the frustrum: this is a geometrical representation of the camera’s field of view and expands outwards from the perspective of the CameraRay
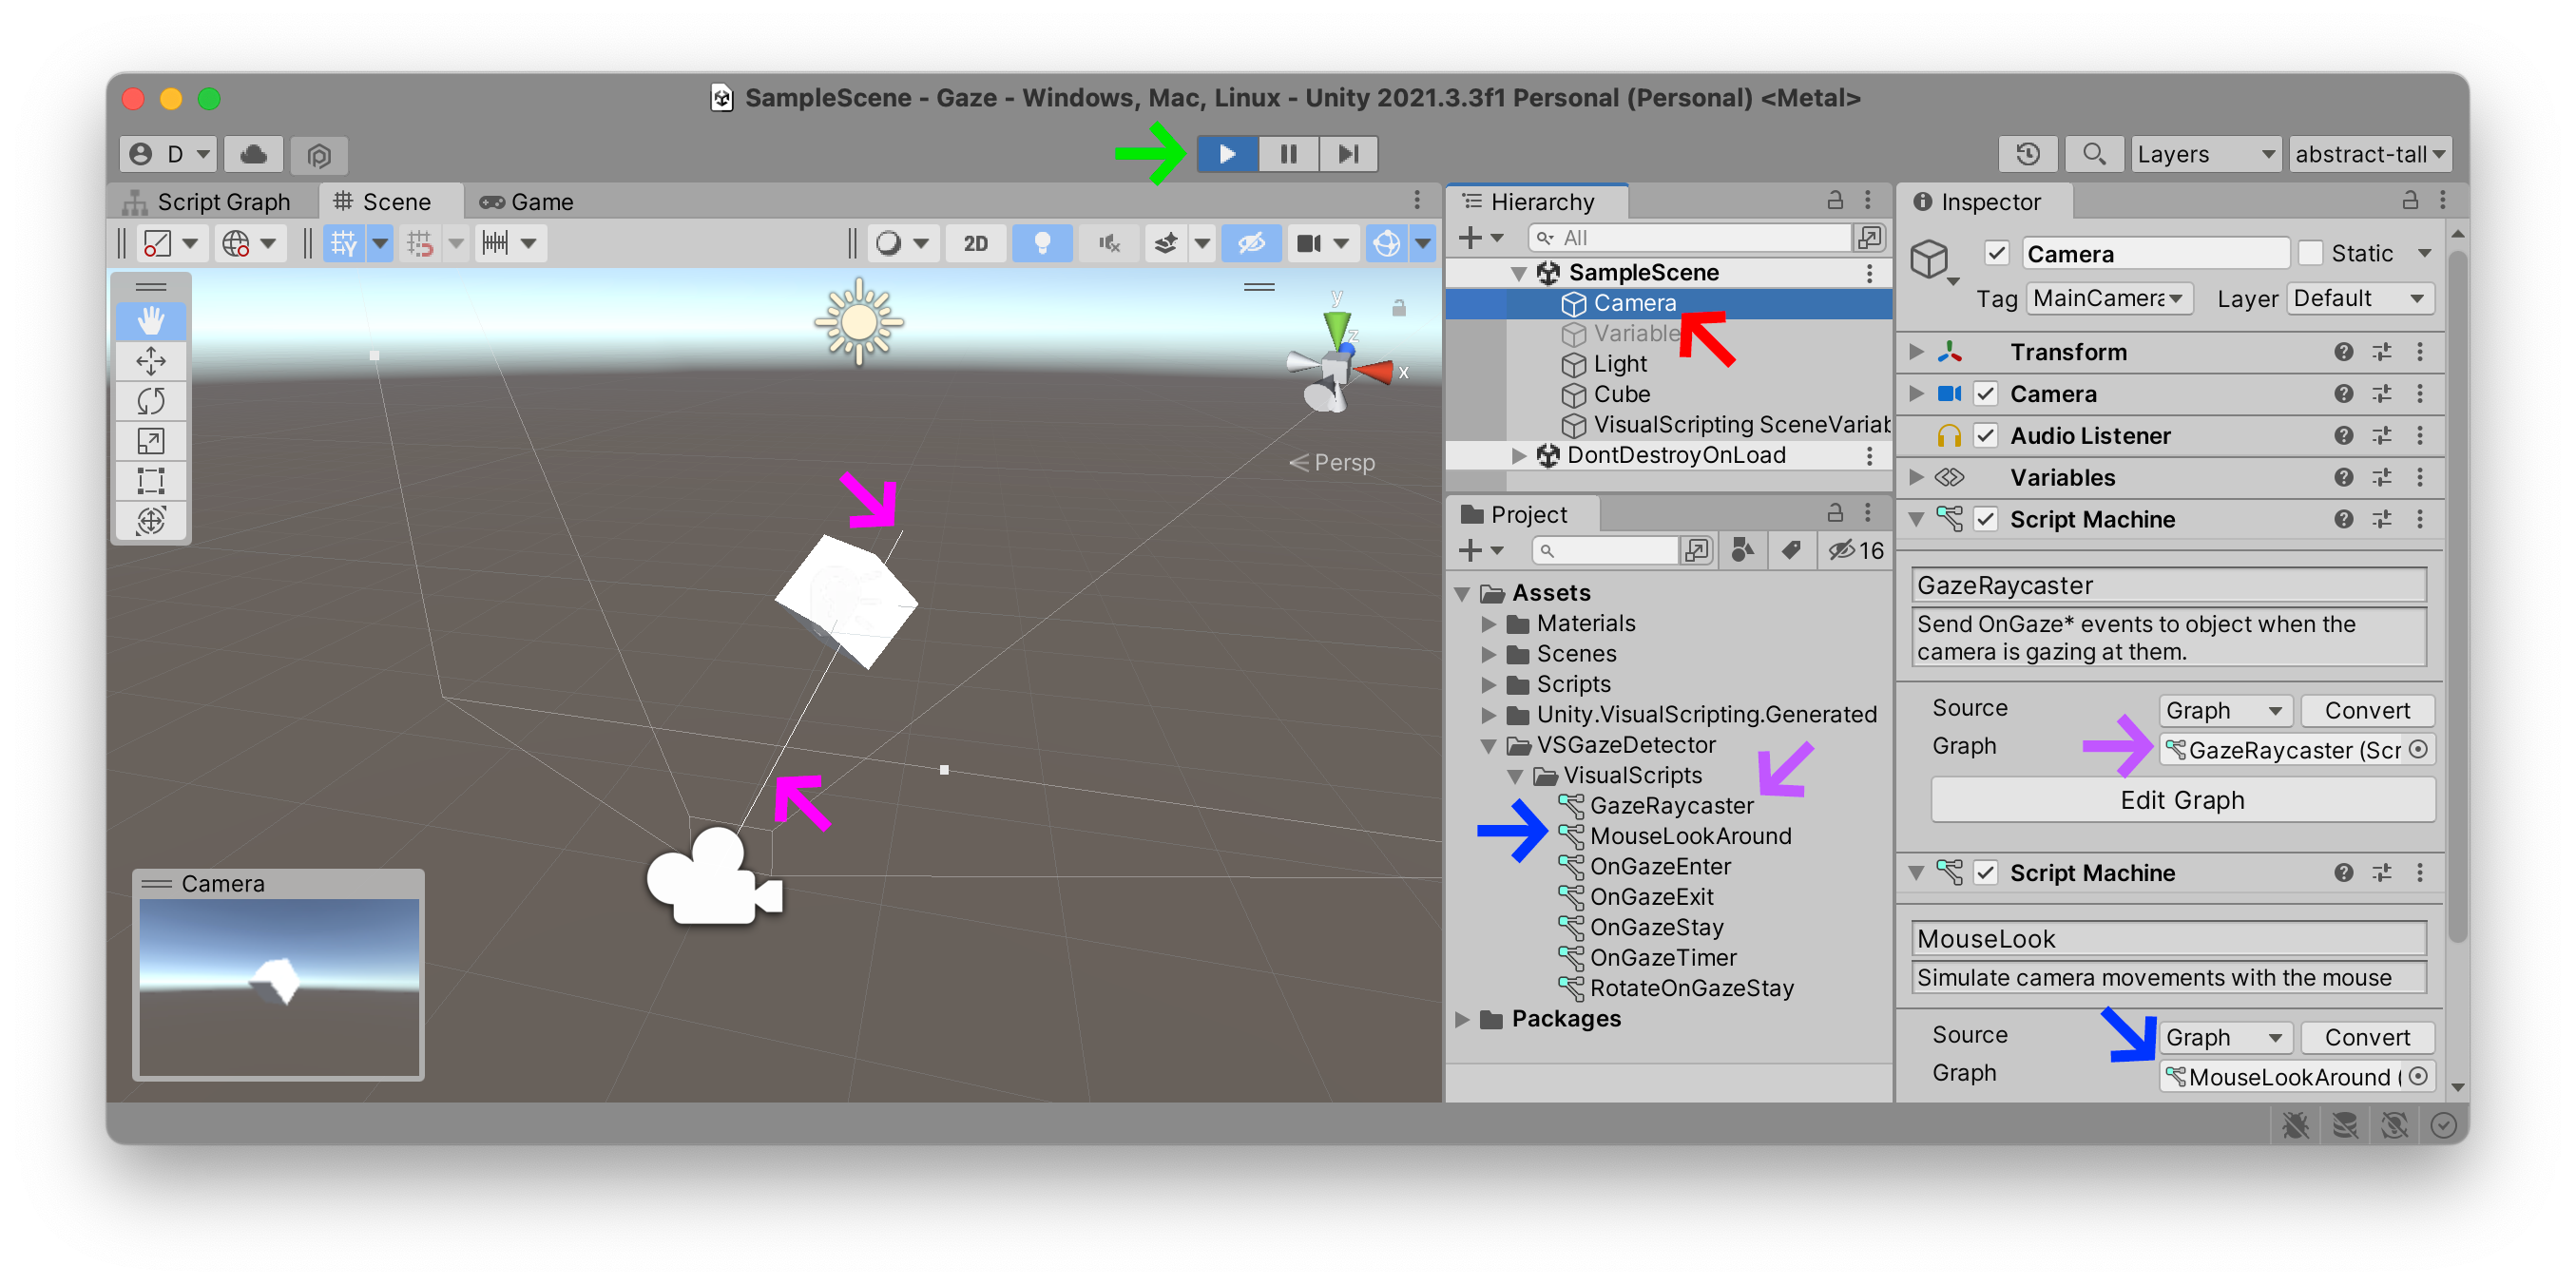
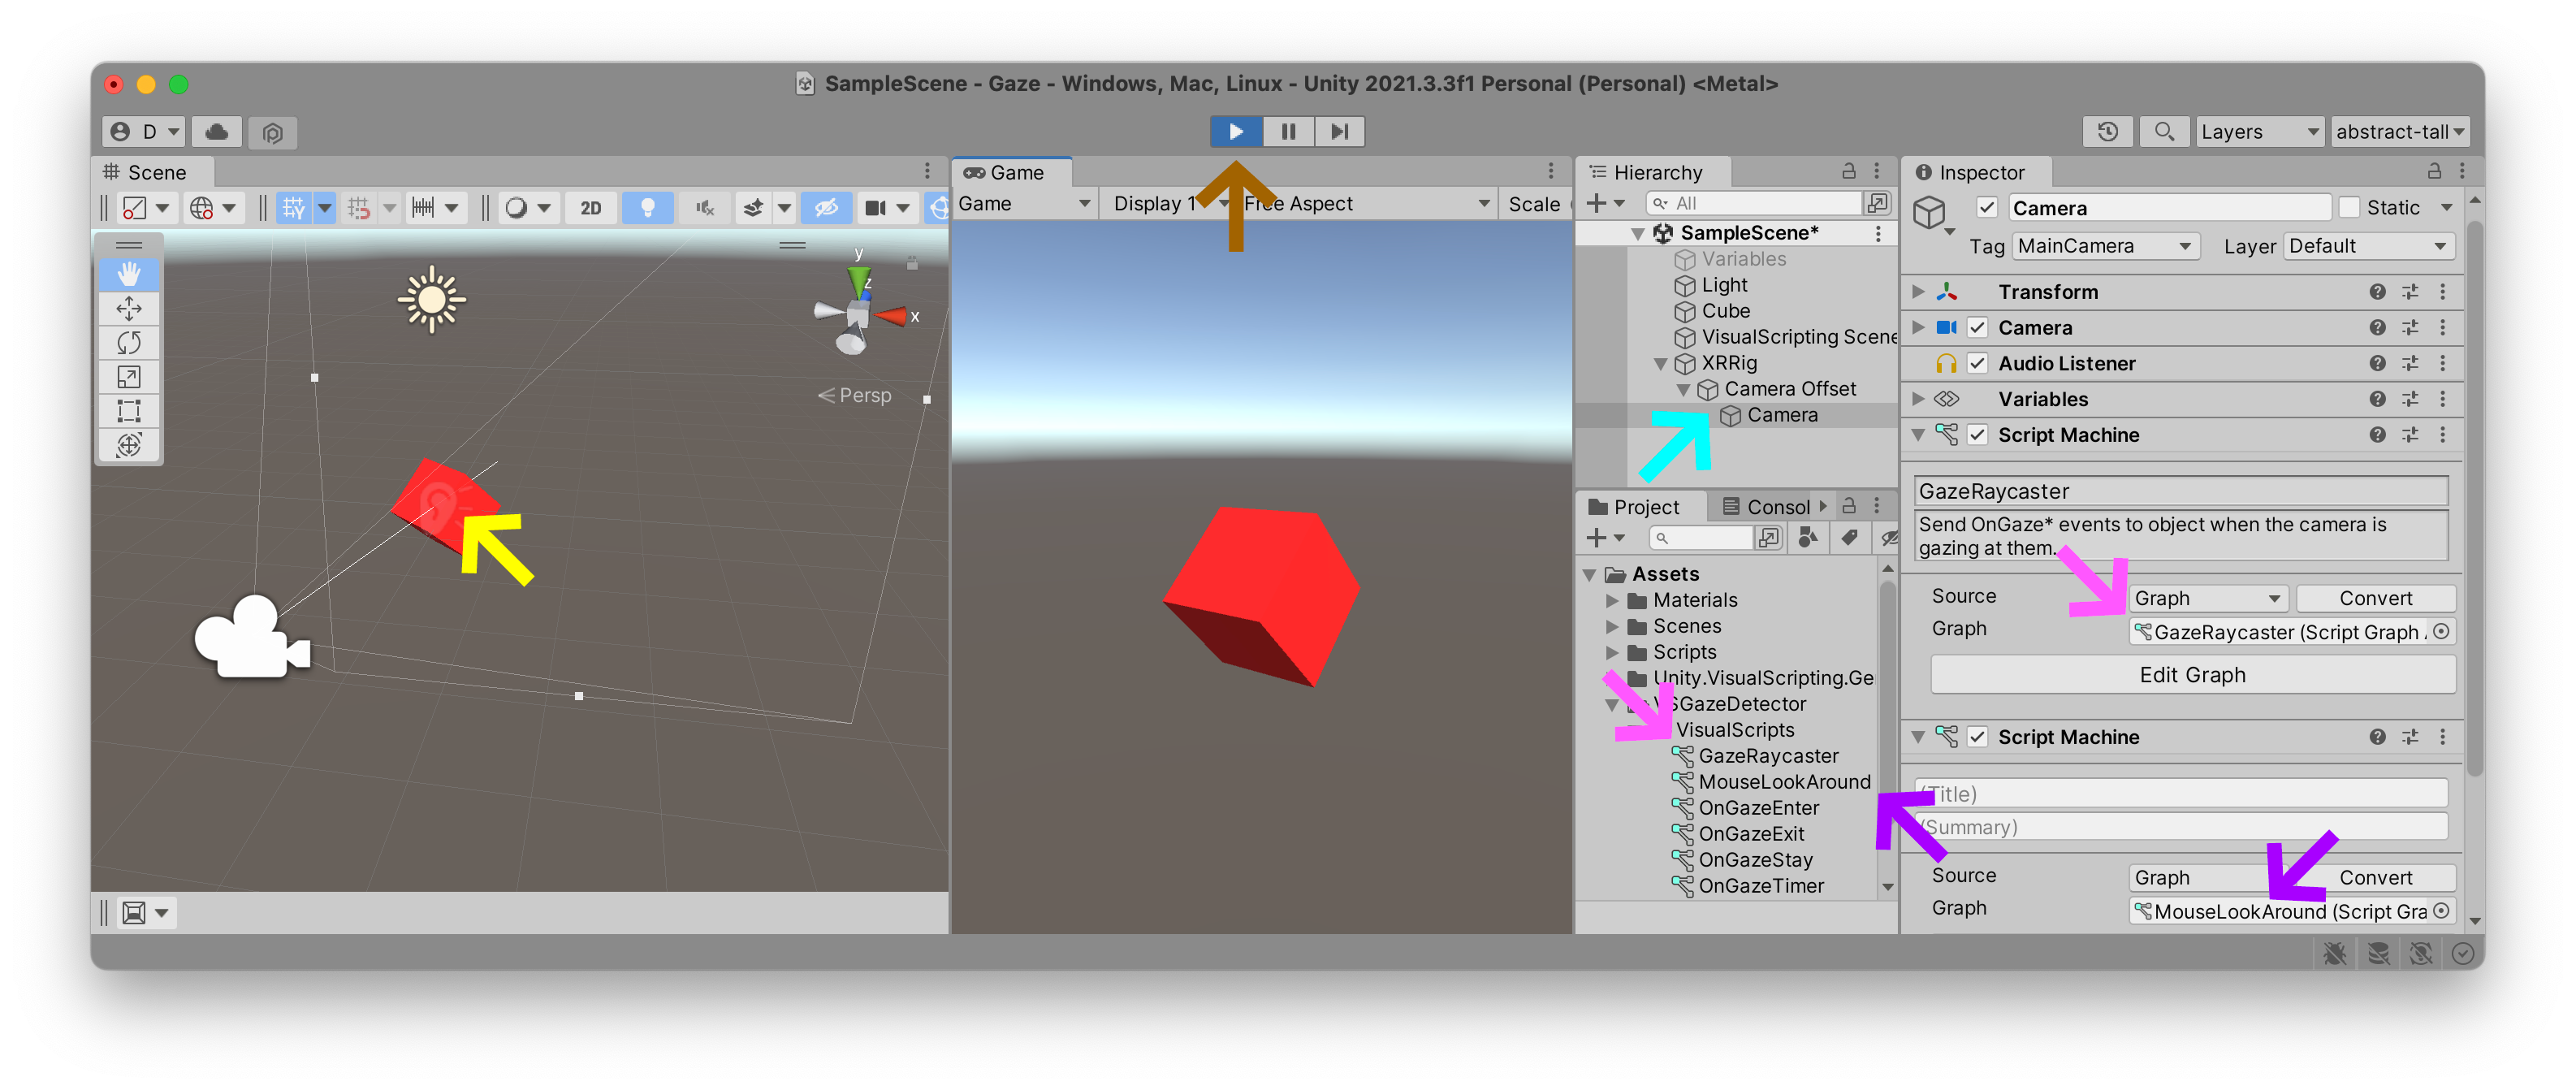
Pierre Rossel’s VS Gaze Detector contains just such a Raycast object that you can connect to your CameraVSGazeDetectorVisualScripts folder and look for the GazeRaycasterMouseLookAroundMain CameraMouseLookAround
Press PlayRay
So far this doesn’t do anything significant. There are currently no instructions in our cube to describe how it should behave whenever this Ray
Script Graph
Here is a screenshot of a new Script GraphCubeCamera that sends out the Ray
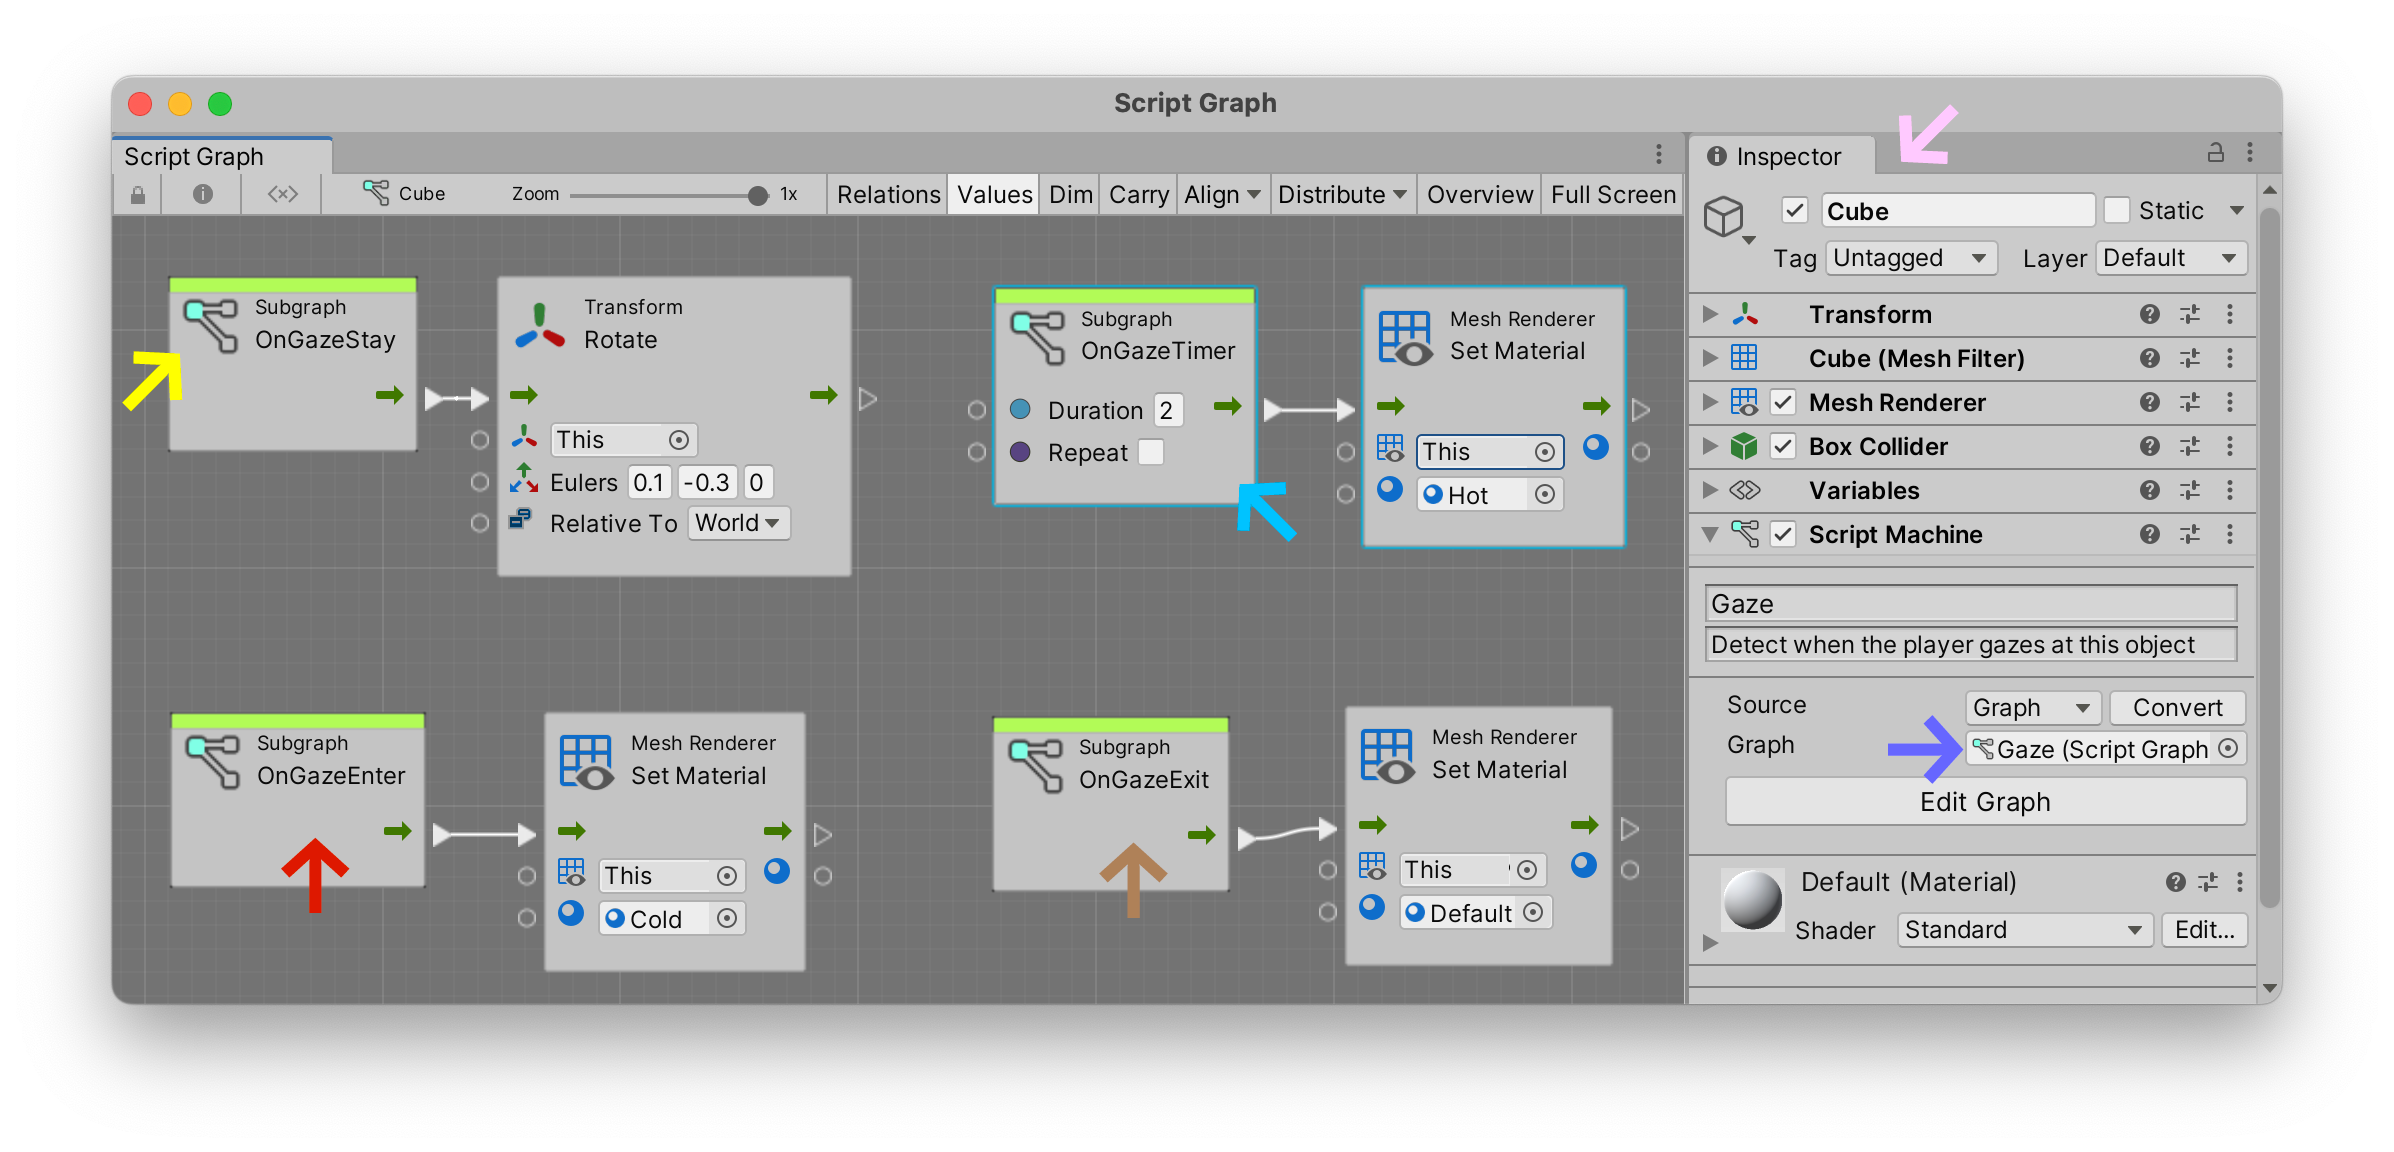
We have created four nodes in this graph, using our new events that we imported with the VsGazeDetector package above.
- The
OnGazeEnterRayenters into collision with ourCubeScript GraphMaterialto theColdmaterial which we created earlier in this tutorial. As you can see in the illustration below, this interaction turns the cube blue. - The
OnGazeExitRayexits collision with ourCubeMaterialback toDefault. - The
OnGazeStayCubeStayaction fires theRotationaction and is repeated constantly, for each frame, approximately sixty times per second as long as we continue to gaze at the object. - The
OnGazeTimerDelay2CubeMaterialto theHotcolor created earlier in this tutorial. In the illustration below, the cube turns red whenever the player stares at it for over2seconds. Since we do not need to constantly change this color, we have left itsRepeatoption unchecked.
XR Rig
Up until now, we have been simulating detecting the player’s gaze using the mouse. The VS Gaze Detector contained a script named MouseLookAroundCamera to simulate looking around in 360°. But what we really want is to be able to look all around while wearing a VR headset. So let’s convert our mouse-based project interaction into a VR headset interaction by activating the “virtual reality mode”.
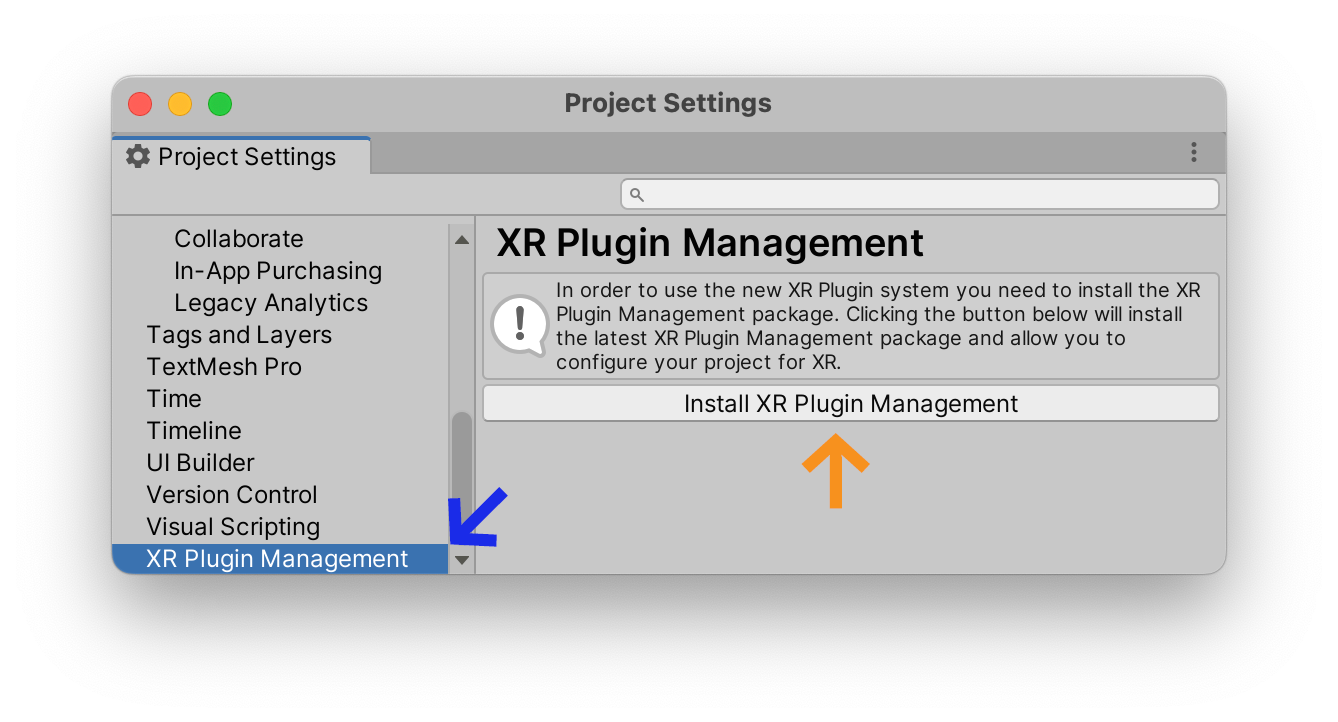
Following the XR Plugin instructions, open the menu Edit > Project Settings, find the XR Plugin ManagementInstall XR Plugin Management
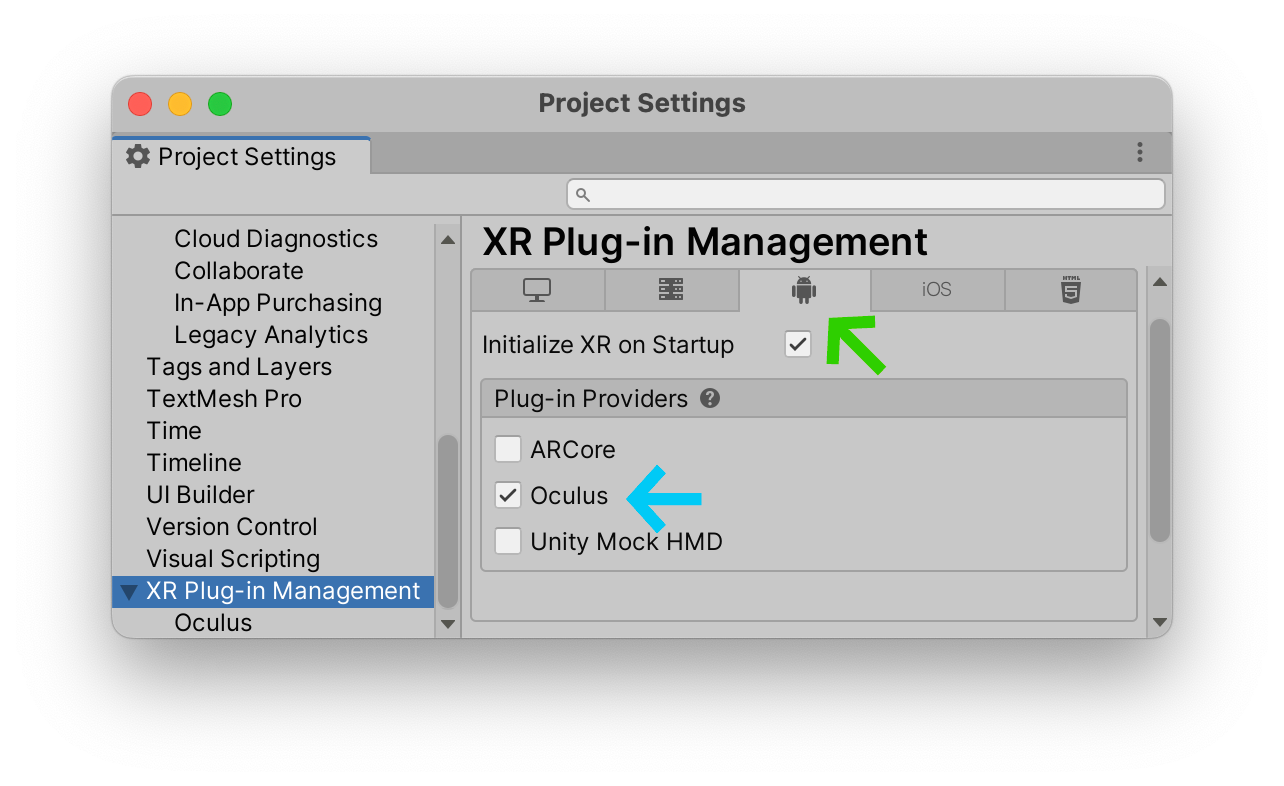
If you are using an Oculus headset, select the AndroidOculus
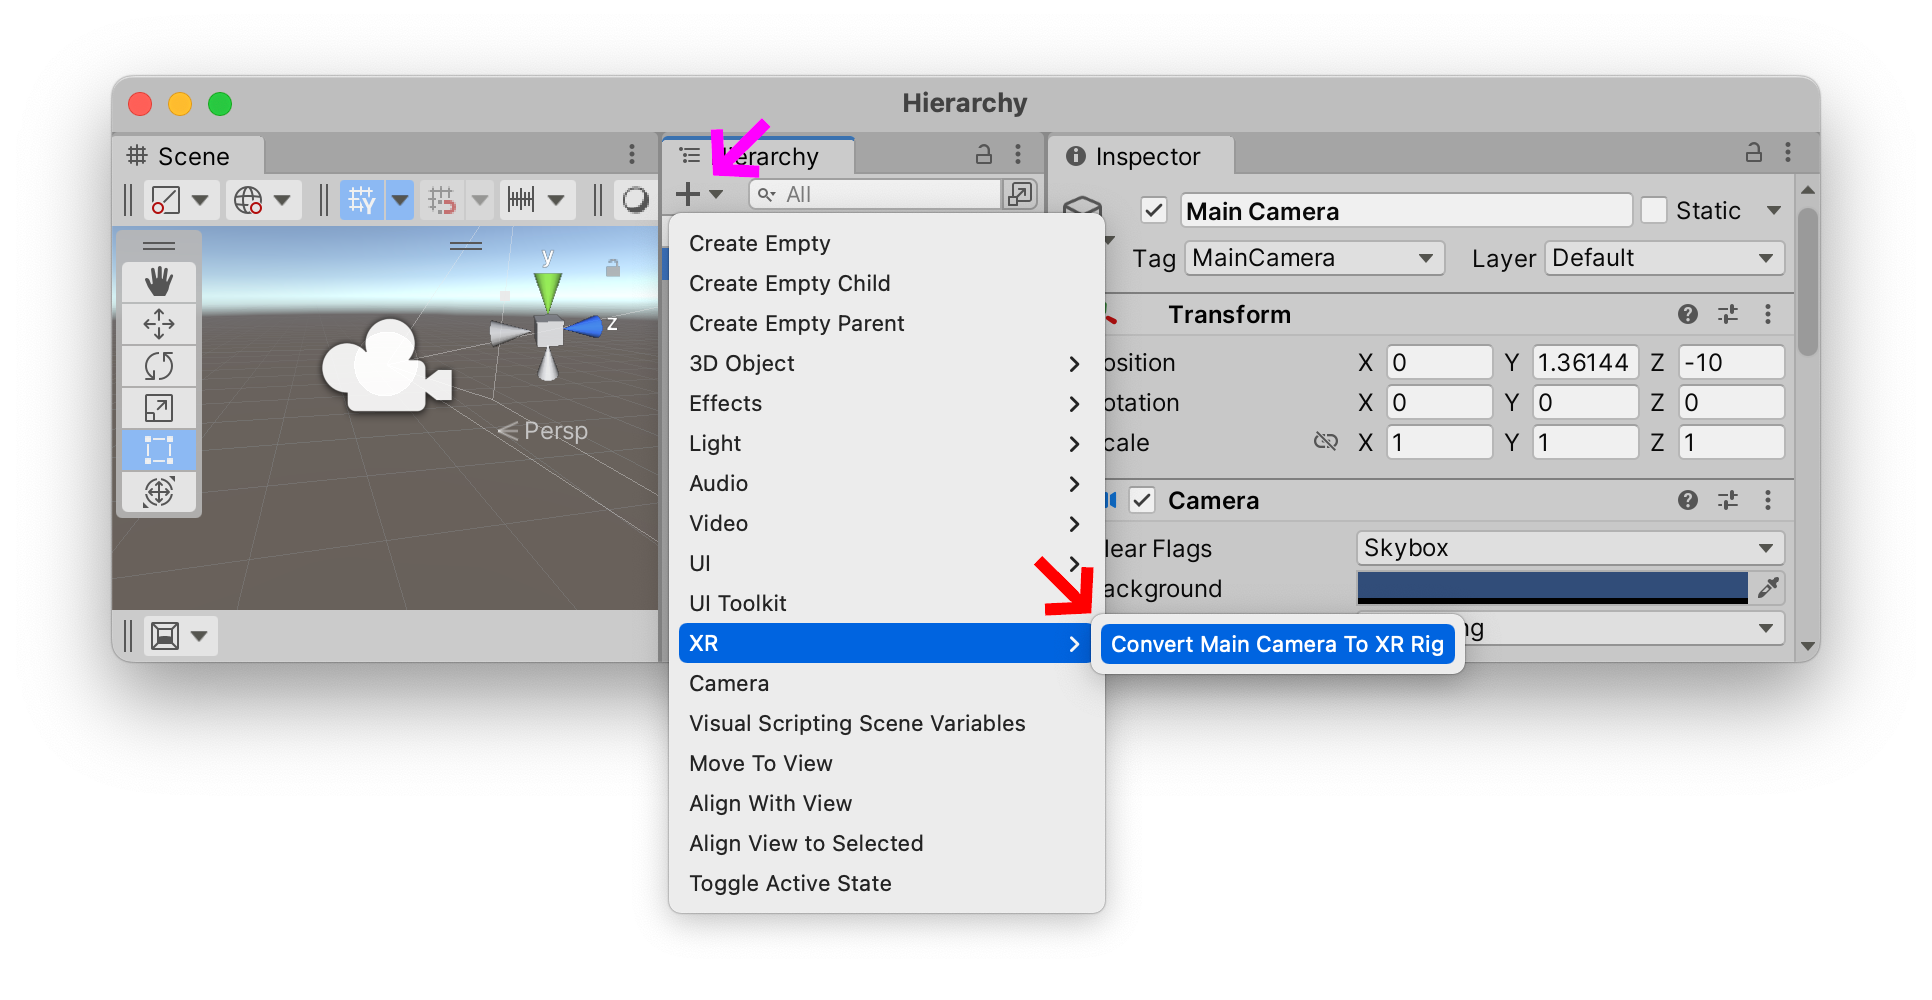
We can now convert the default one-eyed-cyclops Main camera to a binocular VR-headset compatible “rig”: select the +XRConvert Main Camera to XR Rig
You can now upload your project to your VR headset and interact with the cube using the center of your gaze.
If you converted your Camera to an XR RigPlay
If for whatever reason you started from scratch with an empty scene, open up the new CameraXR RigGazeRaycasterMouseLookAroundCamera